

Step 1: Install Open Design
Desktop app (recommended)
The fastest path — no Node, no pnpm, no repo clone:- macOS (Apple Silicon & Intel) → open-design.ai or GitHub Releases
- Windows (x64) → open-design.ai or GitHub Releases
- Linux (AppImage) → GitHub Releases
PATH, loads 259+ skills and 142+ design systems, and is ready to go.
Docker (self-hosted)
From source
Step 2: Get your SiliconFlow API key
To get started, you’ll need a SiliconFlow account:- Sign up at https://cloud.siliconflow.com/ — you can use Google or GitHub.
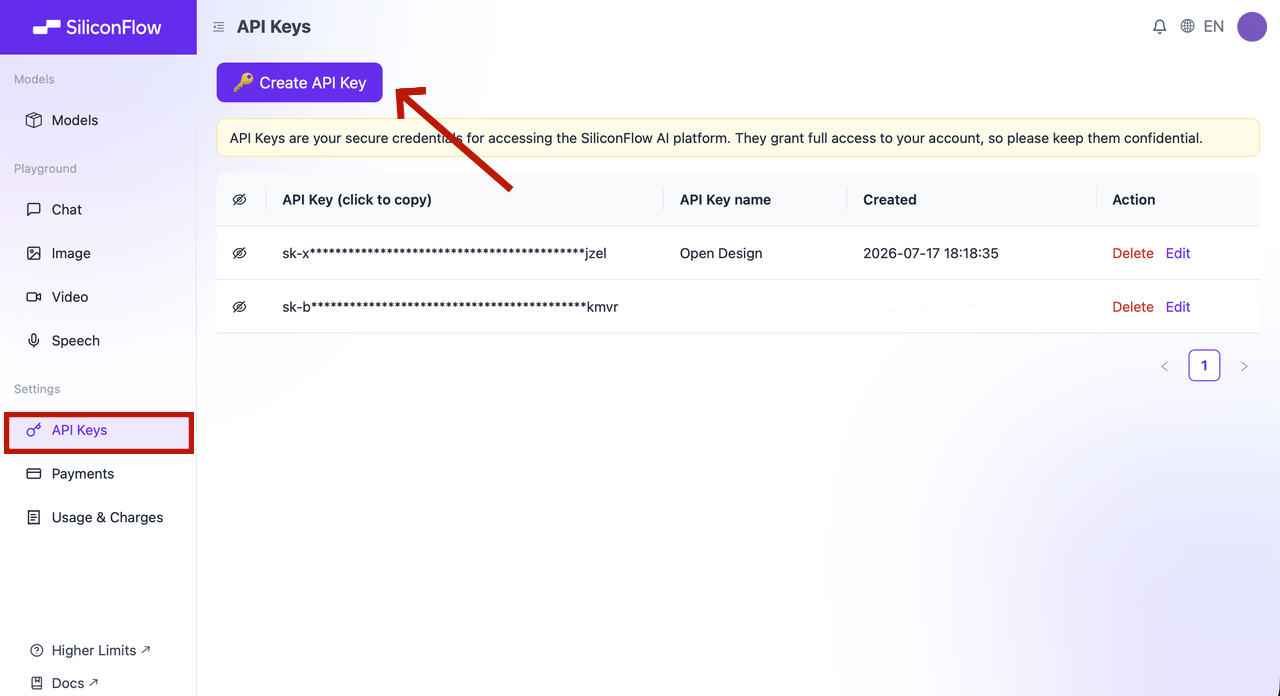
- Open
API Keysin the dashboard. - Click
🔑 Create API Key, name it so you can find it later, and confirm. - Click the key to copy it.
🔐 API keys are credentials. Never include a real key in a document, screenshot, repository, or chat message.
Step 3: Connect SiliconFlow to Open Design
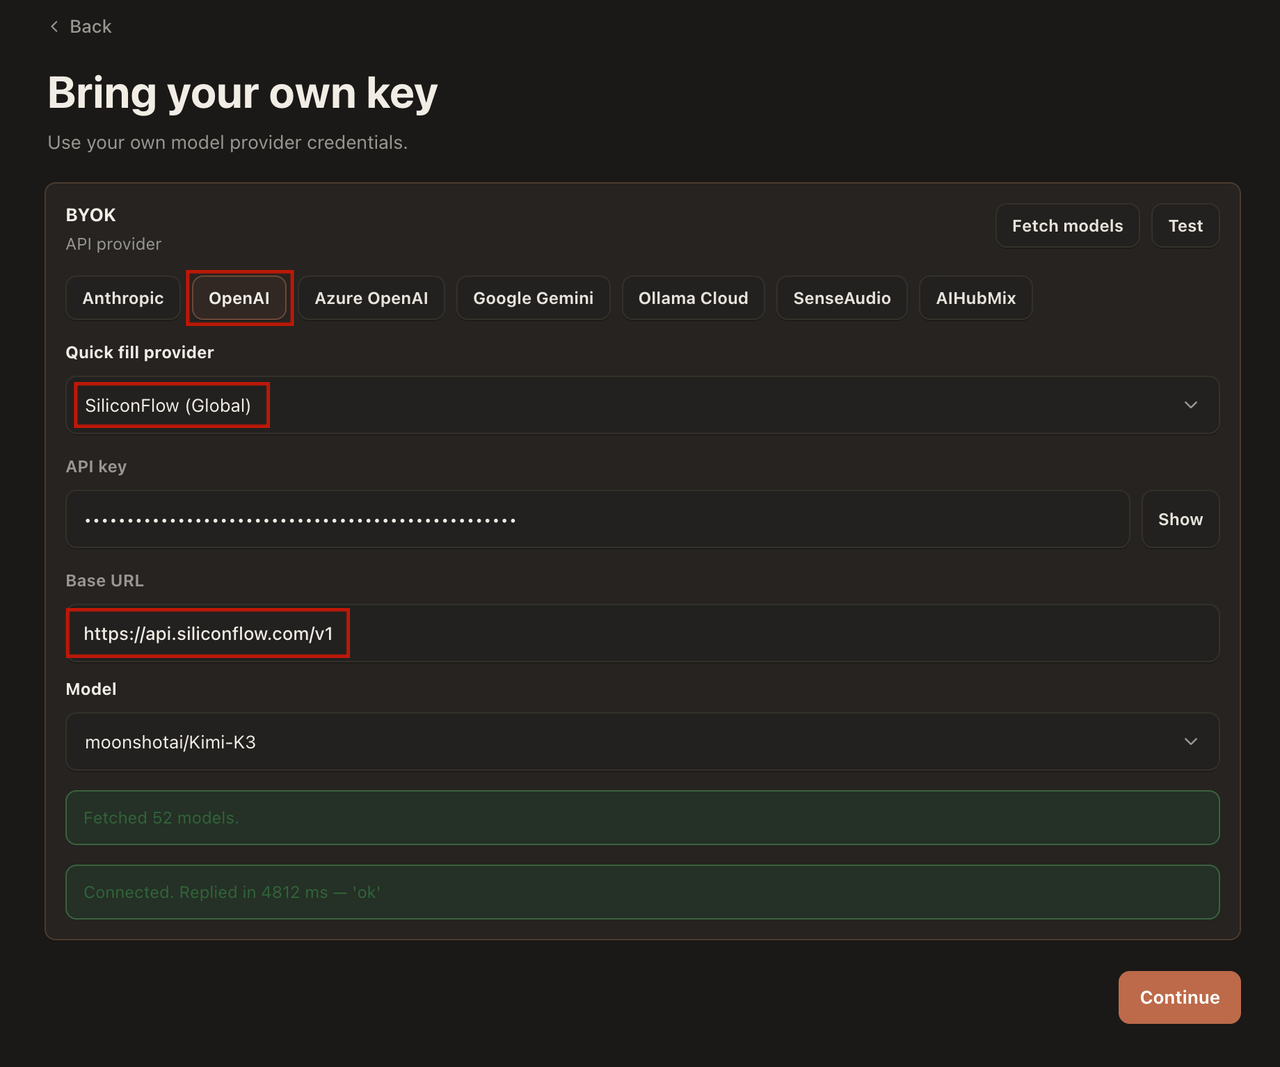
On the Open Design sign-in page, select Local coding agent or Bring your own key.- For Execution mode, choose BYOK.
- For the API provider, choose OpenAI.
- Select the SiliconFlow Global preset from the provider dropdown. This auto-fills the Base URL to
https://api.siliconflow.com/v1. - Paste your SiliconFlow API key.
- Choose a model: enter any model ID from the SiliconFlow model library, for example
deepseek-ai/DeepSeek-V4ormoonshotai/Kimi-K3.
Step 4: Generate your first design
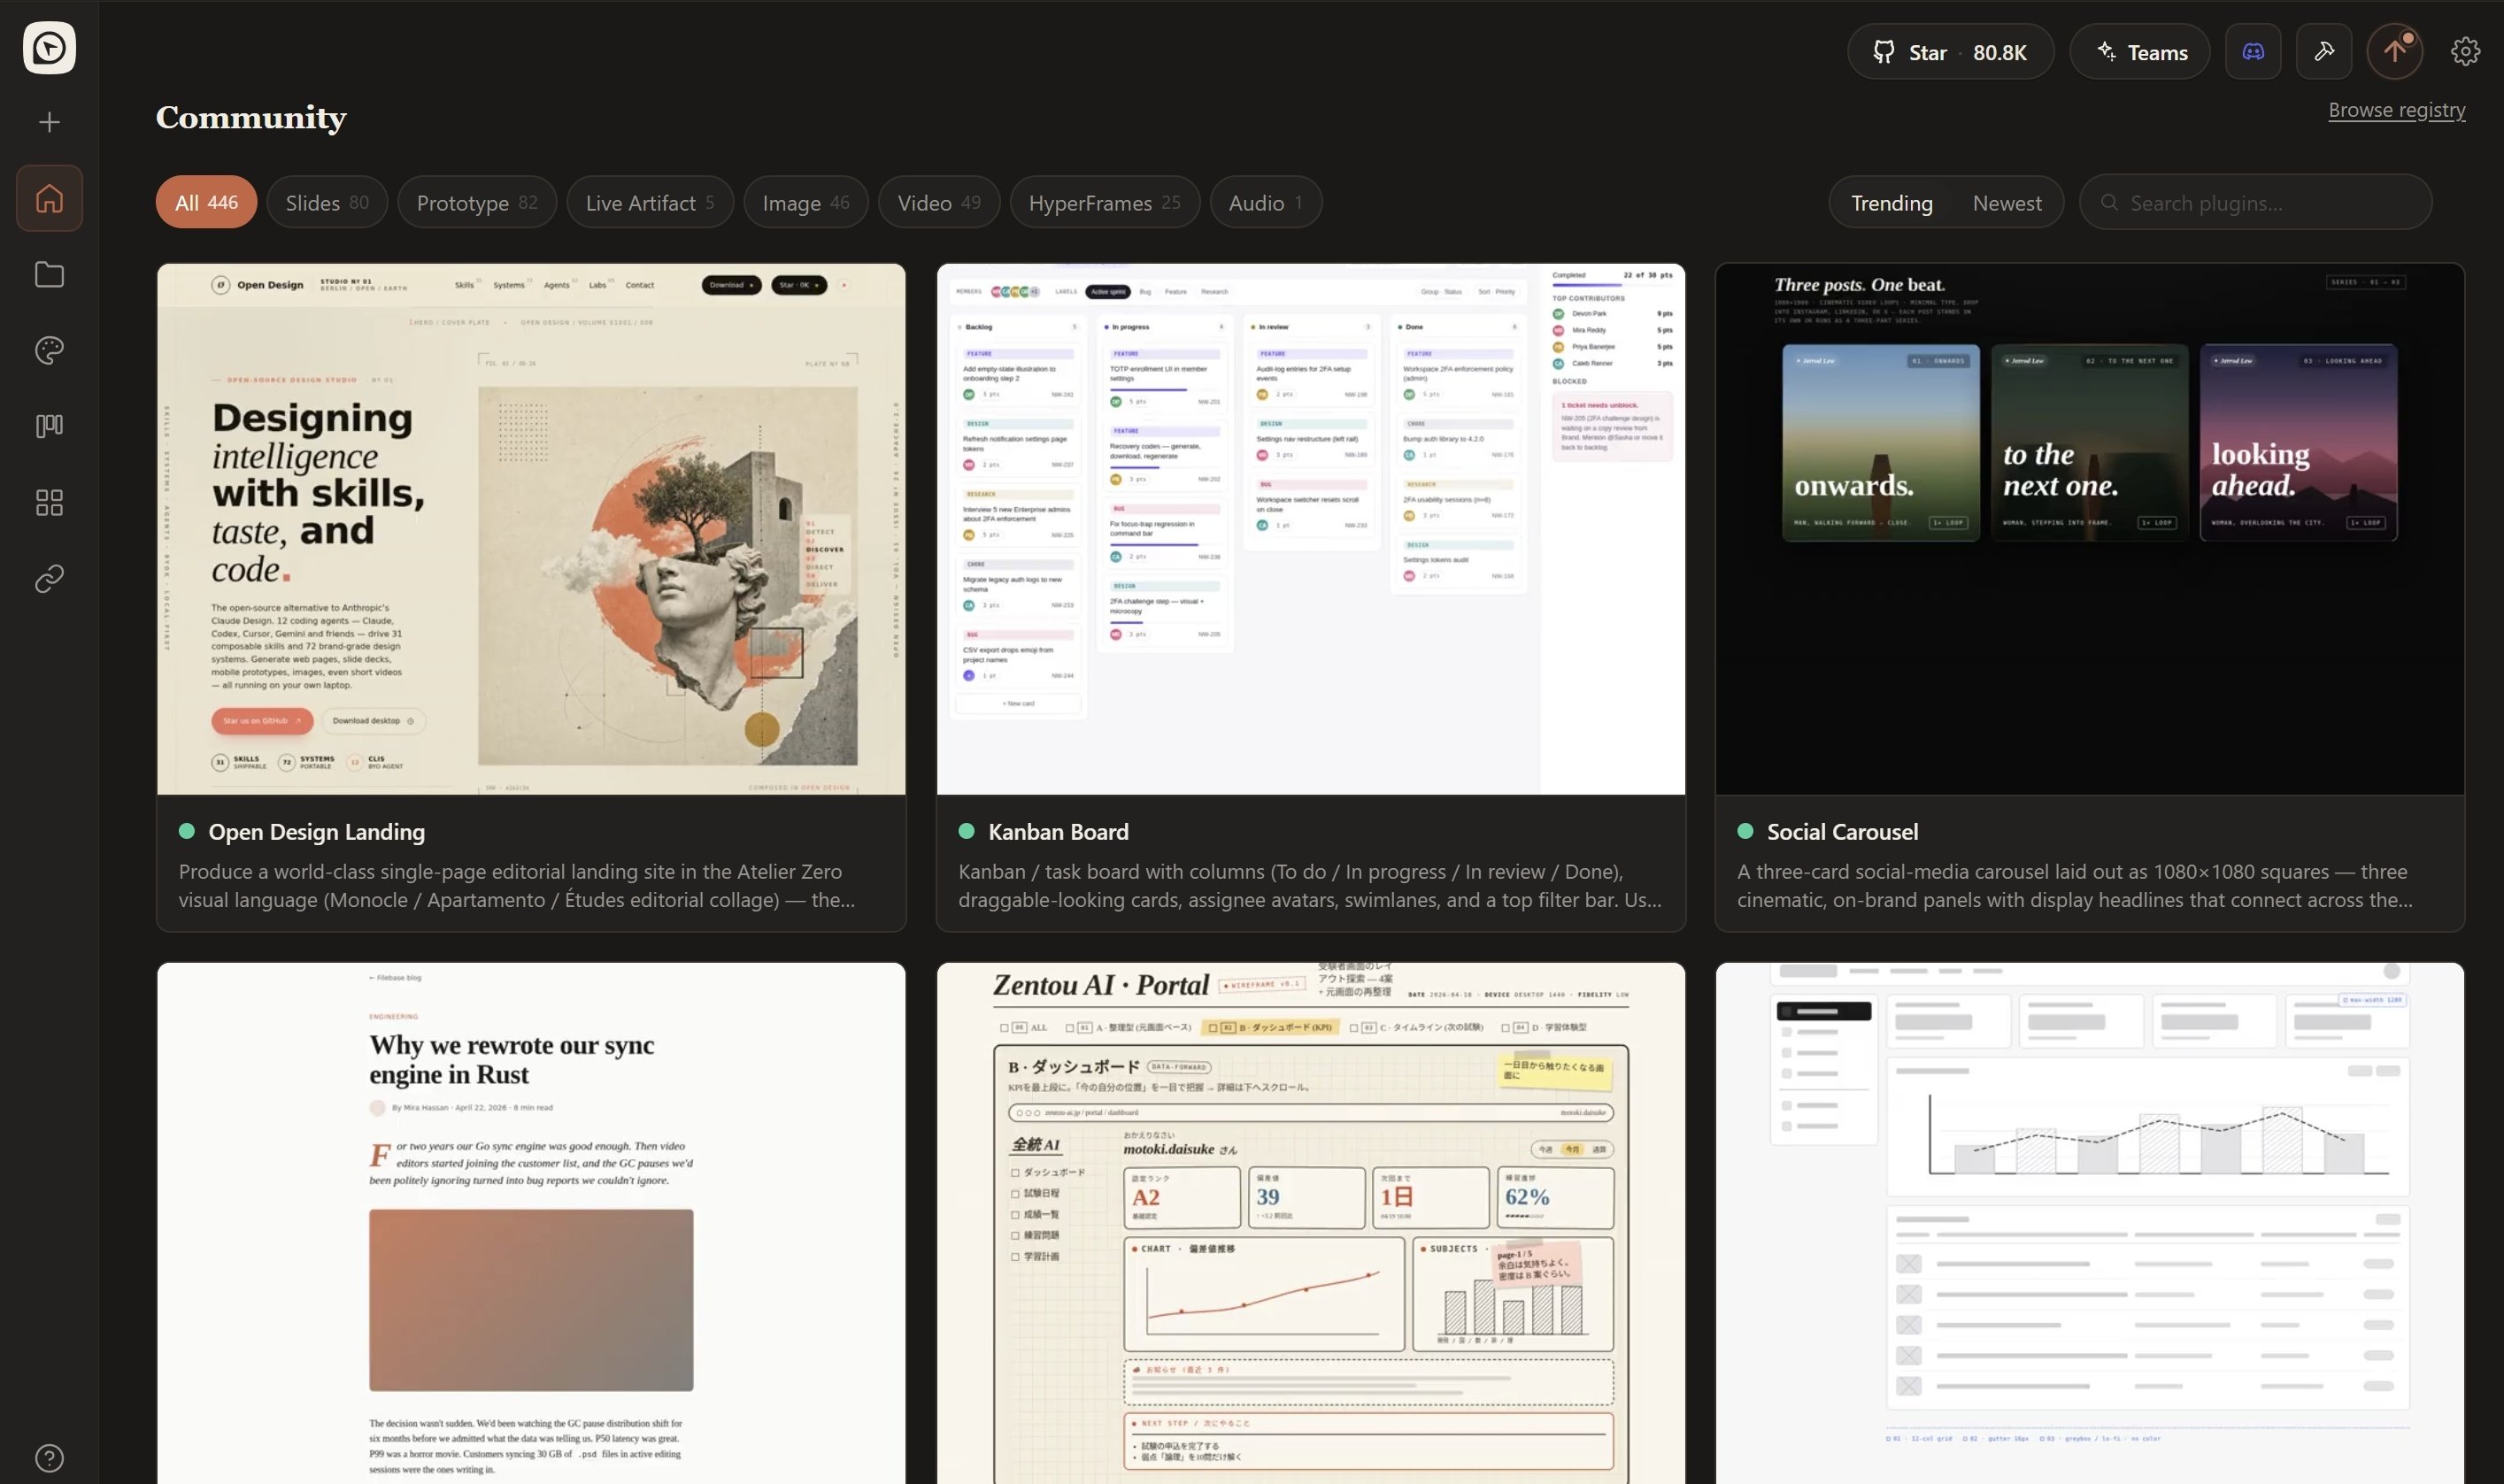
- Head back to the Home page and select New Project or Start Designing.
- Pick a skill (e.g.
canvas-design,ad-creative,twitter share card) or a design template (e.g.Website clone,Prototype,Live artifact). - Type a brief in the chat box and hit run. For example:
- Open Design streams the artifact into a sandboxed preview as it generates.
- Review the output before accepting any changes to local files.
- Iterate in place: refine through follow-up prompts without starting over.
- Export: download as HTML, PDF, PPTX, or ZIP.
- Hand off to code: the artifact is real HTML/CSS, ready to drop into Cursor, Codex, or Claude Code.
What you can build
With SiliconFlow as the model provider, Open Design’s full skill catalog is at your disposal:- Prototypes: landing pages, web apps, mobile screens
- Pitch decks: exportable to PPTX and PDF
- Dashboards: analytics panels, KPI views, decision rooms
- Images & video: branded visuals and motion graphics
Which model should you pick?
The model you choose affects both the quality of generated artifacts and generation speed. For design tasks, strong instruction-following and long-context capability matter most, because the agent needs to read a fullDESIGN.md (often 2,000+ tokens) plus skill instructions and produce complete, production-ready artifacts.
Ready to build? Create a SiliconFlow API key, connect it to Open Design, and start generating production-ready designs with 200+ models in minutes.
Resources
Open Design
- Website: https://open-design.ai/
- GitHub: https://github.com/nexu-io/open-design
- Quickstart: https://github.com/nexu-io/open-design/blob/main/QUICKSTART.md
- Discord: https://discord.gg/mHAjSMV6gz
- X: https://x.com/OpenDesignHQ
SiliconFlow
- Website: https://siliconflow.com
- API Documentation: https://docs.siliconflow.com
- Model Library: https://siliconflow.com/models
- Discord: https://discord.com/invite/7Ey3dVNFpT
- X: https://x.com/SiliconFlowAI