Step 1: Prerequisites
Get Your SiliconFlow API Key
Before you begin, ensure you have a valid SiliconFlow account:- Register a SiliconFlow account at https://cloud.siliconflow.com/. You can sign up with Google or GitHub.
- Log in and navigate to
API Keysin the dashboard. - Click
🔑Create API Keyand add a name to your key to help you identify it later, then confirm to create it. - Click the API key to copy it automatically.

Step 2: Install Cline
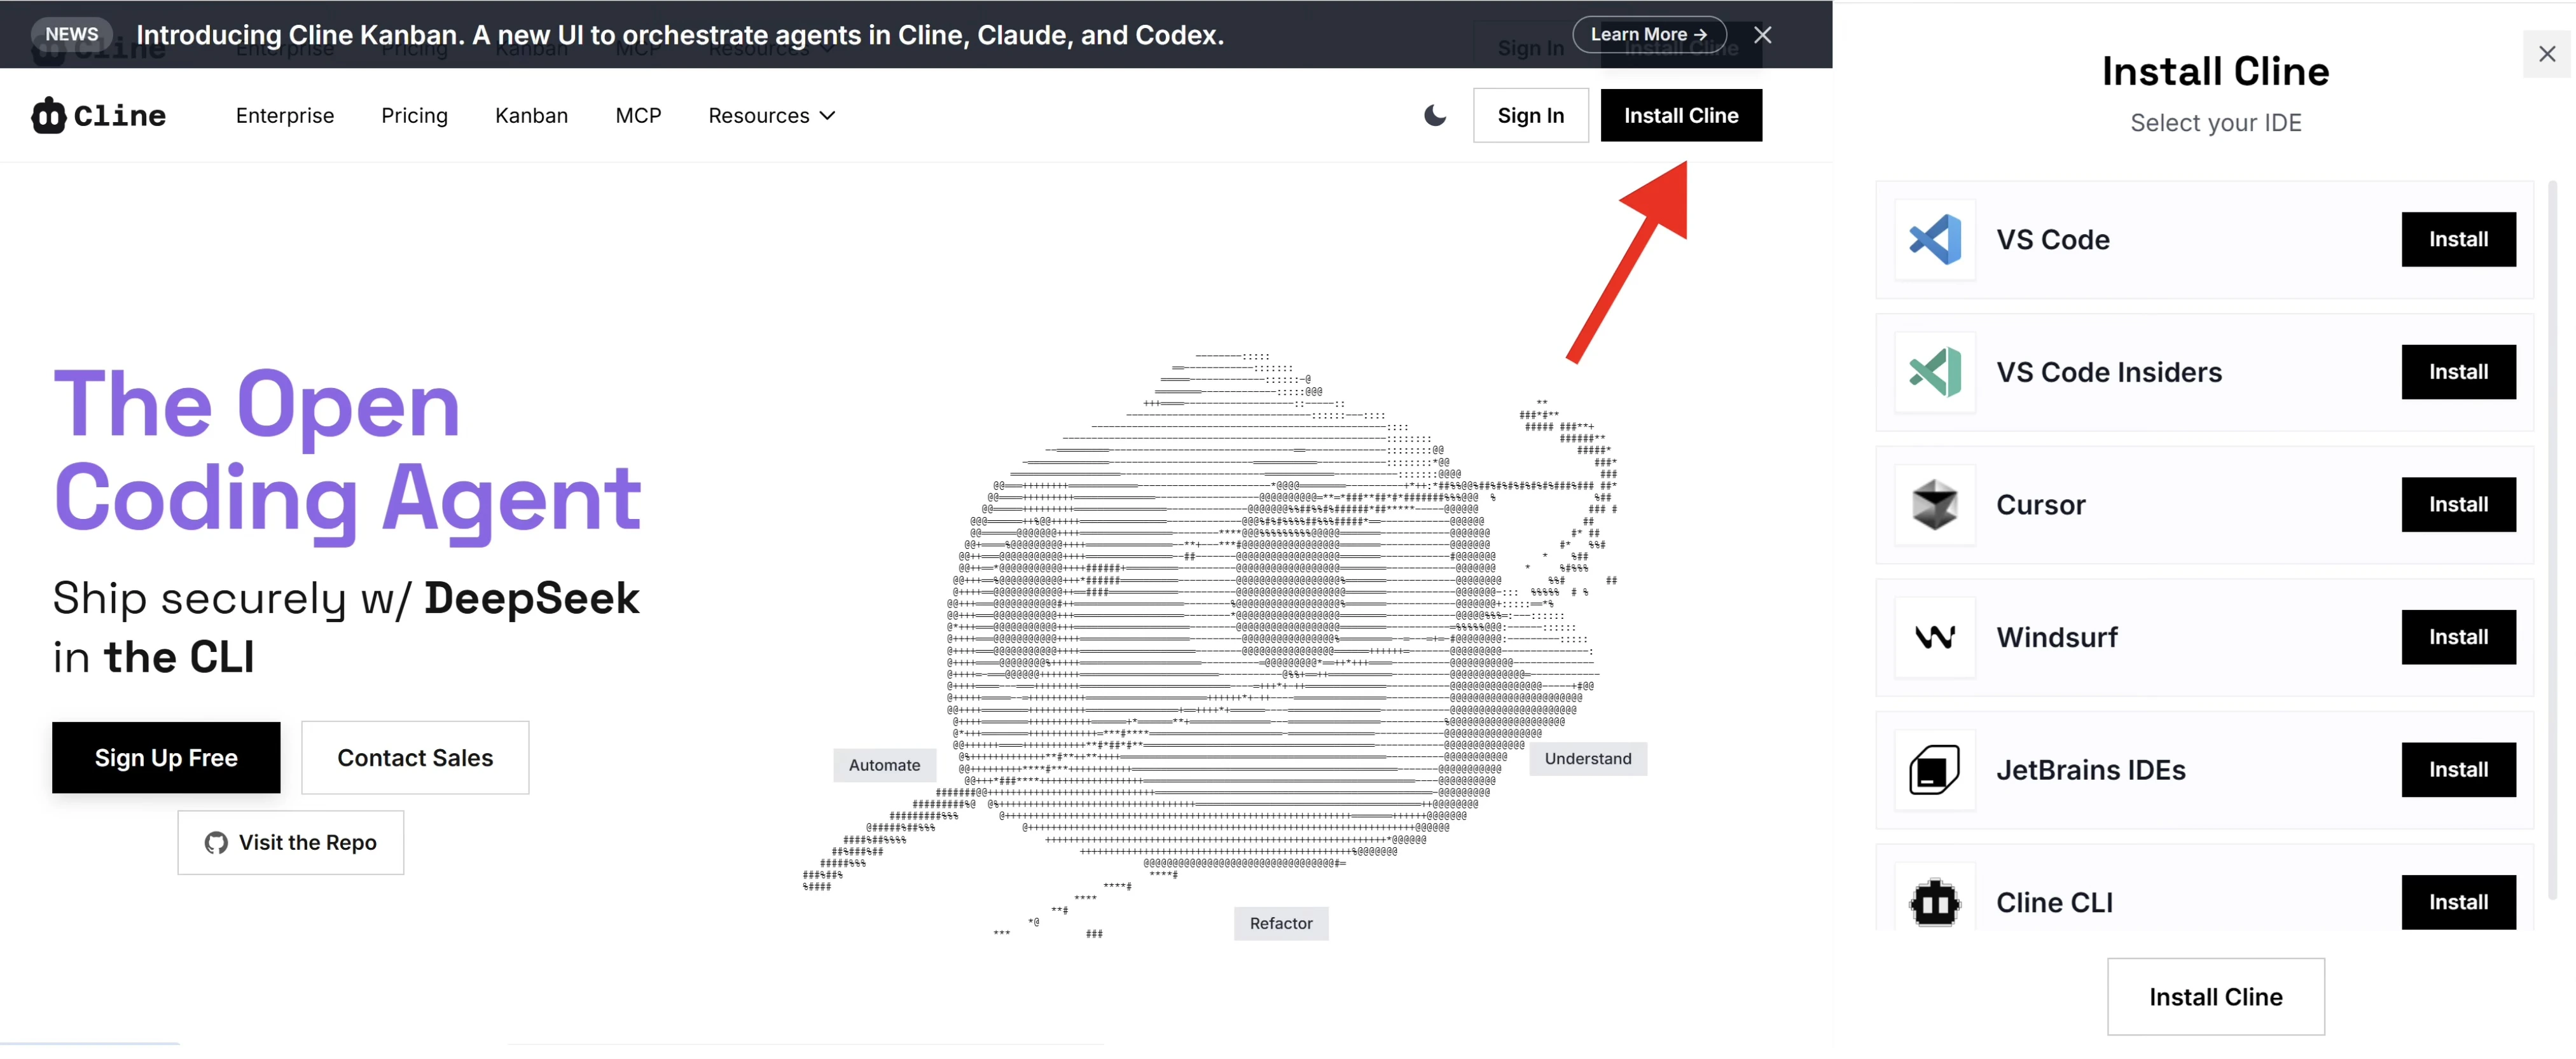
Next, install the Cline extension in your development environment.- Visit the official Cline website: https://cline.bot
- Click
Install Clinein the top-right corner. - Choose your preferred IDE (e.g., VS Code) and proceed with installation.
- When prompted, allow the link to open in the associated application.
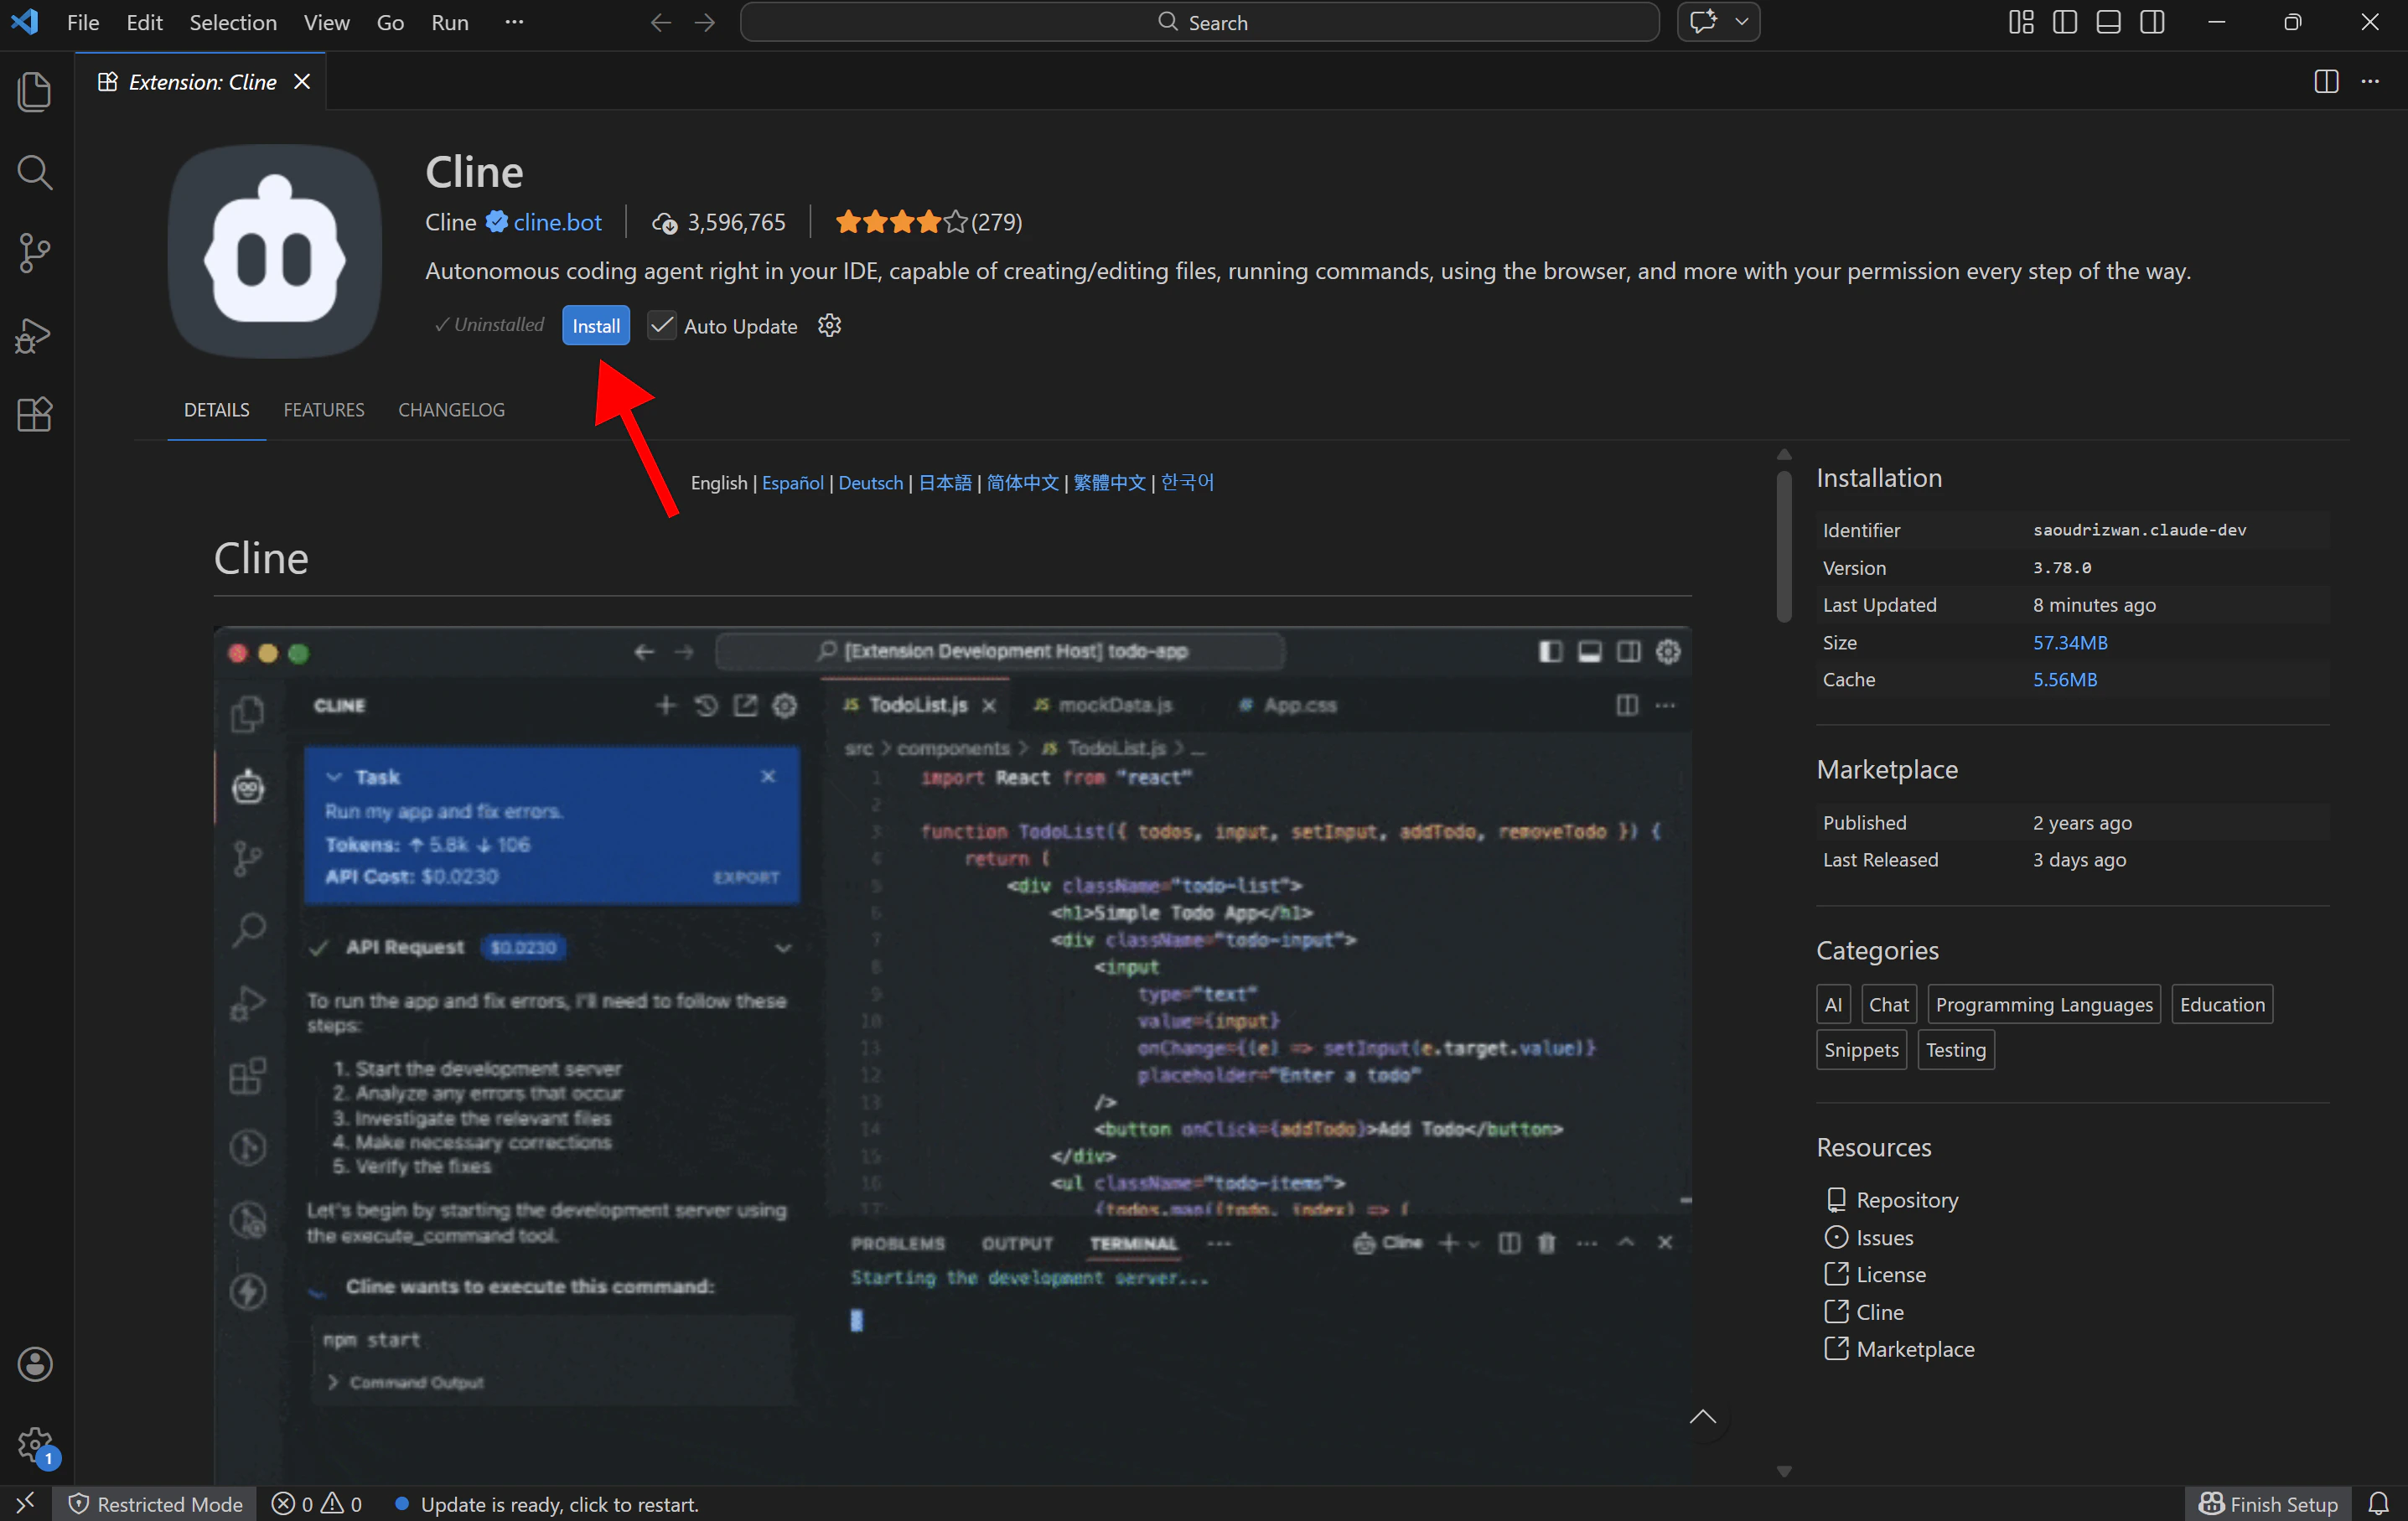
- The VS Code extension page will open automatically; Click
Installto proceed.
Step 3: Configure SiliconFlow APIs
-
Open Cline in VS Code: After installing the Cline extension, you will find the Cline icon in the Activity Bar on the left side of VS Code and click the icon to open the Cline chat interface.
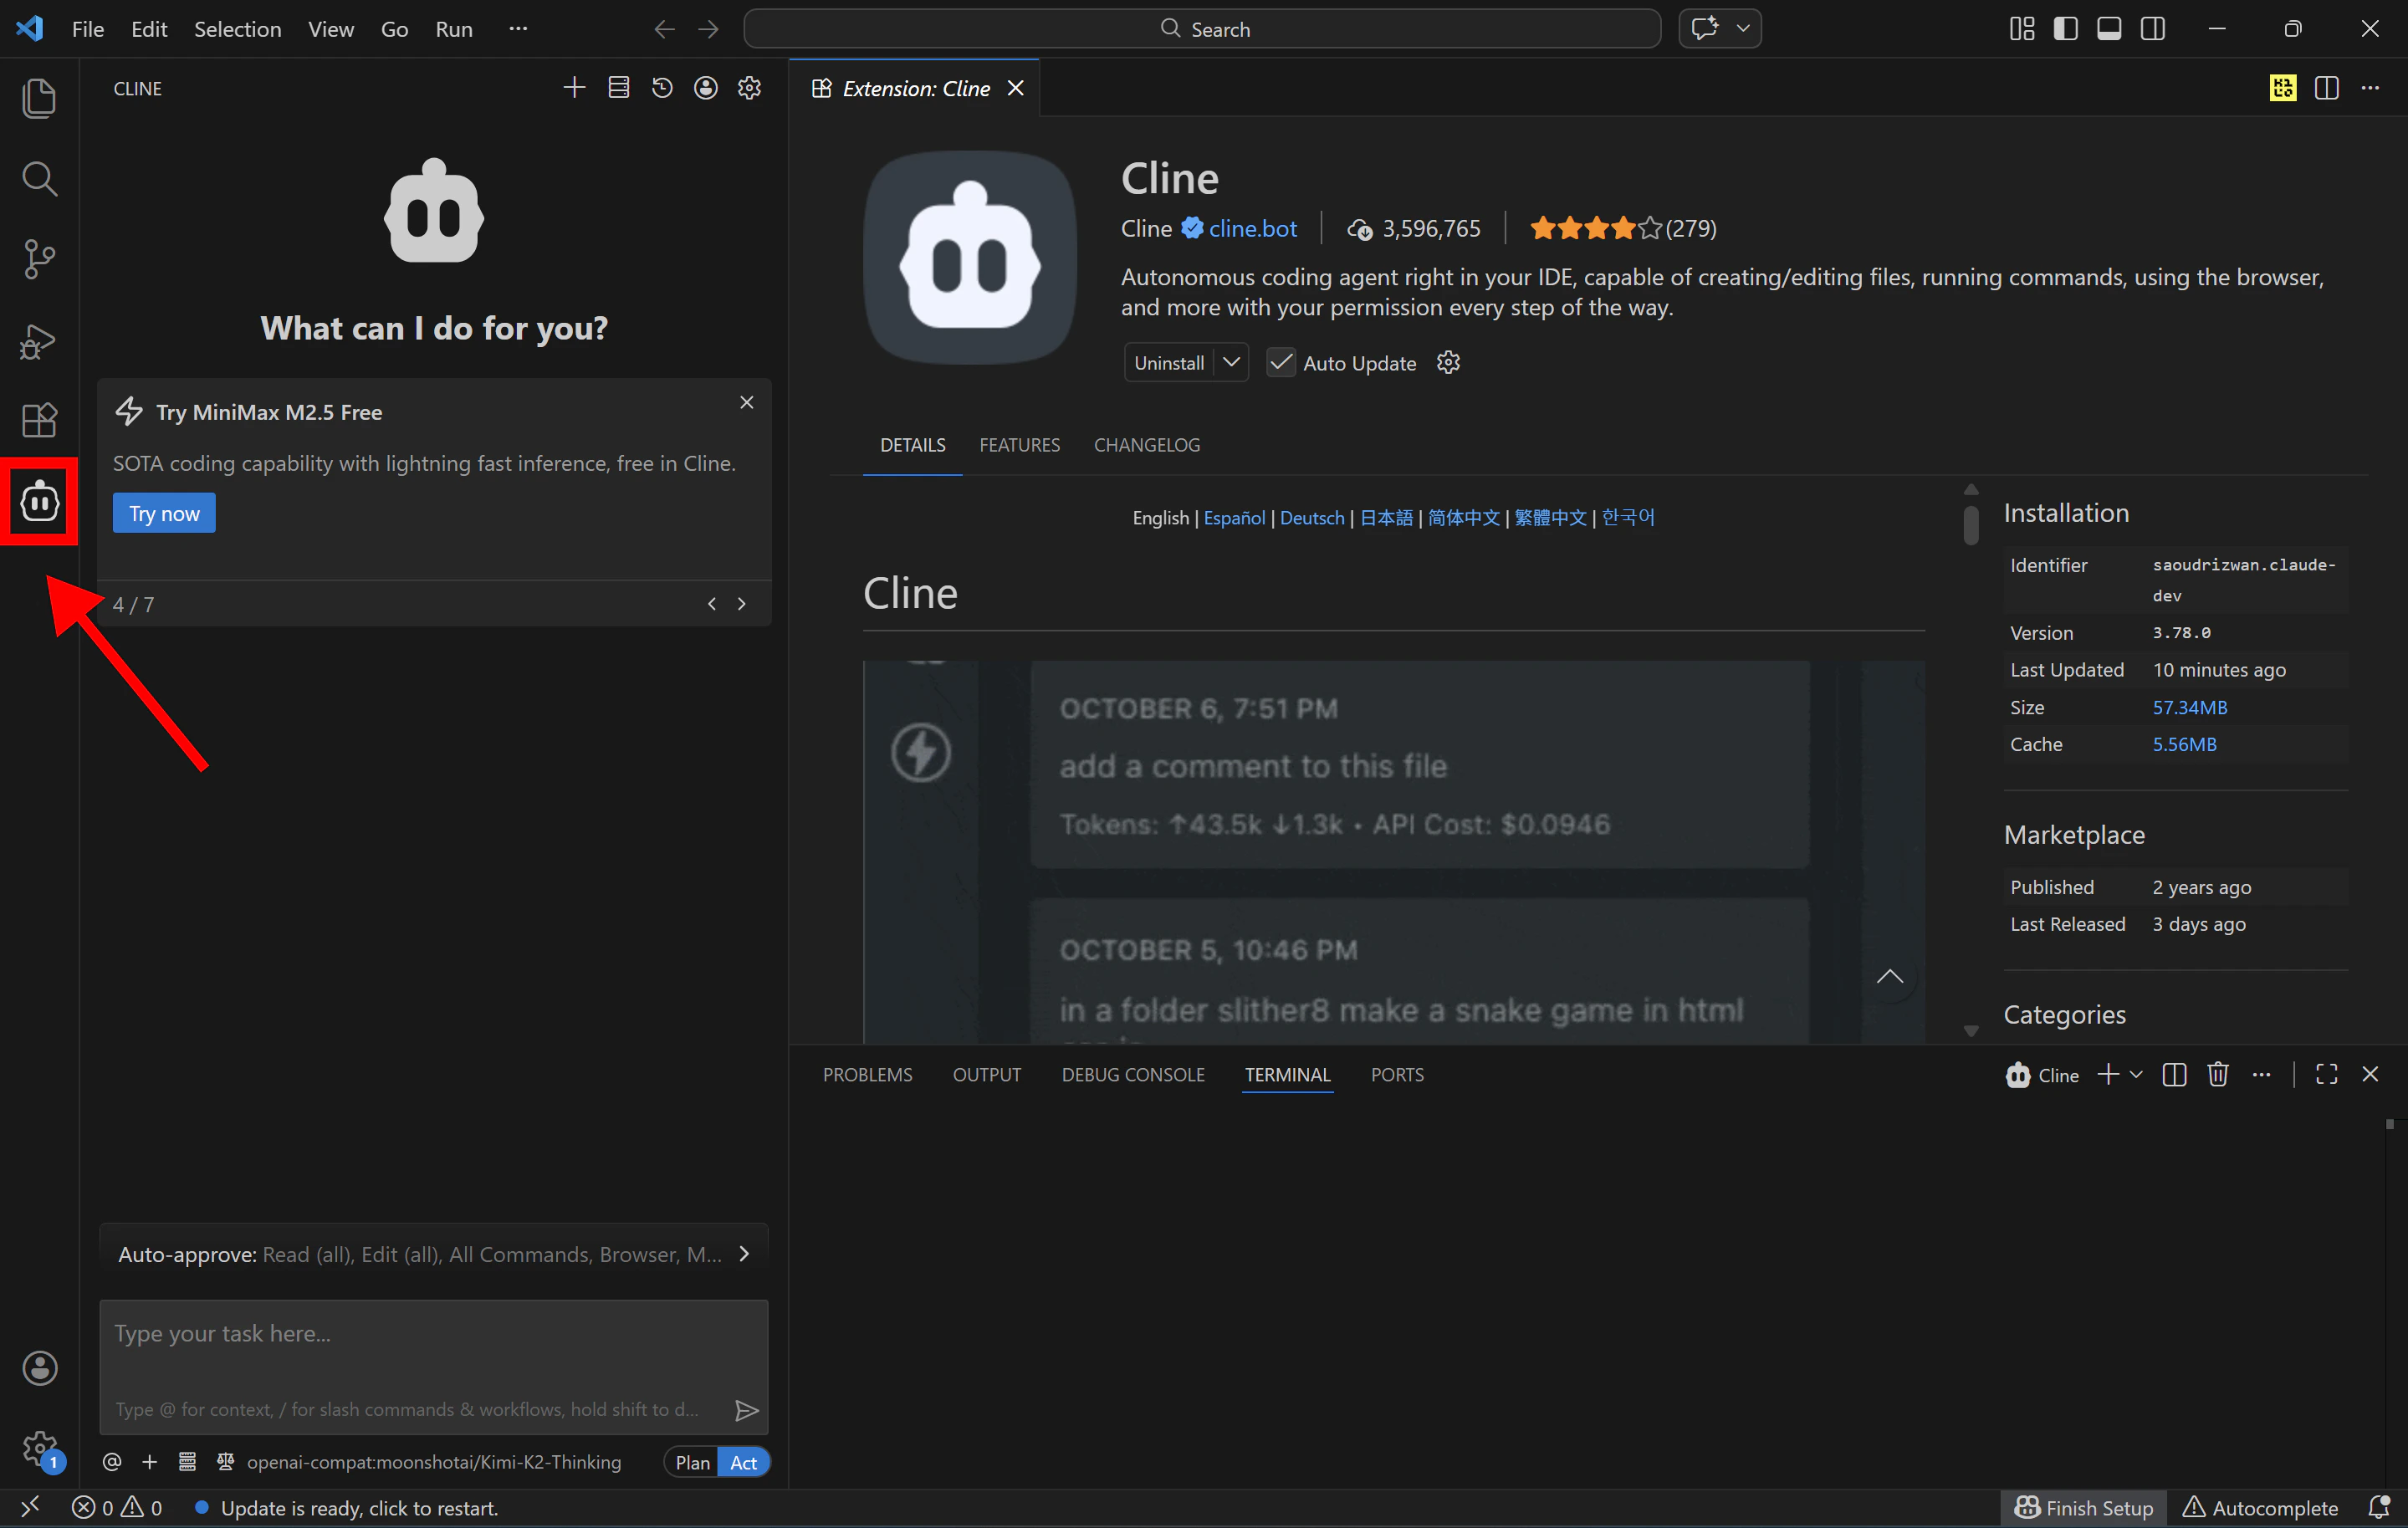
-
Click the ⚙️ Settings (gear icon) in the top-right corner to configure your API provider
- API Provider:
OpenAI Compatible - Base URL:
https://api.siliconflow.com/v1 - OpenAI Compatible API Key: Paste Your SiliconFlow API Key Here
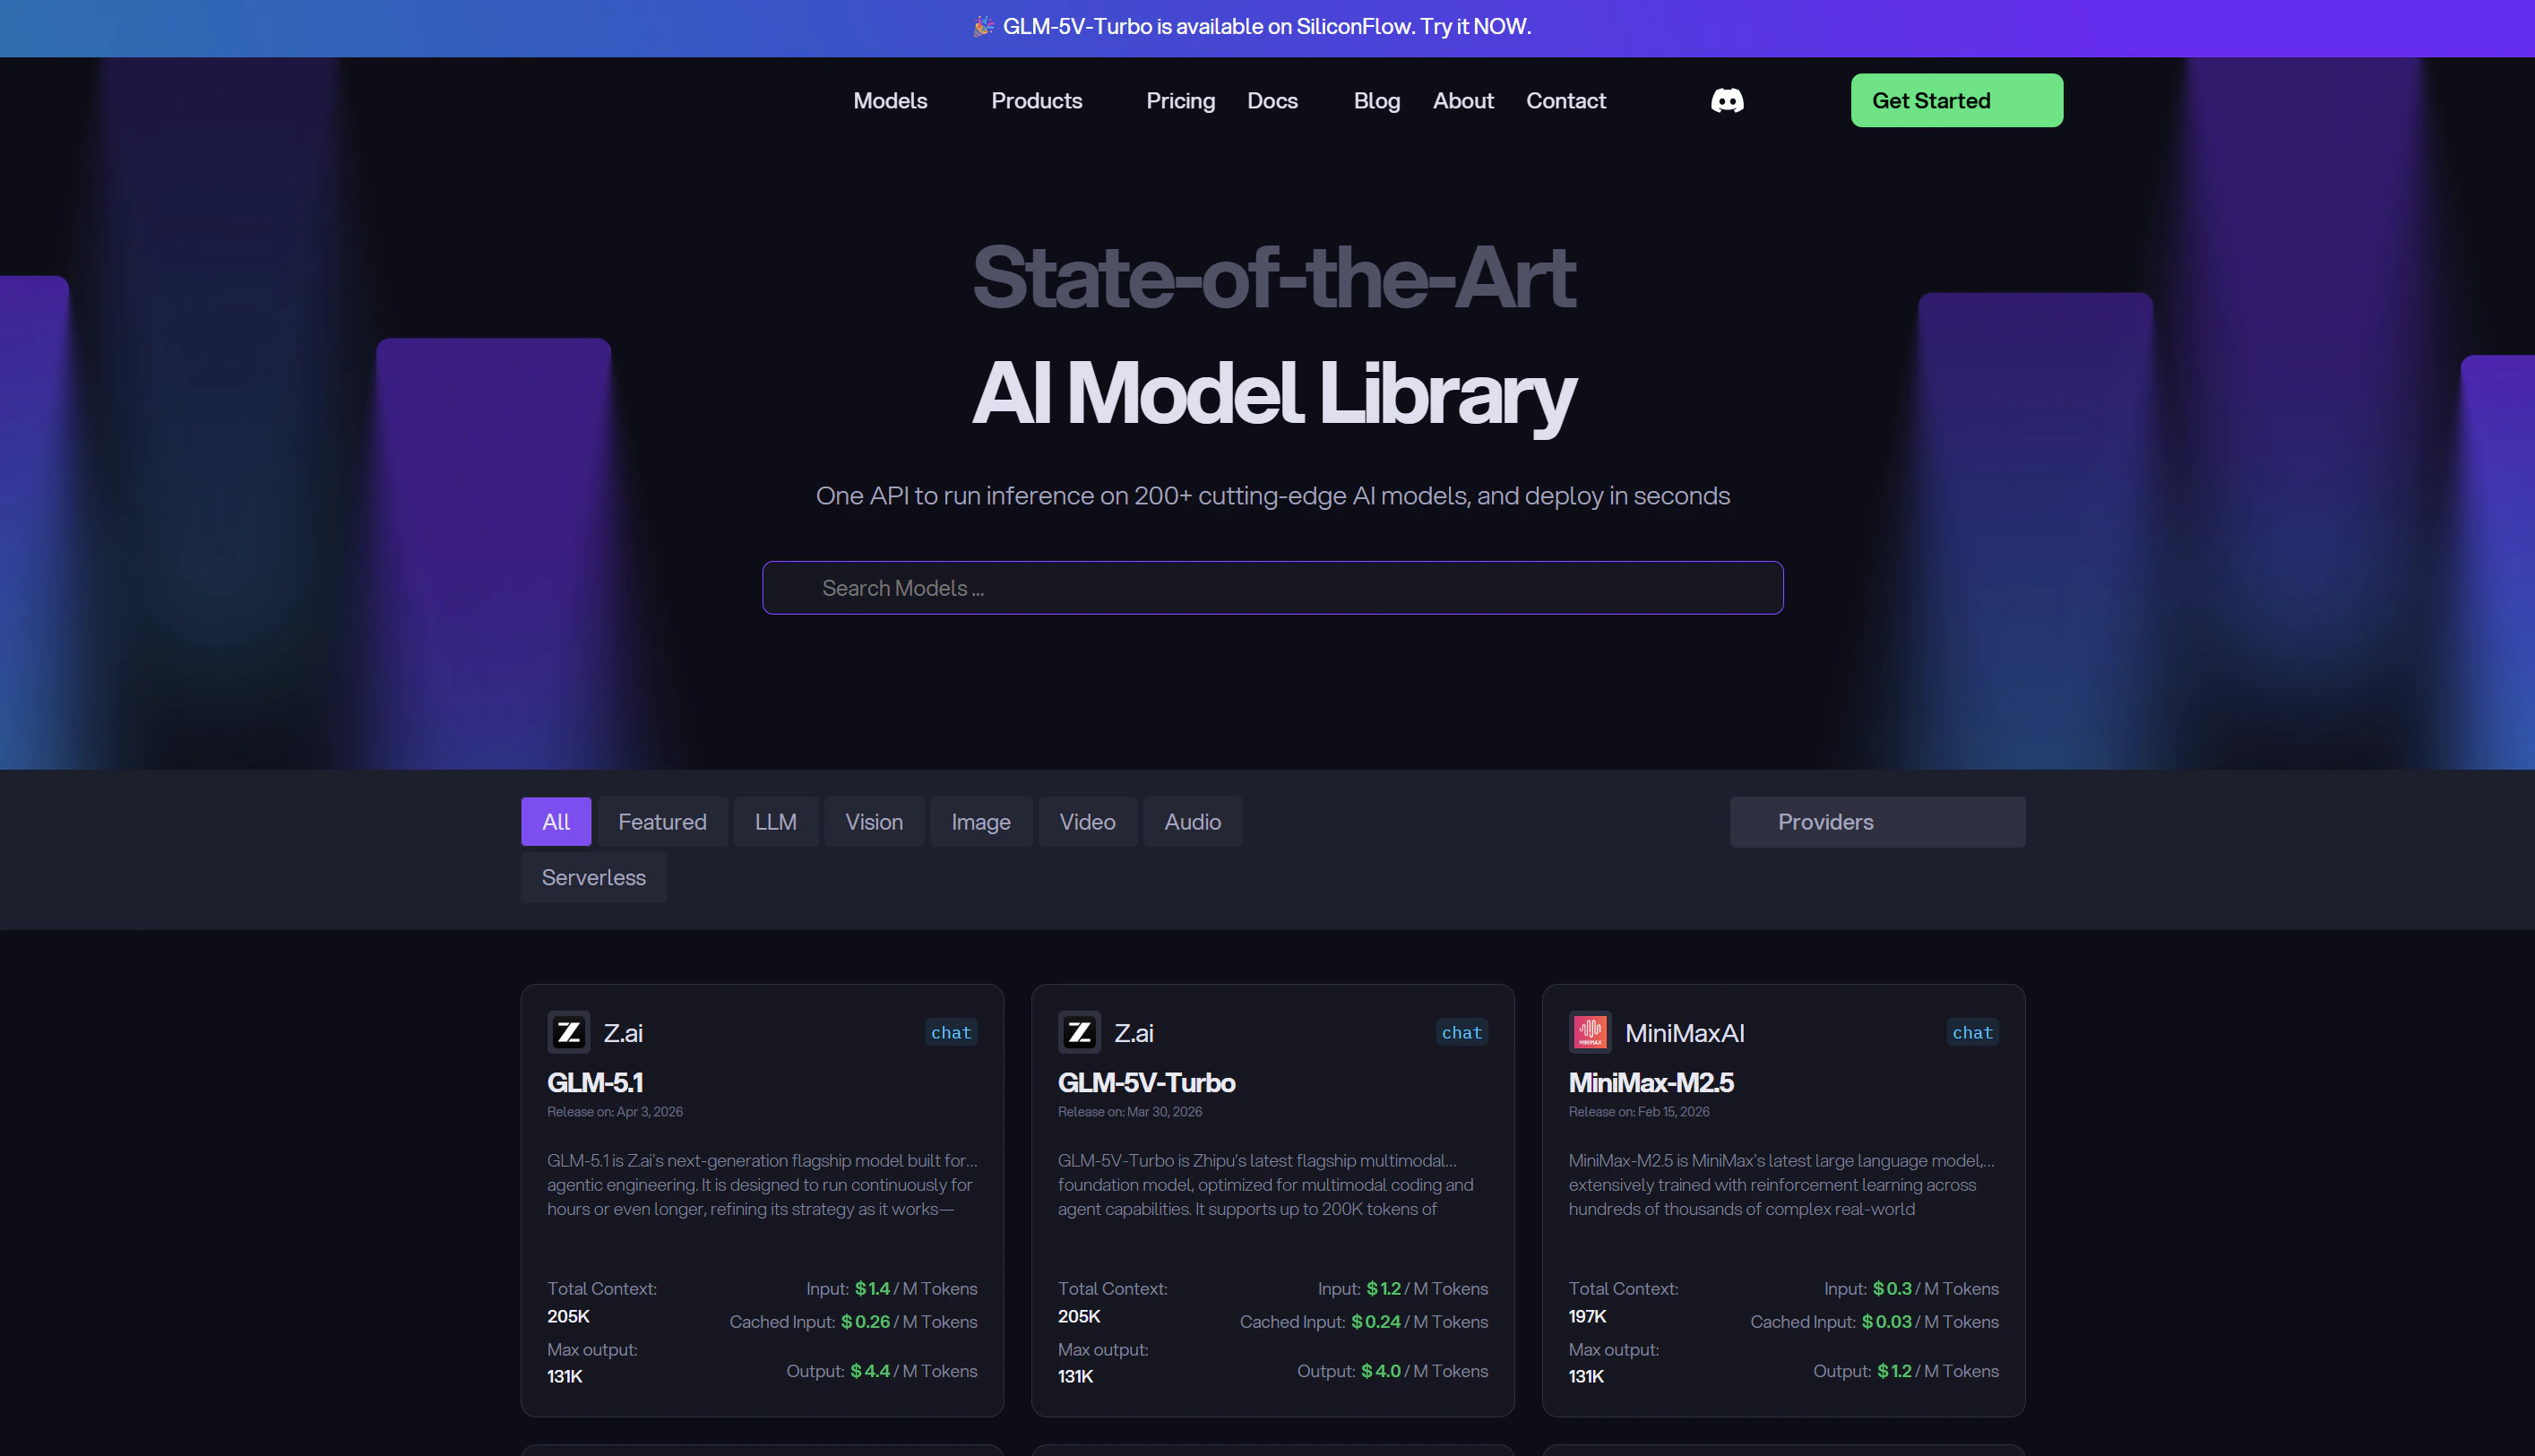
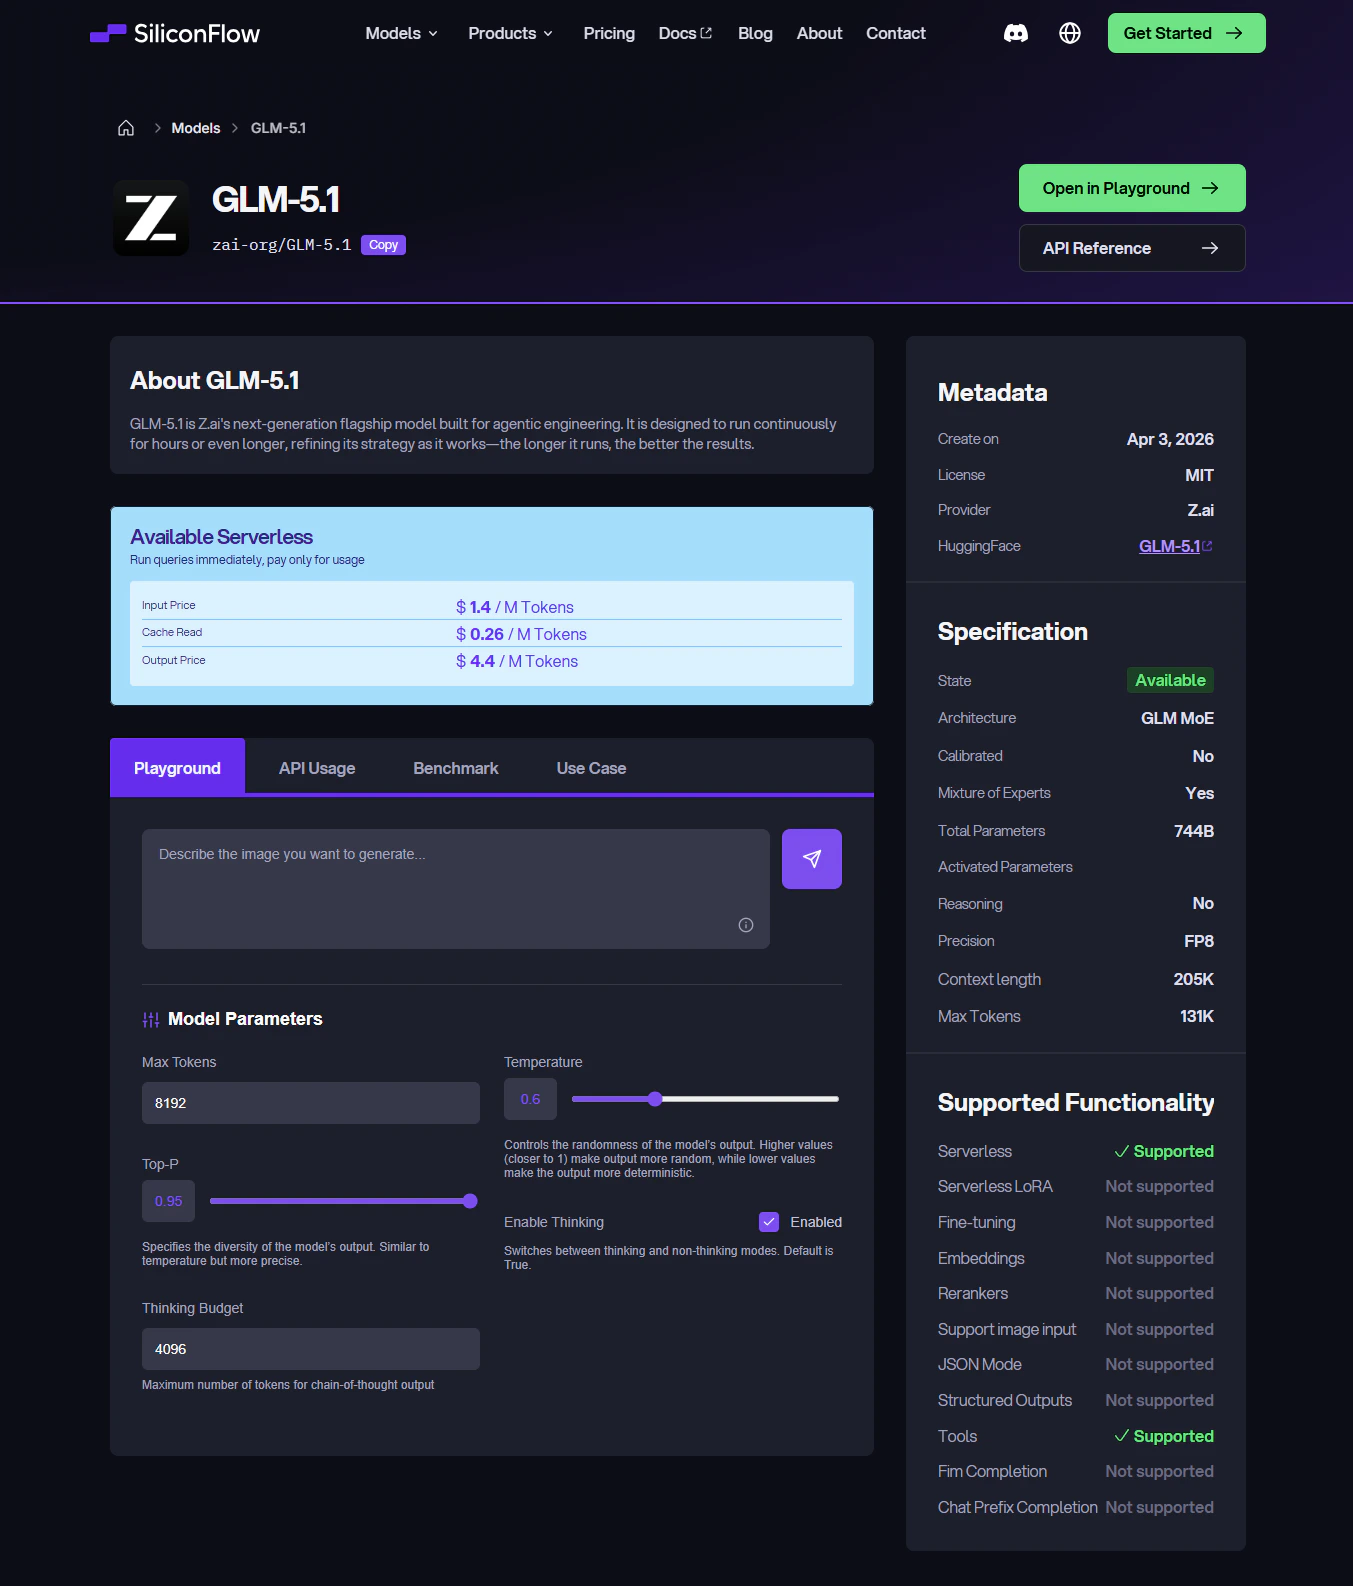
- Model ID: Enter the model you want to use, for example,
zai-org/GLM-5.1. You can browse the full model list at SiliconFlow’s model library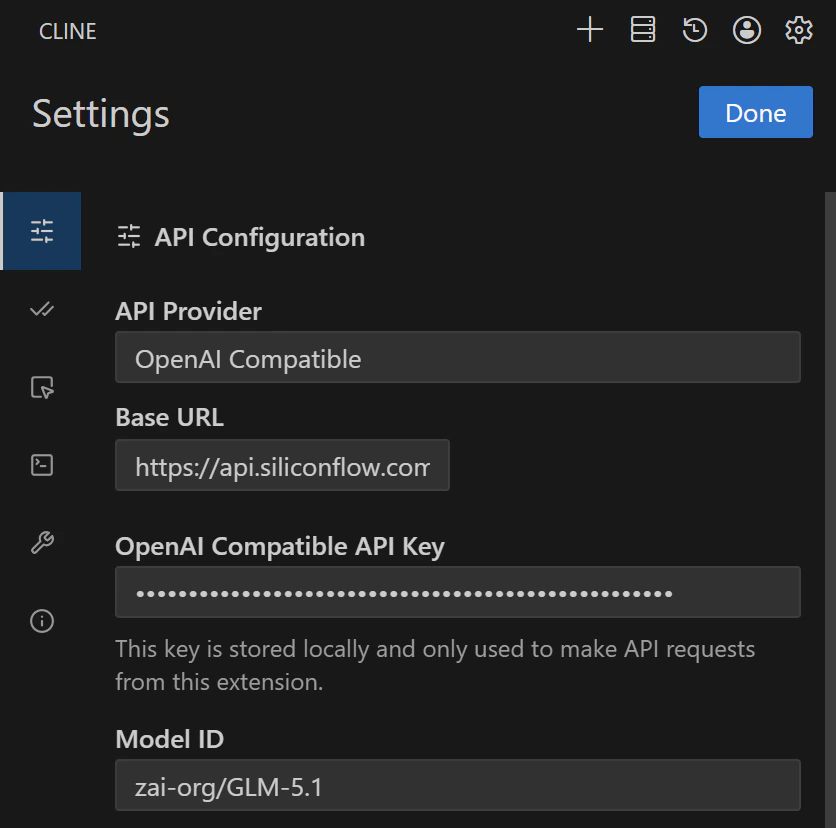
- API Provider:
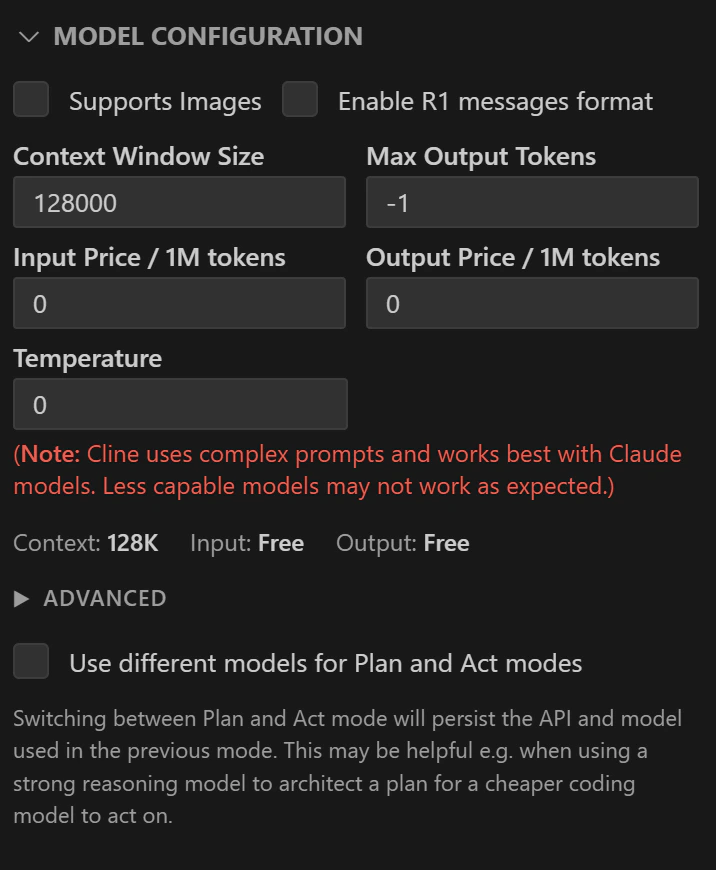
- Customize model configuration (optional)
- Support Images
- Enable R1 message format
- Context window size
- Max output tokens
- Temperature
- Input and output pricing reference
- Plan Mode model
- Act Mode model
Step 4: Start Building with Cline
Once your SiliconFlow API is configured, you’re ready to start building with Cline.Before Using: Two Things You Need to Know
Plan Mode vs Act Mode
At the bottom of the Cline panel, you’ll see a toggle button that switches between two modes:- Plan mode: In this mode, Cline only “talks”. It analyzes your request and walks you through its approach, but won’t create or modify any files. Use this when you want to discuss requirements or clarify your idea before writing any code.
- Act mode: Cline starts creating files and writing code. Once you’ve aligned on the approach in Plan mode, click the toggle to switch to Act and Cline will begin proposing actual file changes.
Auto-Approve Settings
By default, Cline asks for your explicit approval before every file creation, file edit, or terminal command. If you’d like Cline to handle certain actions autonomously, you can configure this in the auto-approve settings, for example, allowing Cline to read files or run terminal commands without prompting you each time. Now, you’re good to go! Start building your projects with Cline powered by SiliconFlow APIs.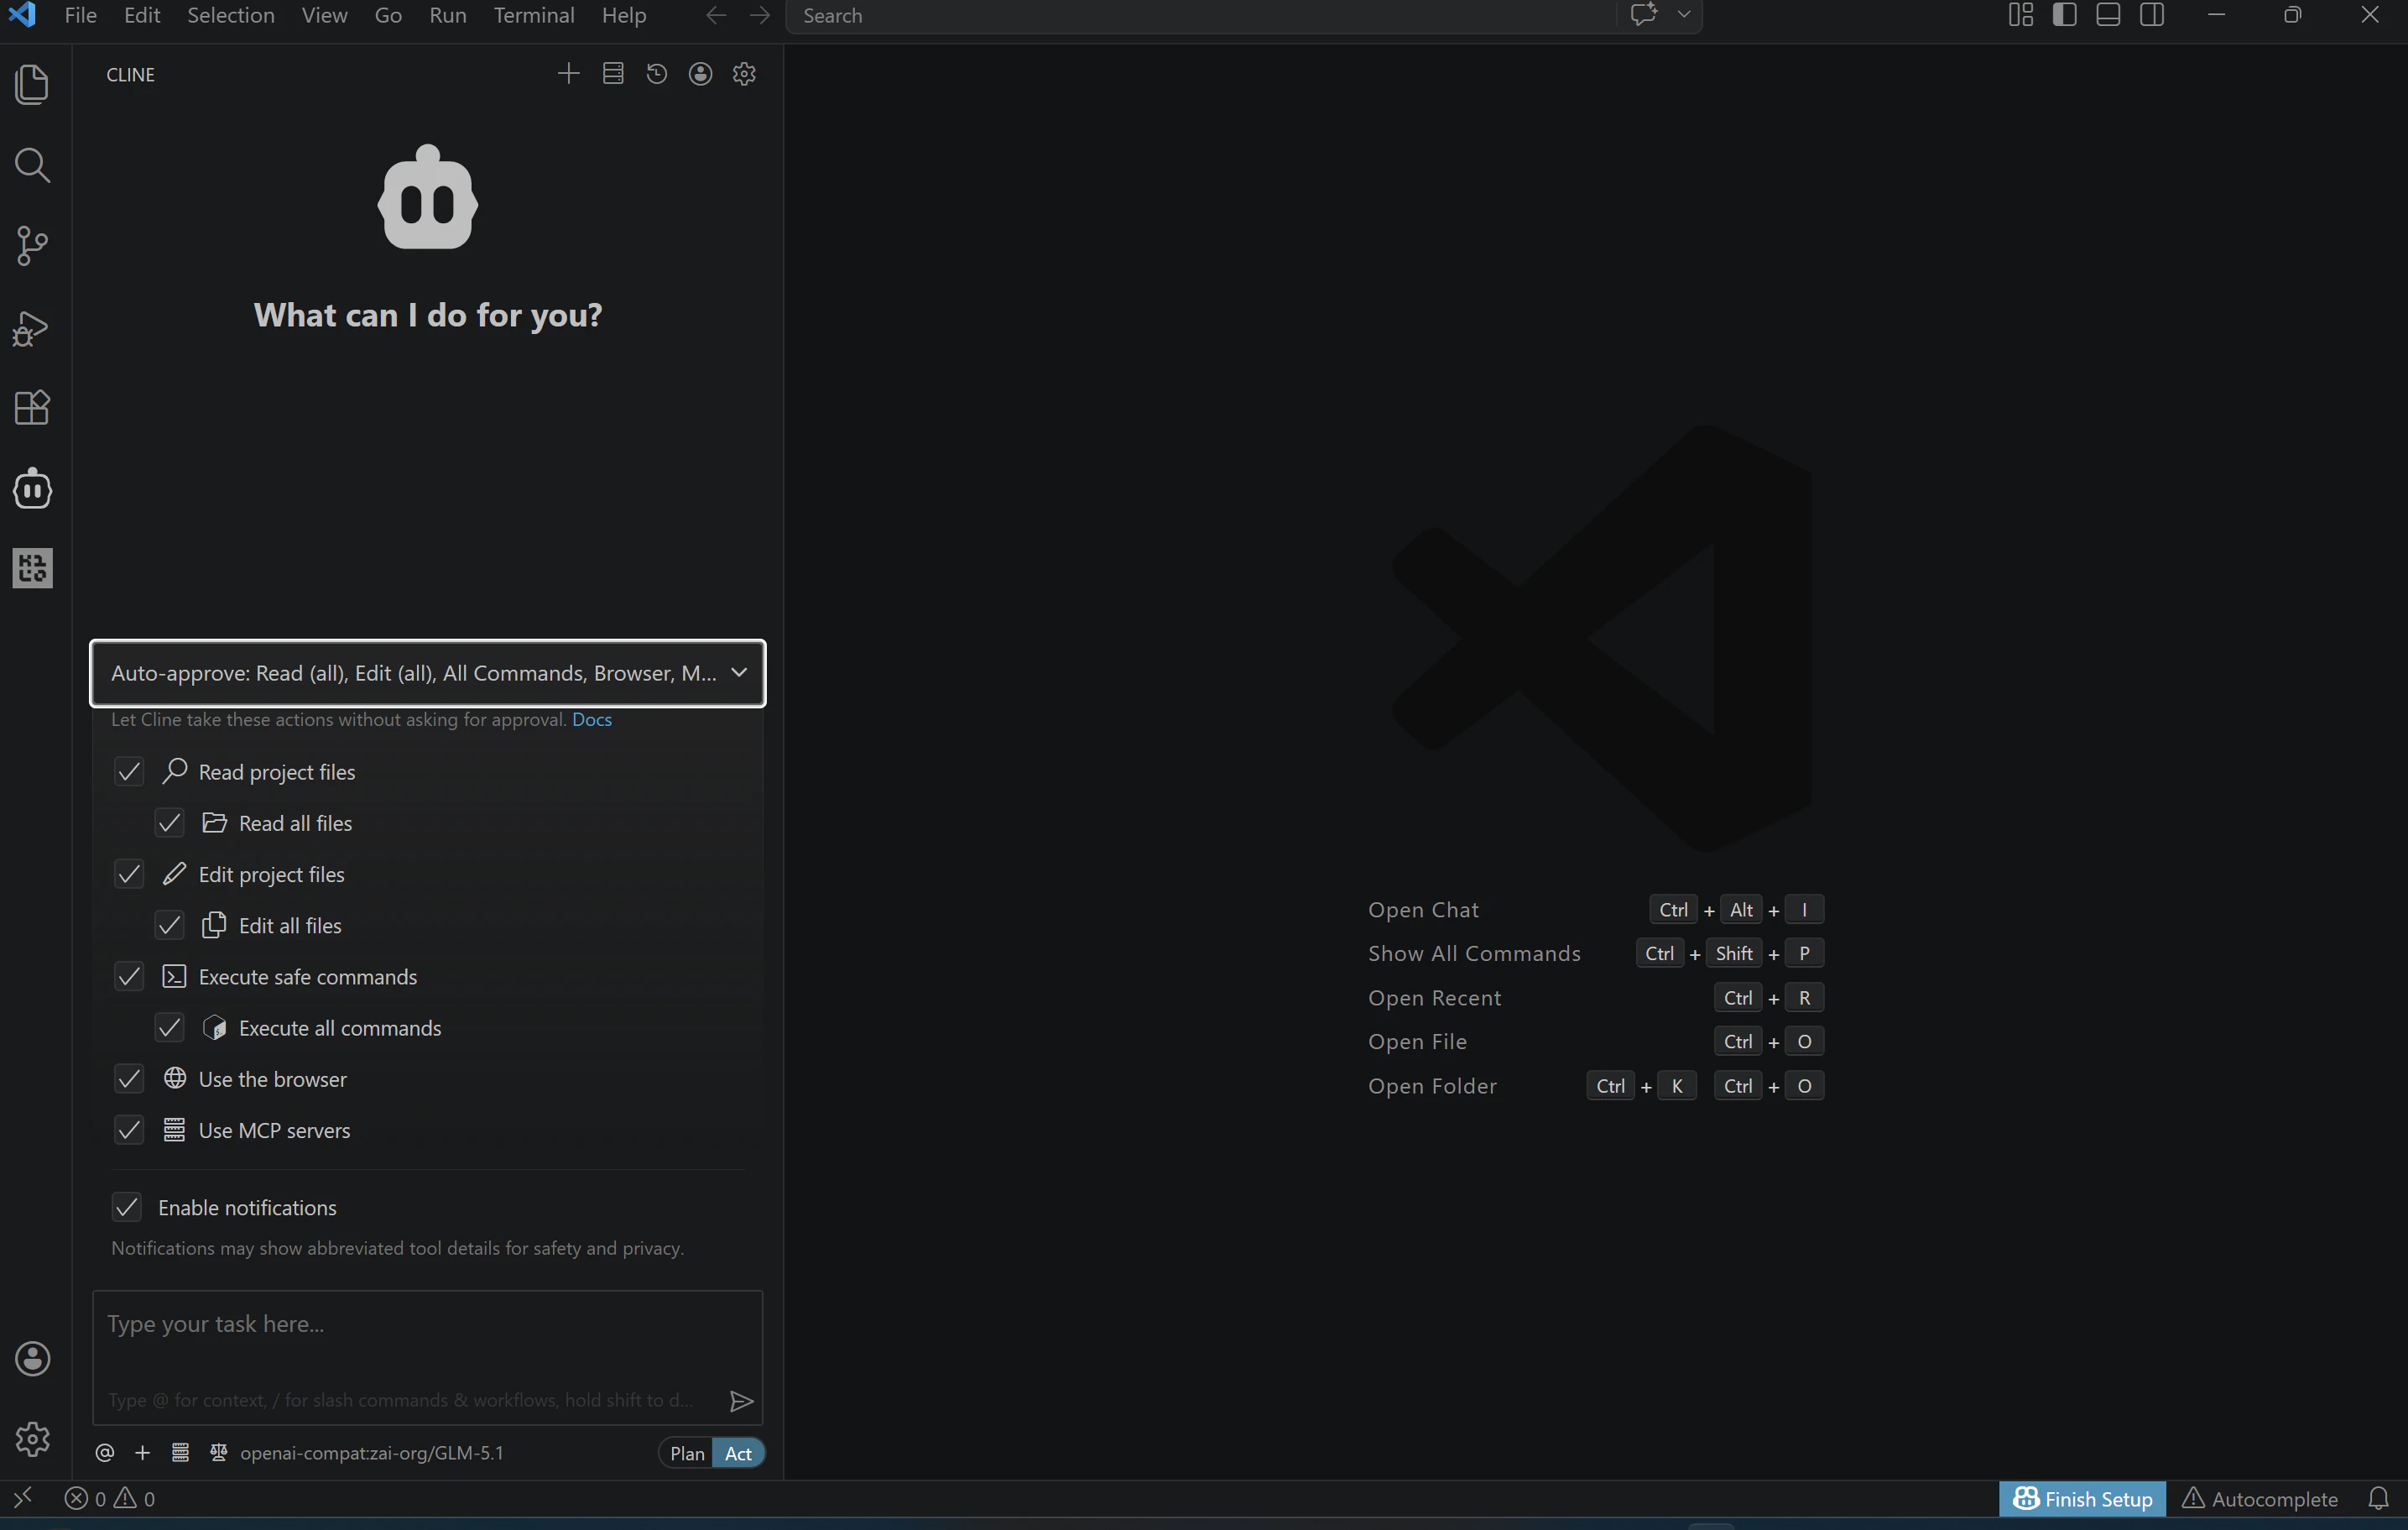
Which Model Should I Start With?
Based on Cline OpenRouter monthly usage, here are the most-used models by Cline users right now: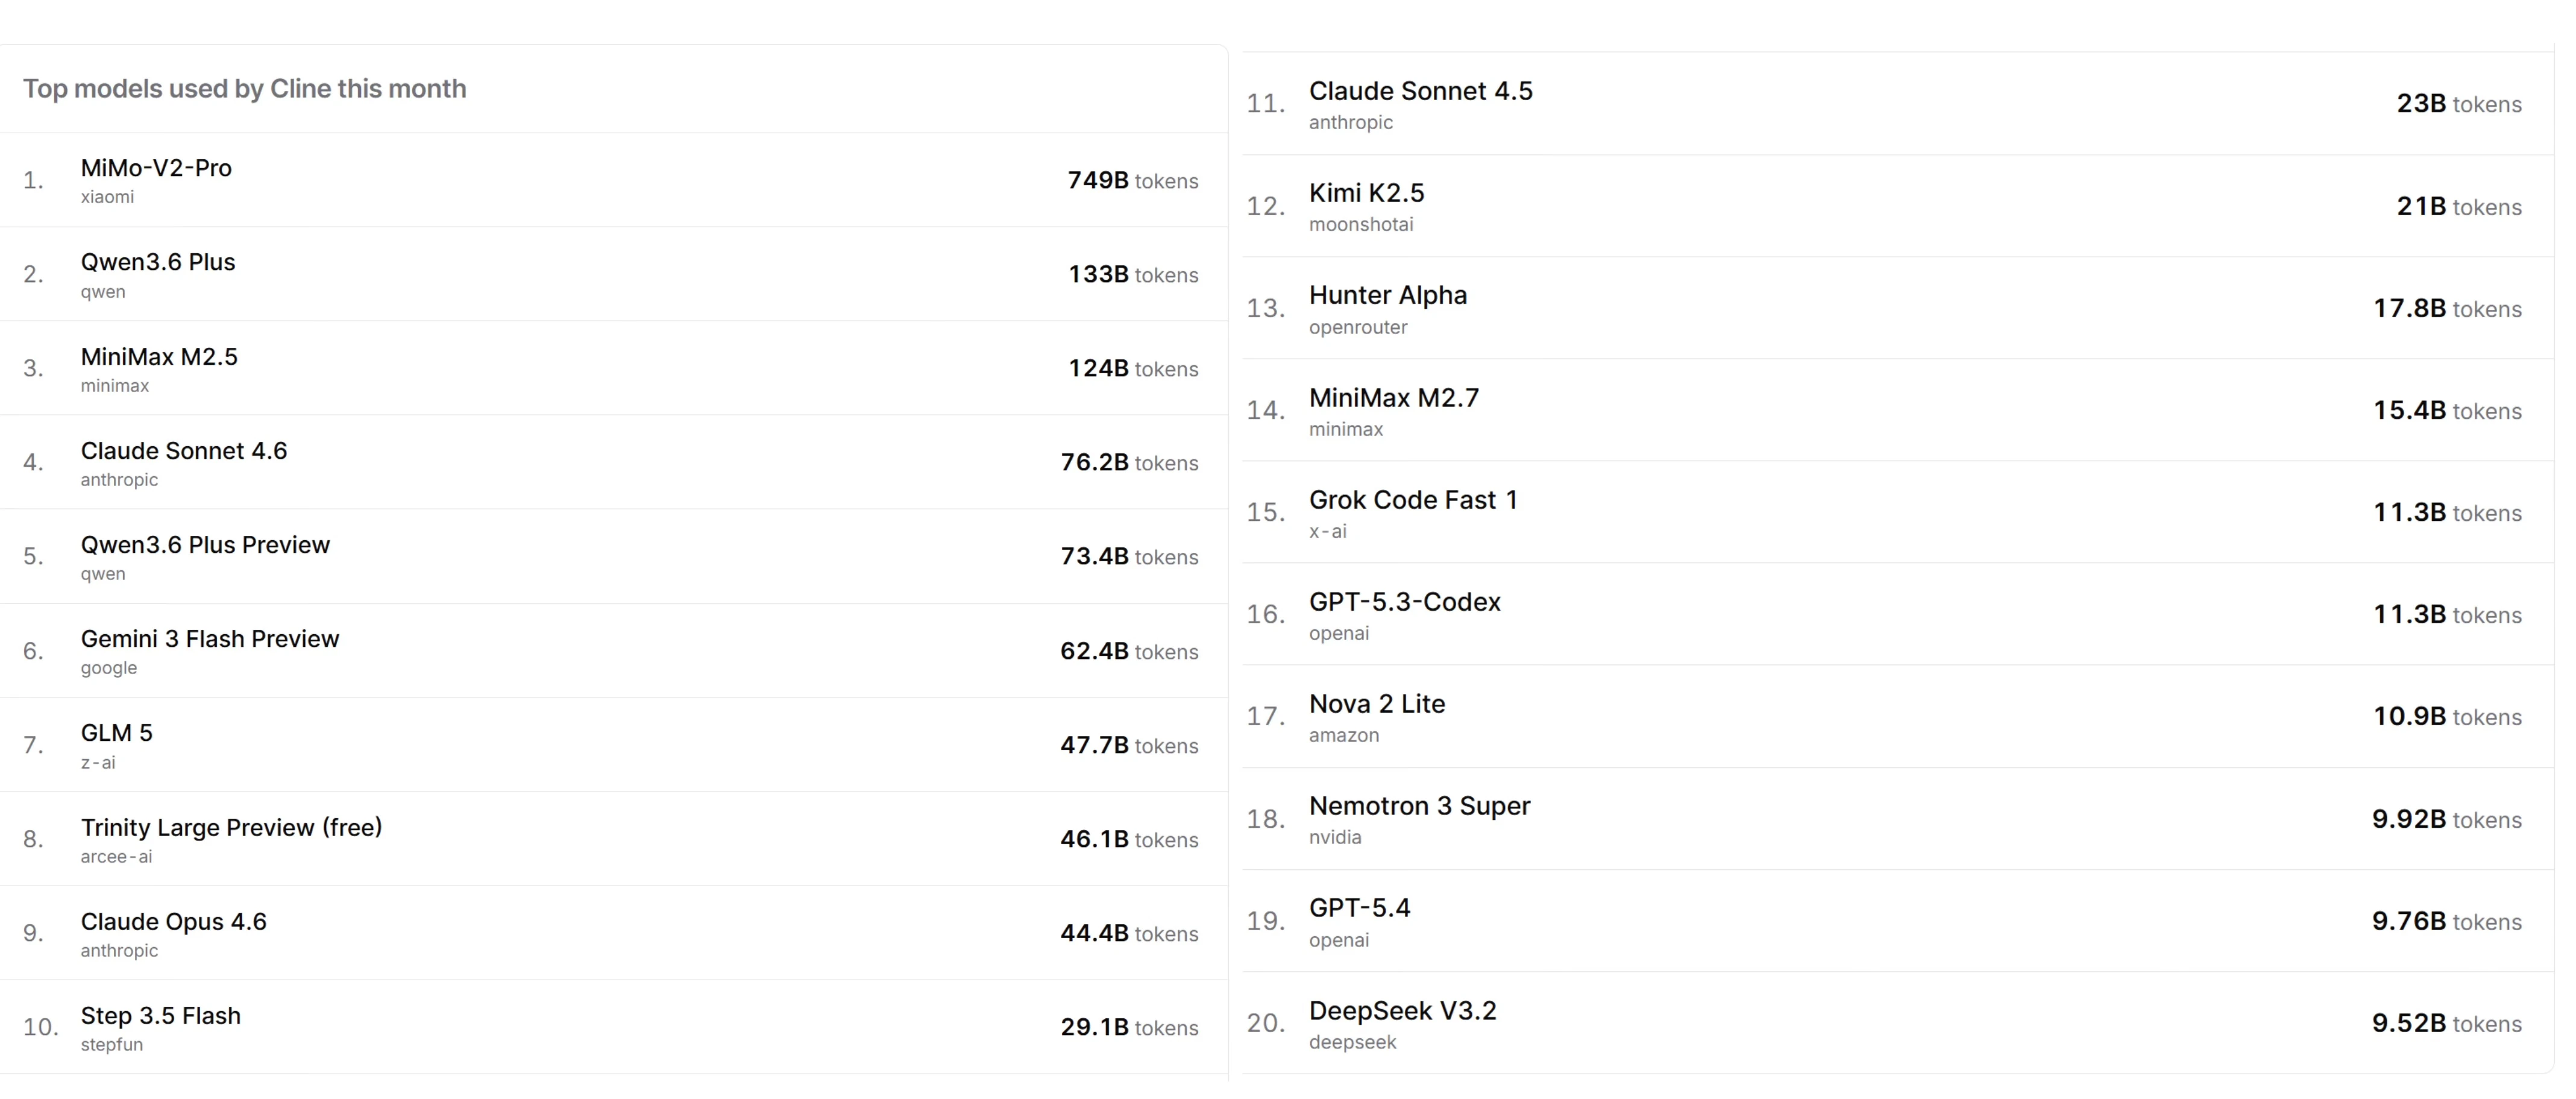
Already Using OpenRouter?
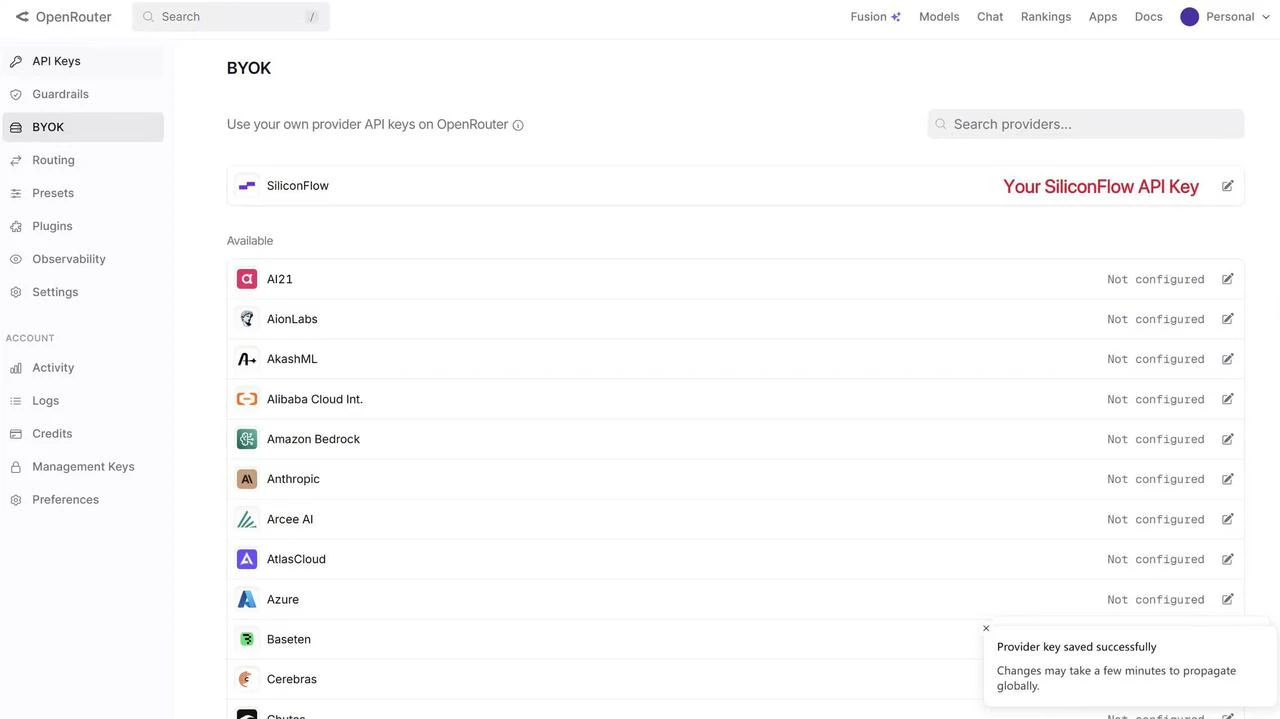
If you’re managing models across multiple platforms, you can now connect your SiliconFlow API key to OpenRouter using BYOK to get a unified workflow without switching between accounts. Once connected:- Requests draw from your SiliconFlow balance first
- Billing and rate limits stay in your SiliconFlow account
- OpenRouter’s fallback routing still works to improve reliability
Resources
Cline
- Website: https://cline.bot/
- Docs: https://docs.cline.bot/
- Github: https://github.com/cline/cline
- Discord: https://discord.gg/cline
- X: https://x.com/cline
OpenRouter
- BYOK Setting: https://openrouter.ai/workspaces/default/byok
- Cline OpenRouter Usage: https://openrouter.ai/apps/cline
- SiliconFlow on OpenRouter: https://openrouter.ai/provider/siliconflow
SiliconFlow
- Website: https://siliconflow.com
- API Documentation: https://docs.siliconflow.com
- Model Library: https://siliconflow.com/models
- Discord: https://discord.com/invite/7Ey3dVNFpT
- X: https://x.com/SiliconFlowAI