Step 1: Prerequisites
Get Your SiliconFlow API Key
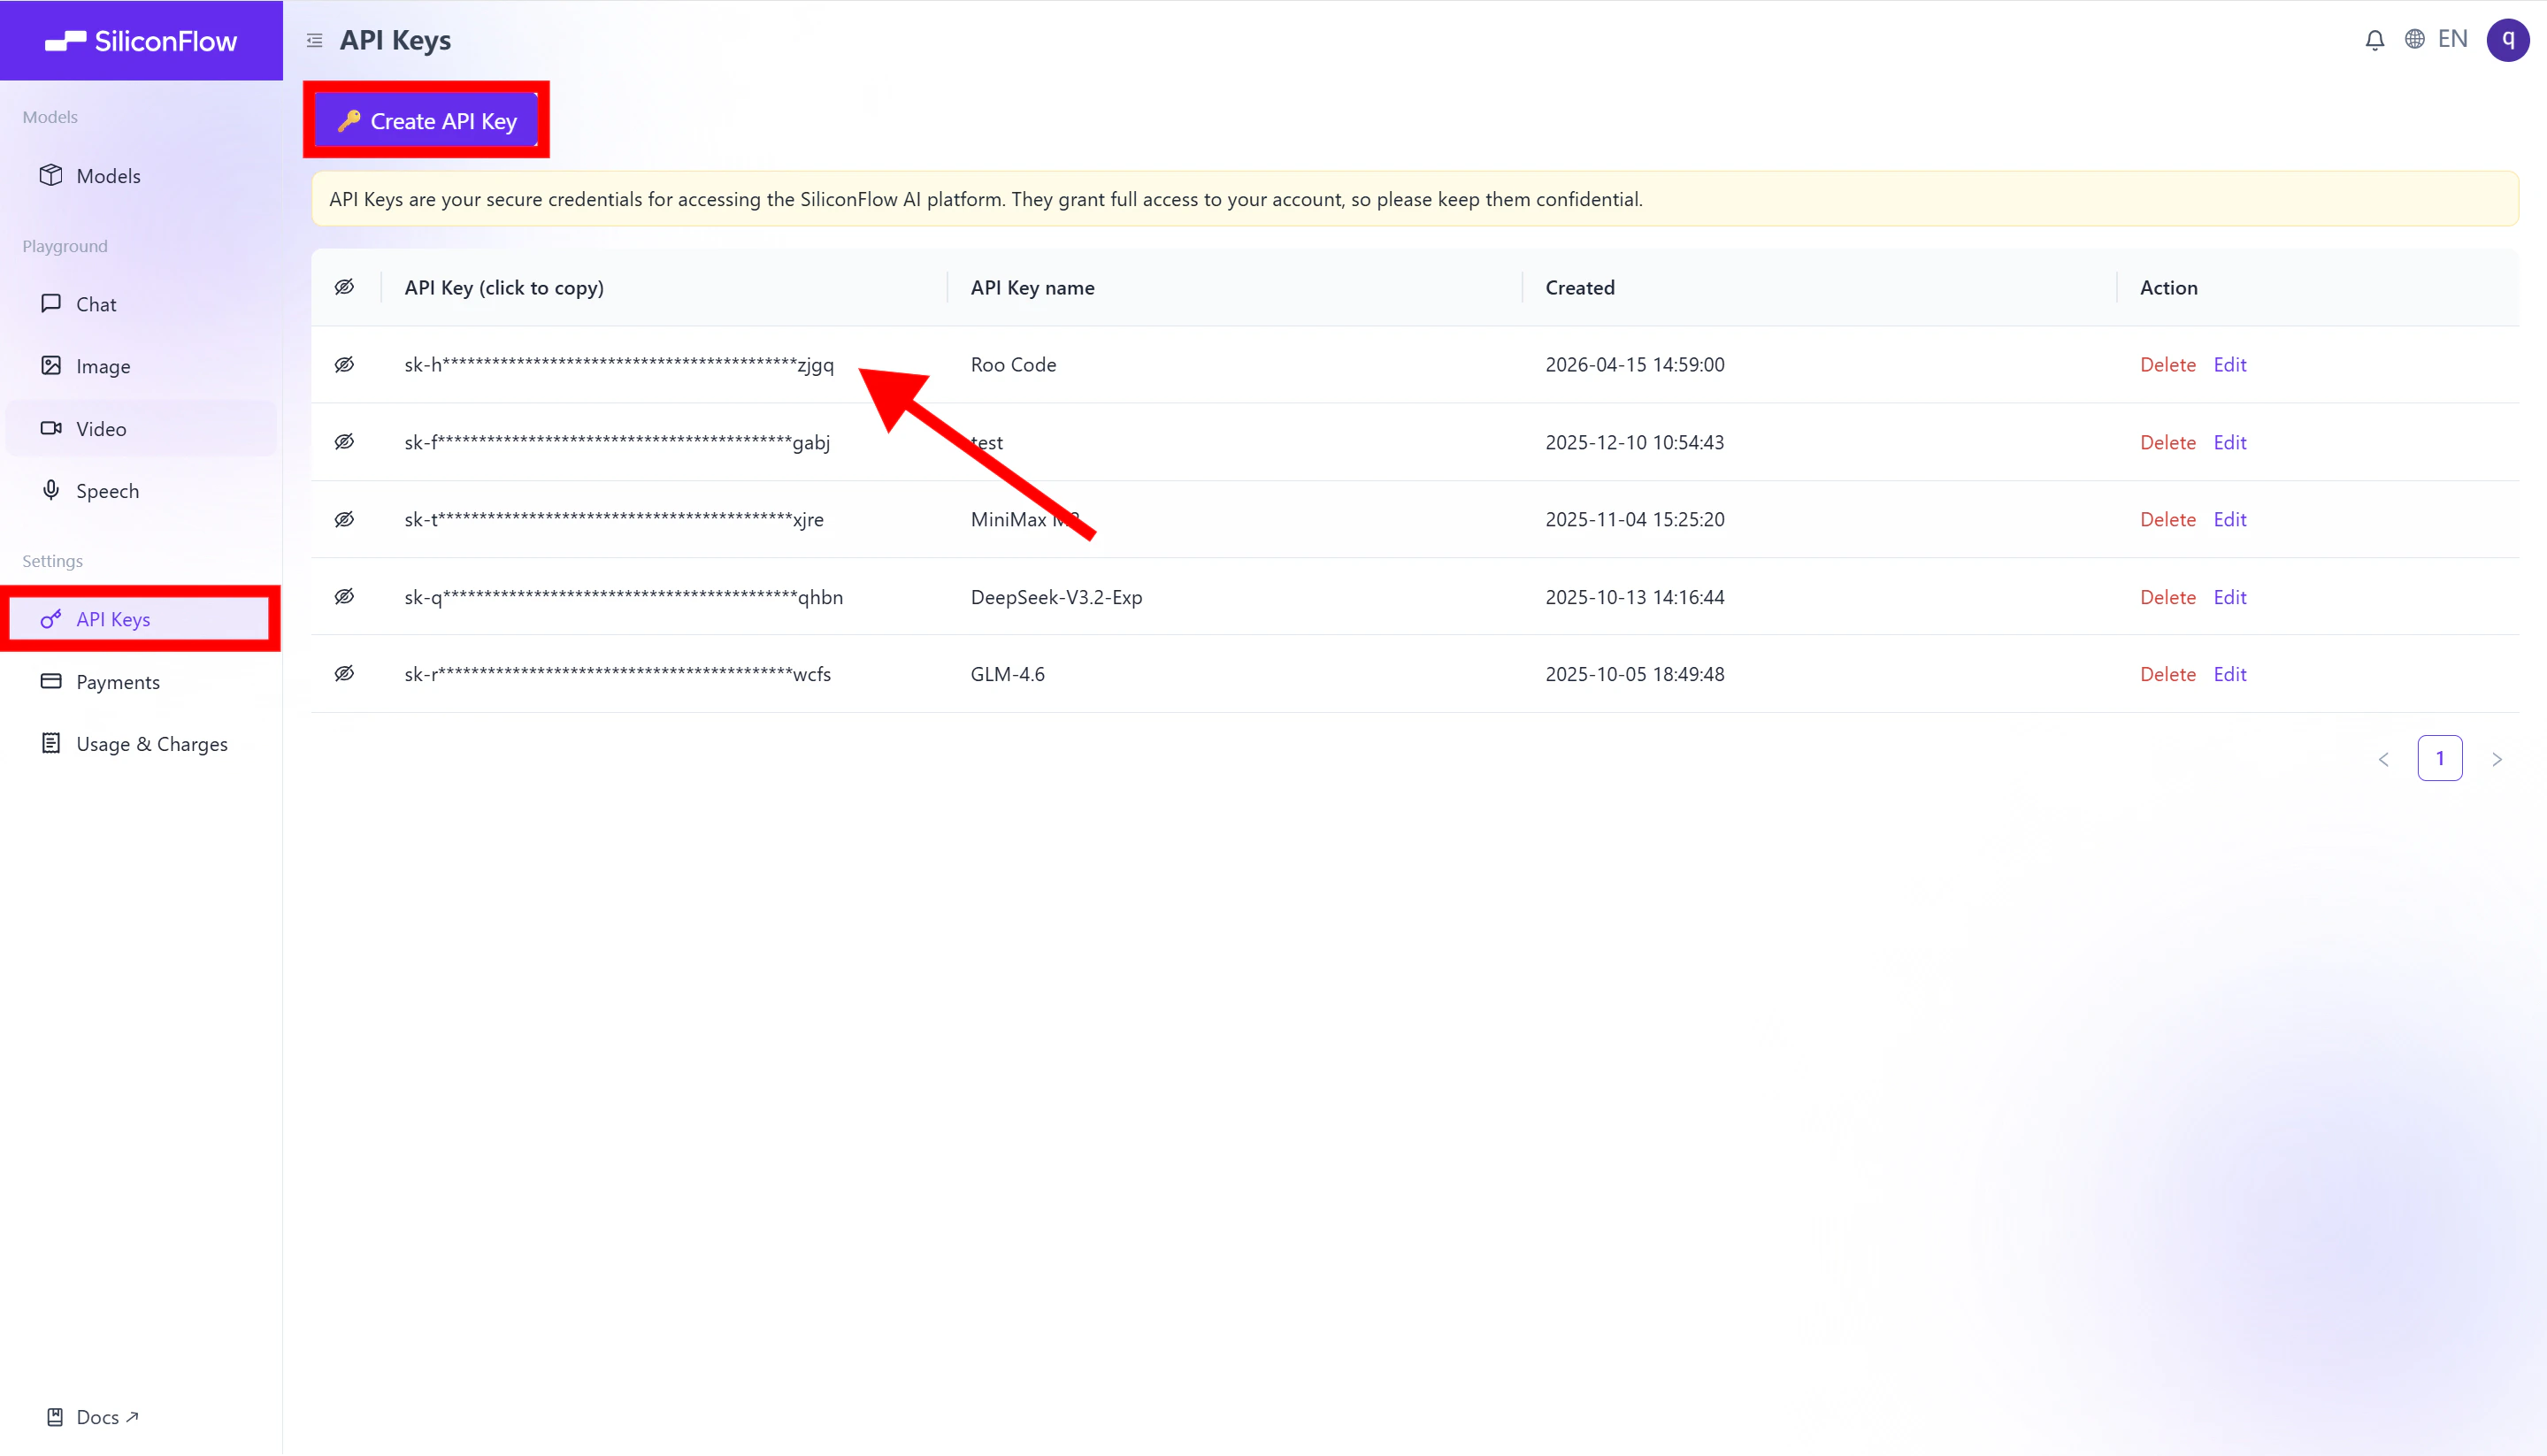
Before you begin, ensure you have a valid SiliconFlow account:- Register a SiliconFlow account at https://cloud.siliconflow.com/. You can sign up with Google or GitHub.
- Log in and navigate to
API Keysin the dashboard. - Click
🔑Create API Keyand add a name to your key to help you identify it later, then confirm to create it. - Click the API key to copy it automatically.
Step 2: Install Roo Code
Next, install the Roo Code extension in VS Code.- Visit the official Roo Code website: https://roocode.com/
- Click
Installin the top-right corner.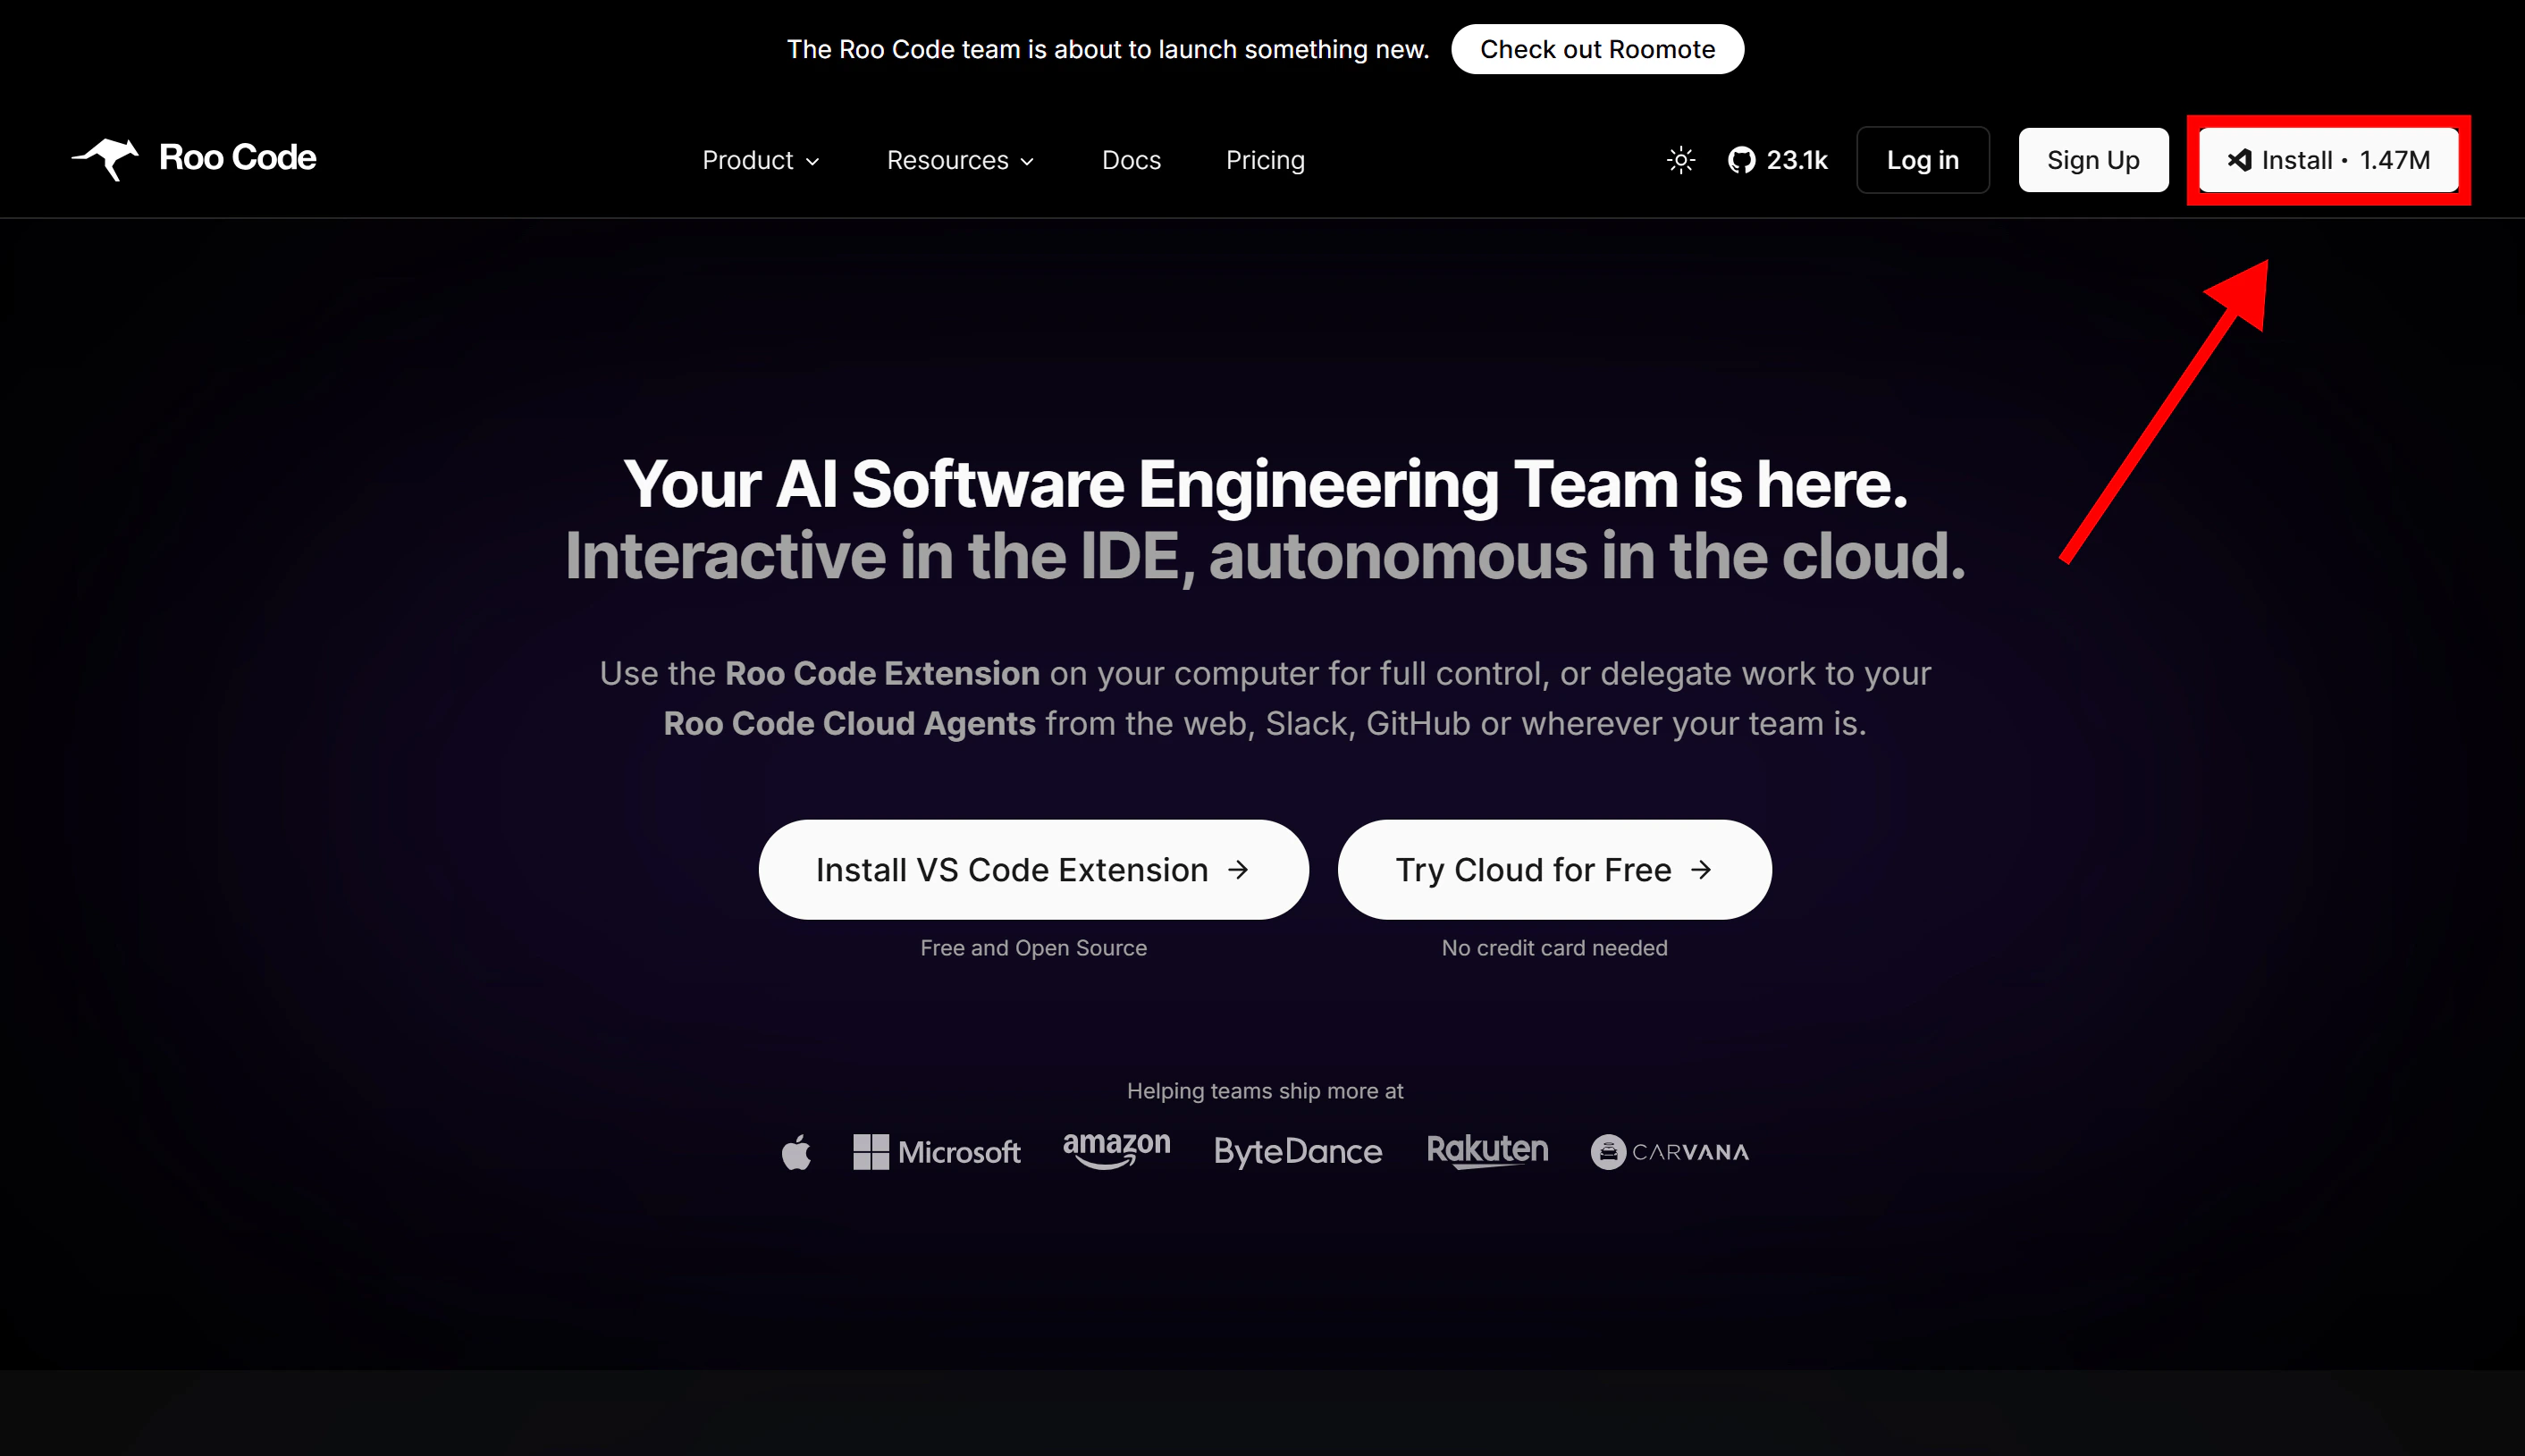
- You will be redirected to the VS Code Marketplace; Click
Installto proceed - When prompted by your browser, allow it to open Visual Studio Code, then click
Installwithin the editor to complete the setup.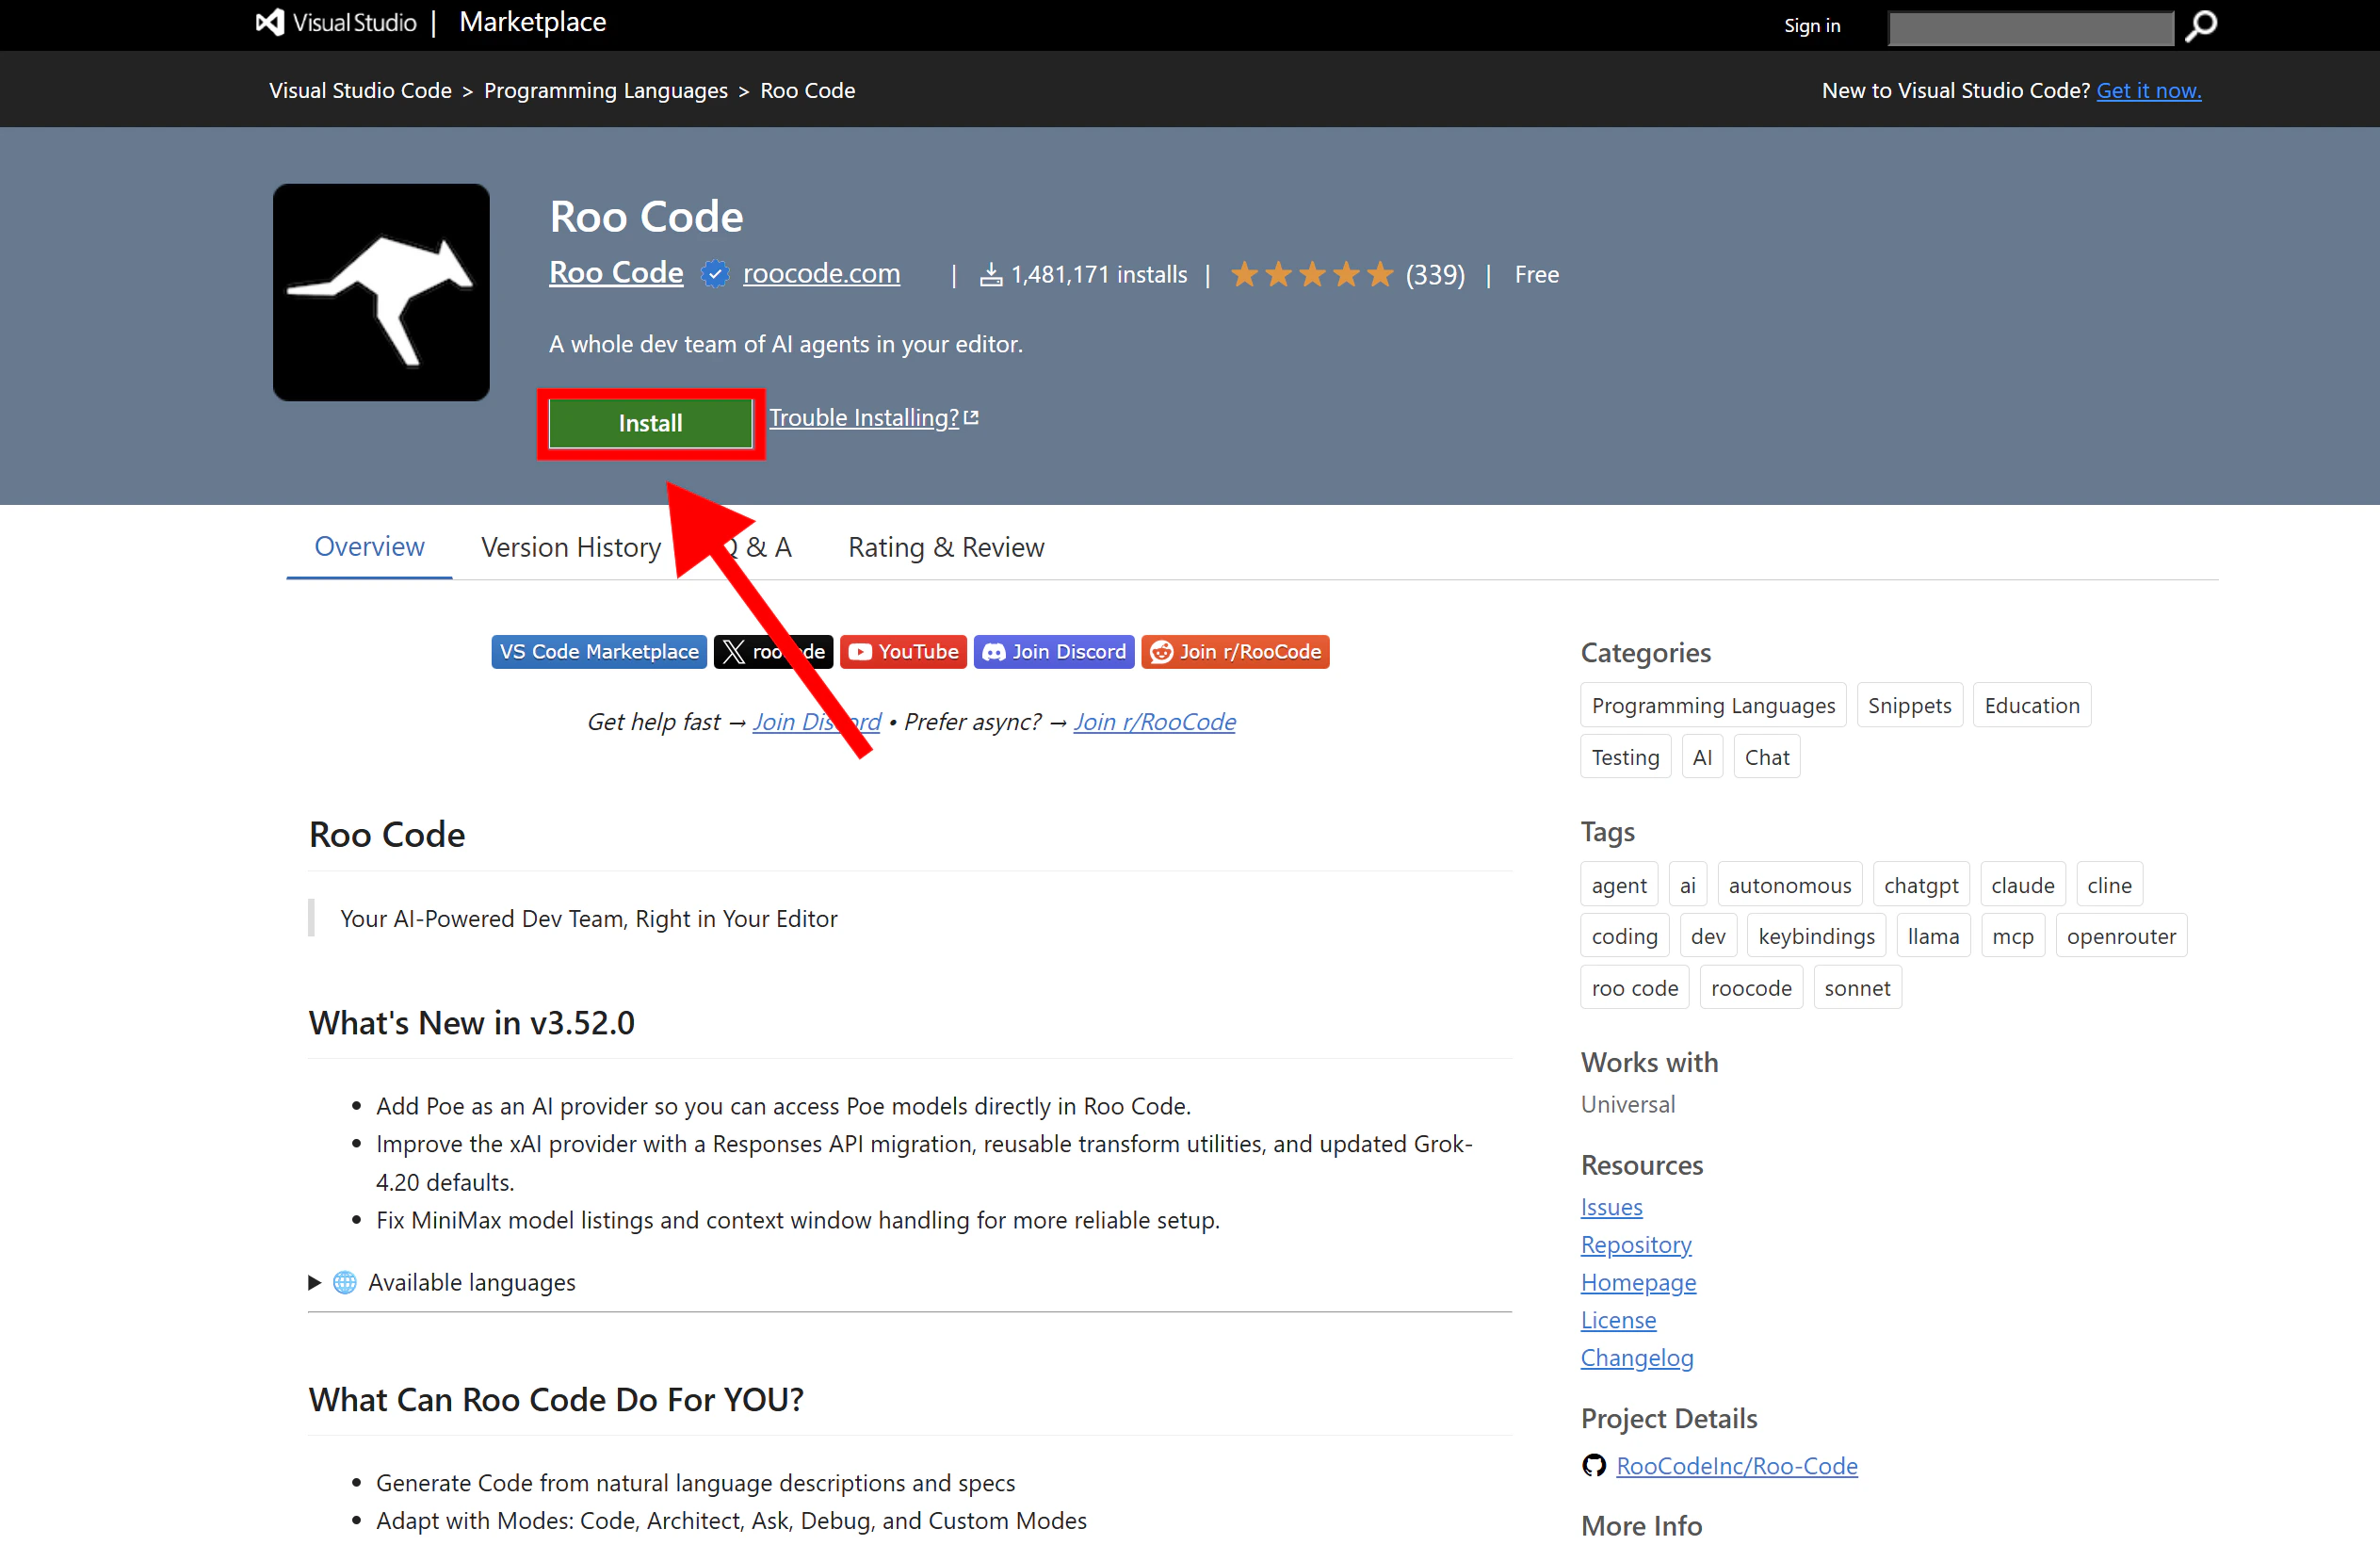

Step 3: Configure SiliconFlow APIs
- Open Roo Code: Click the Roo Code icon in the Activity Bar (left-hand side of VS Code).
-
Access Settings: Sign in (or continue without an account) and click the
⚙️ Settings(gear icon) in the top-right corner.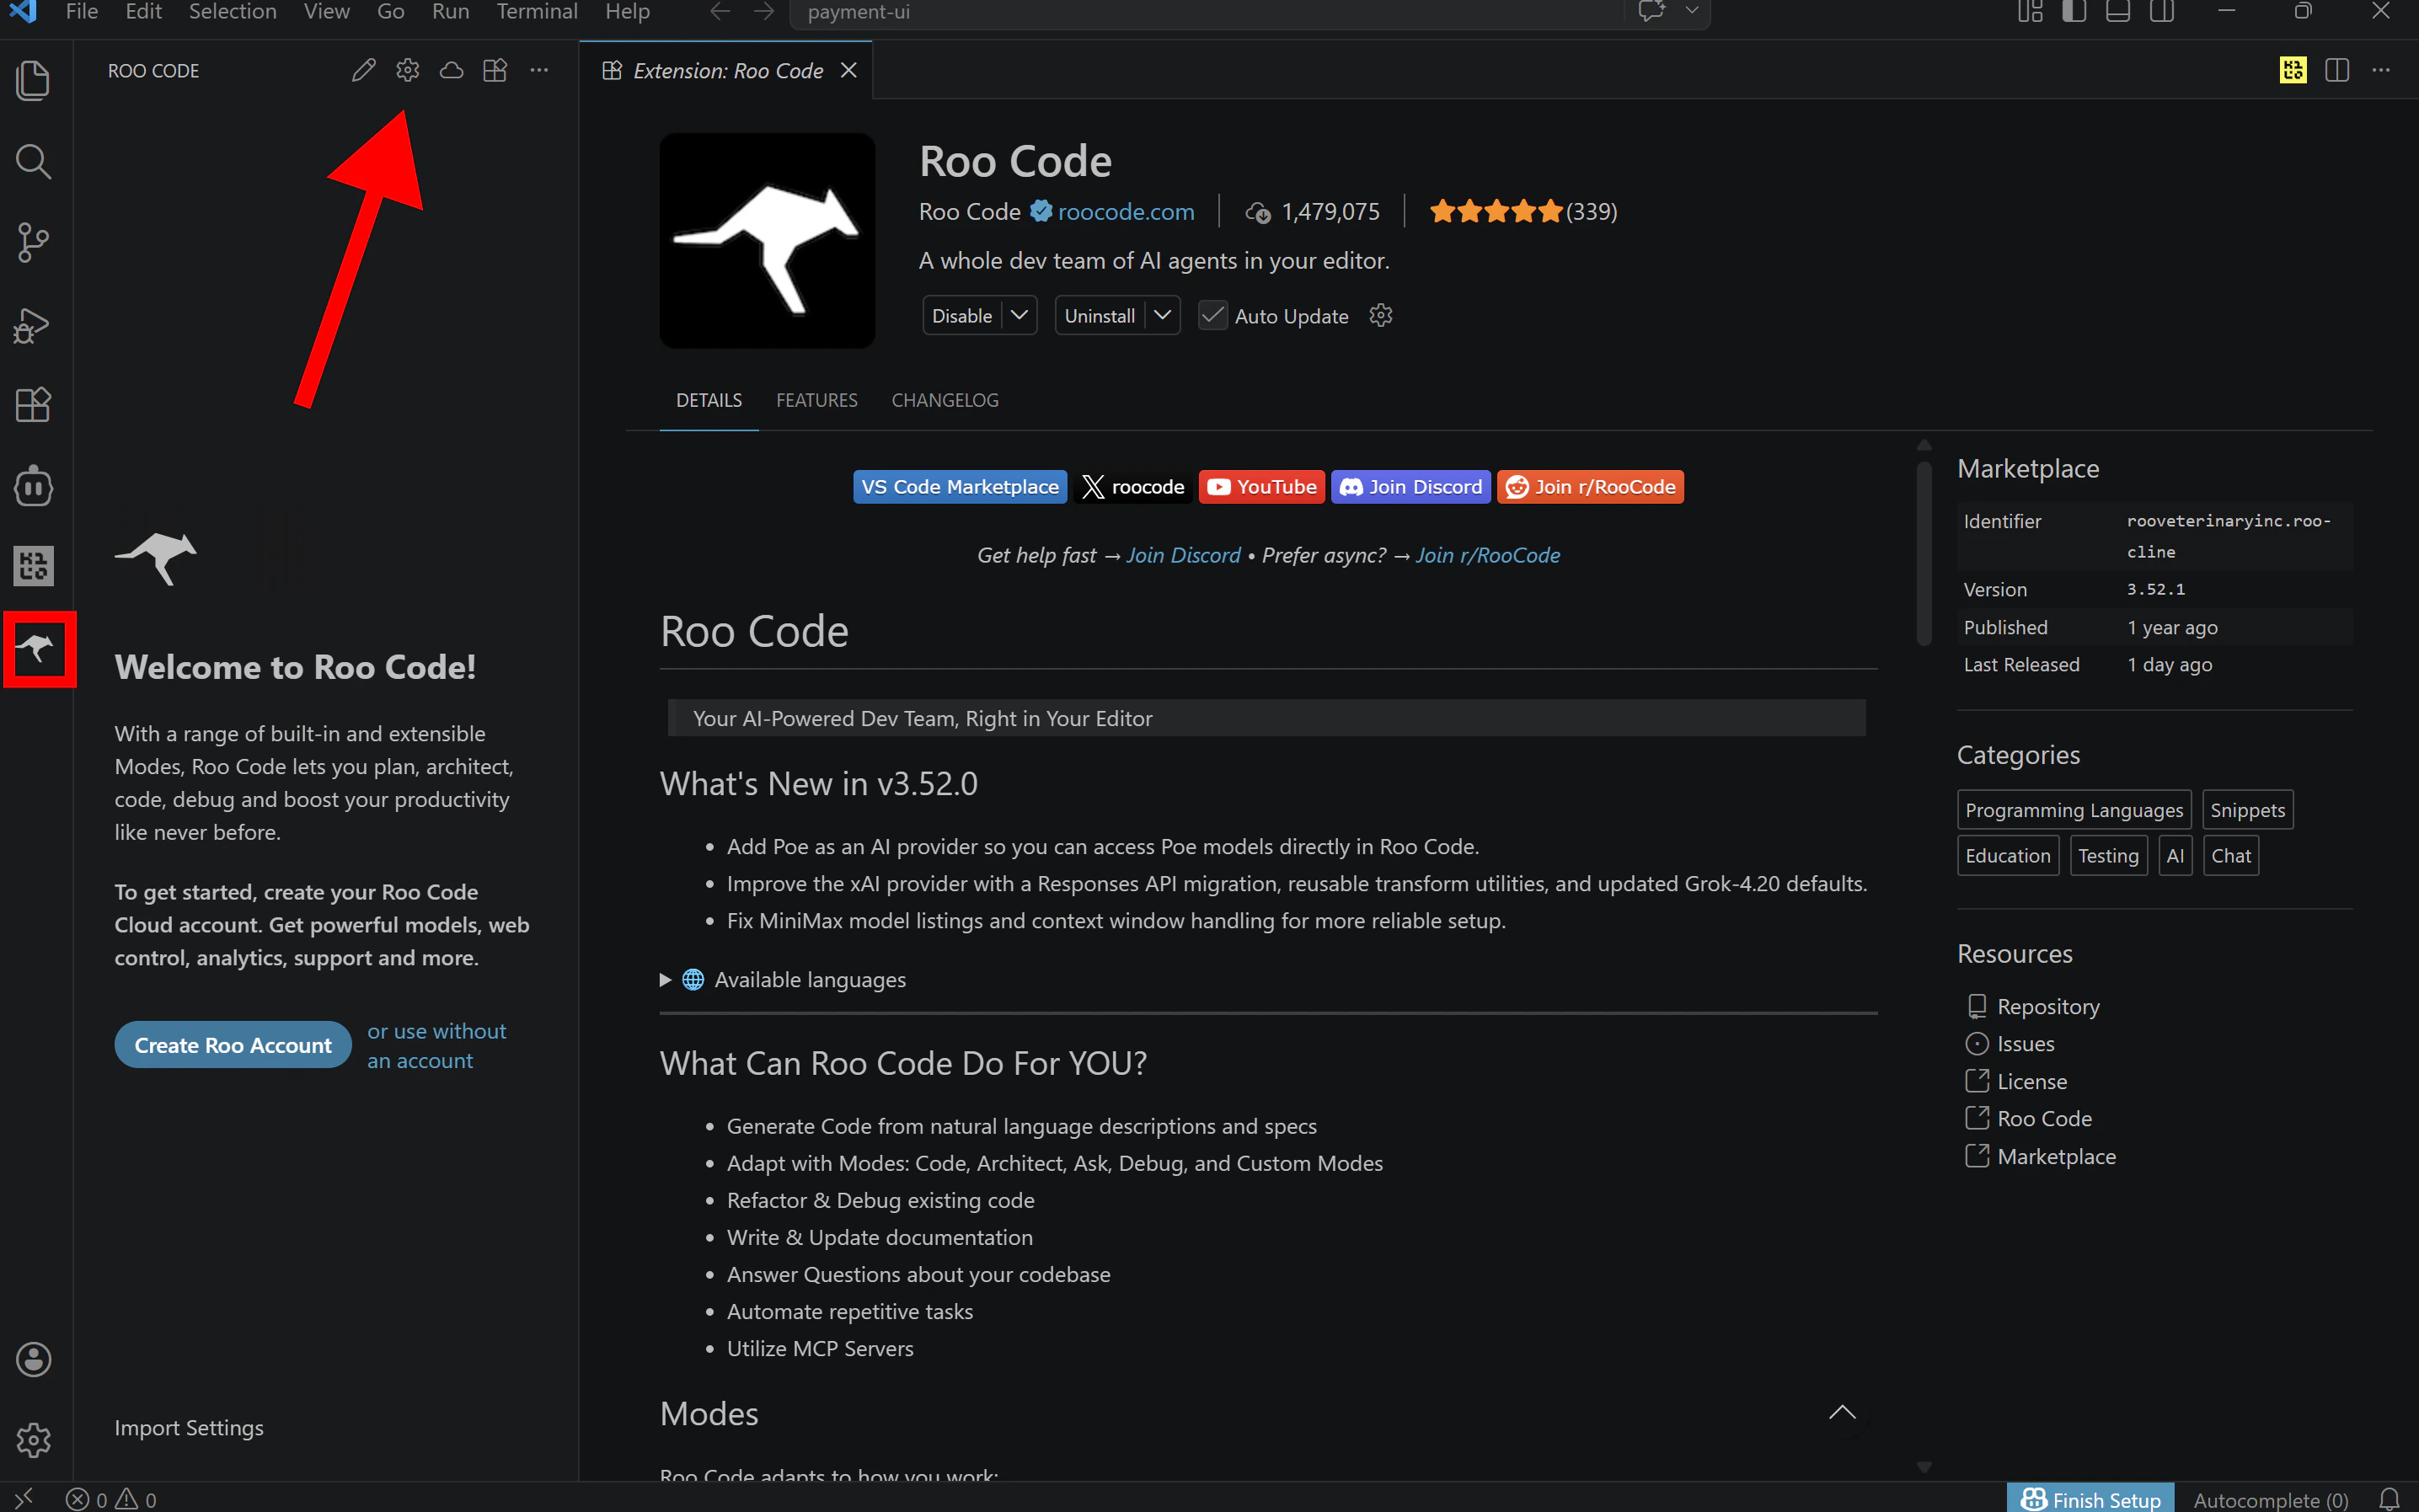
-
Select Provider**:** Choose
3rd-party Providerand fill in the following details:- API Provider:
OpenAI Compatible - Base URL:
https://api.siliconflow.com/v1 - OpenAI Compatible API Key:
Paste Your SiliconFlow API Key Here - Model ID: Enter the model you want to use, for example,
zai-org/GLM-5.1. You can browse the full model list at SiliconFlow’s model library https://www.siliconflow.com/model
- API Provider:
-
Click
Finishto save your settings.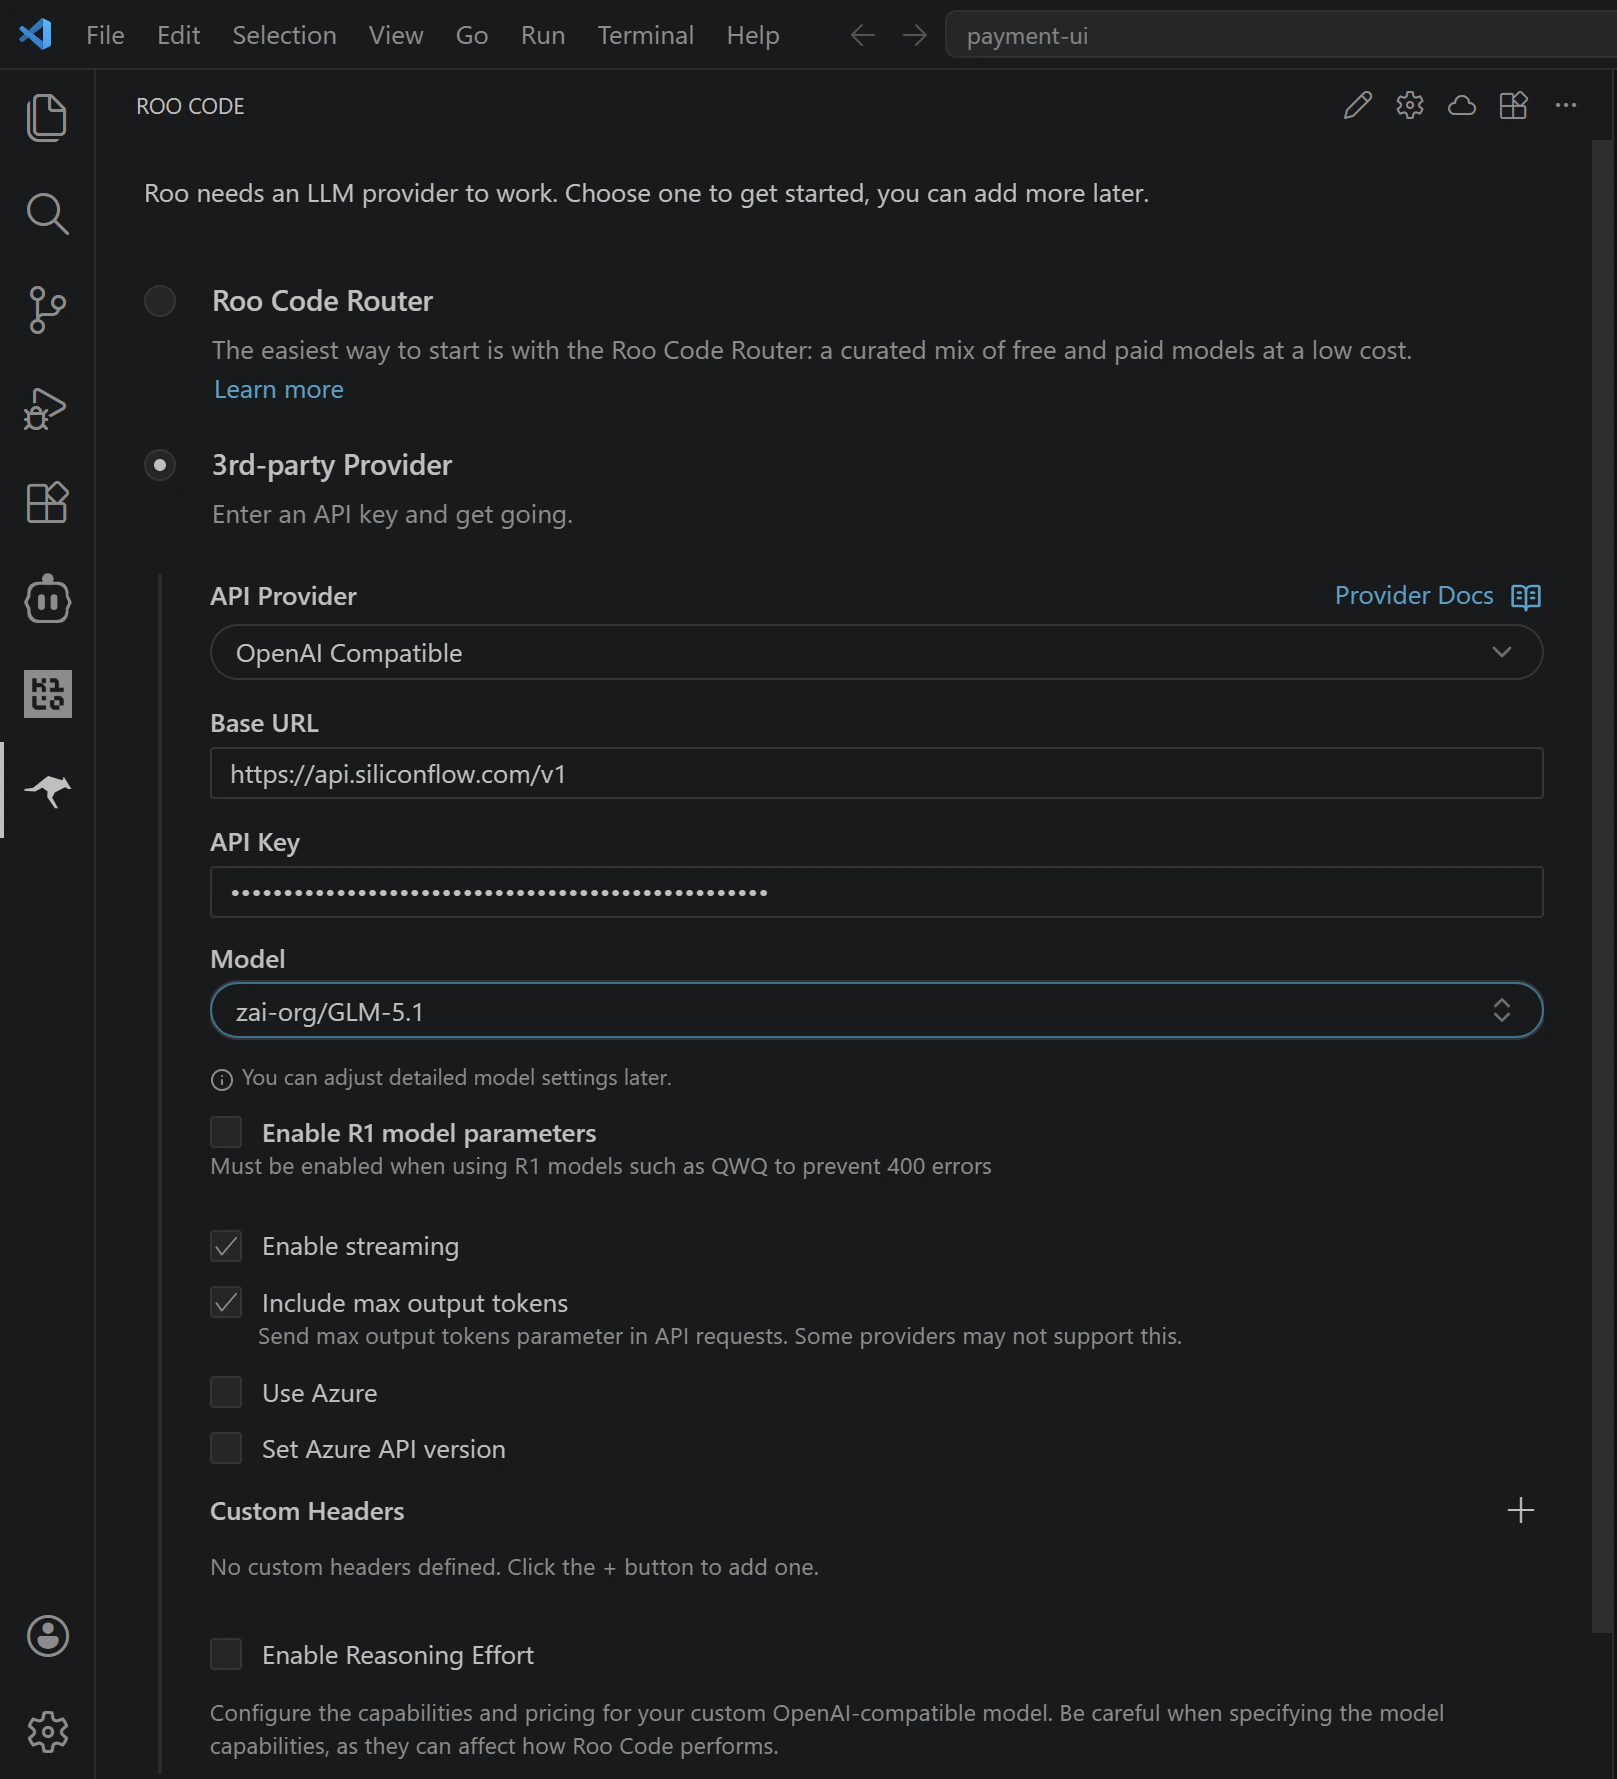
- Fine-Tuning Your Profile
siliconflow for easier access later. You can also fine-tune your setup in the settings section:
- Performance: Adjust
max output tokensandcontext window size. - Capabilities: Enable
image supportand otheradvanced parameters. - Billing: View detailed
prompt caching rates(Input, Output, and Cache pricing).
Step 4: Start Building with Roo Code
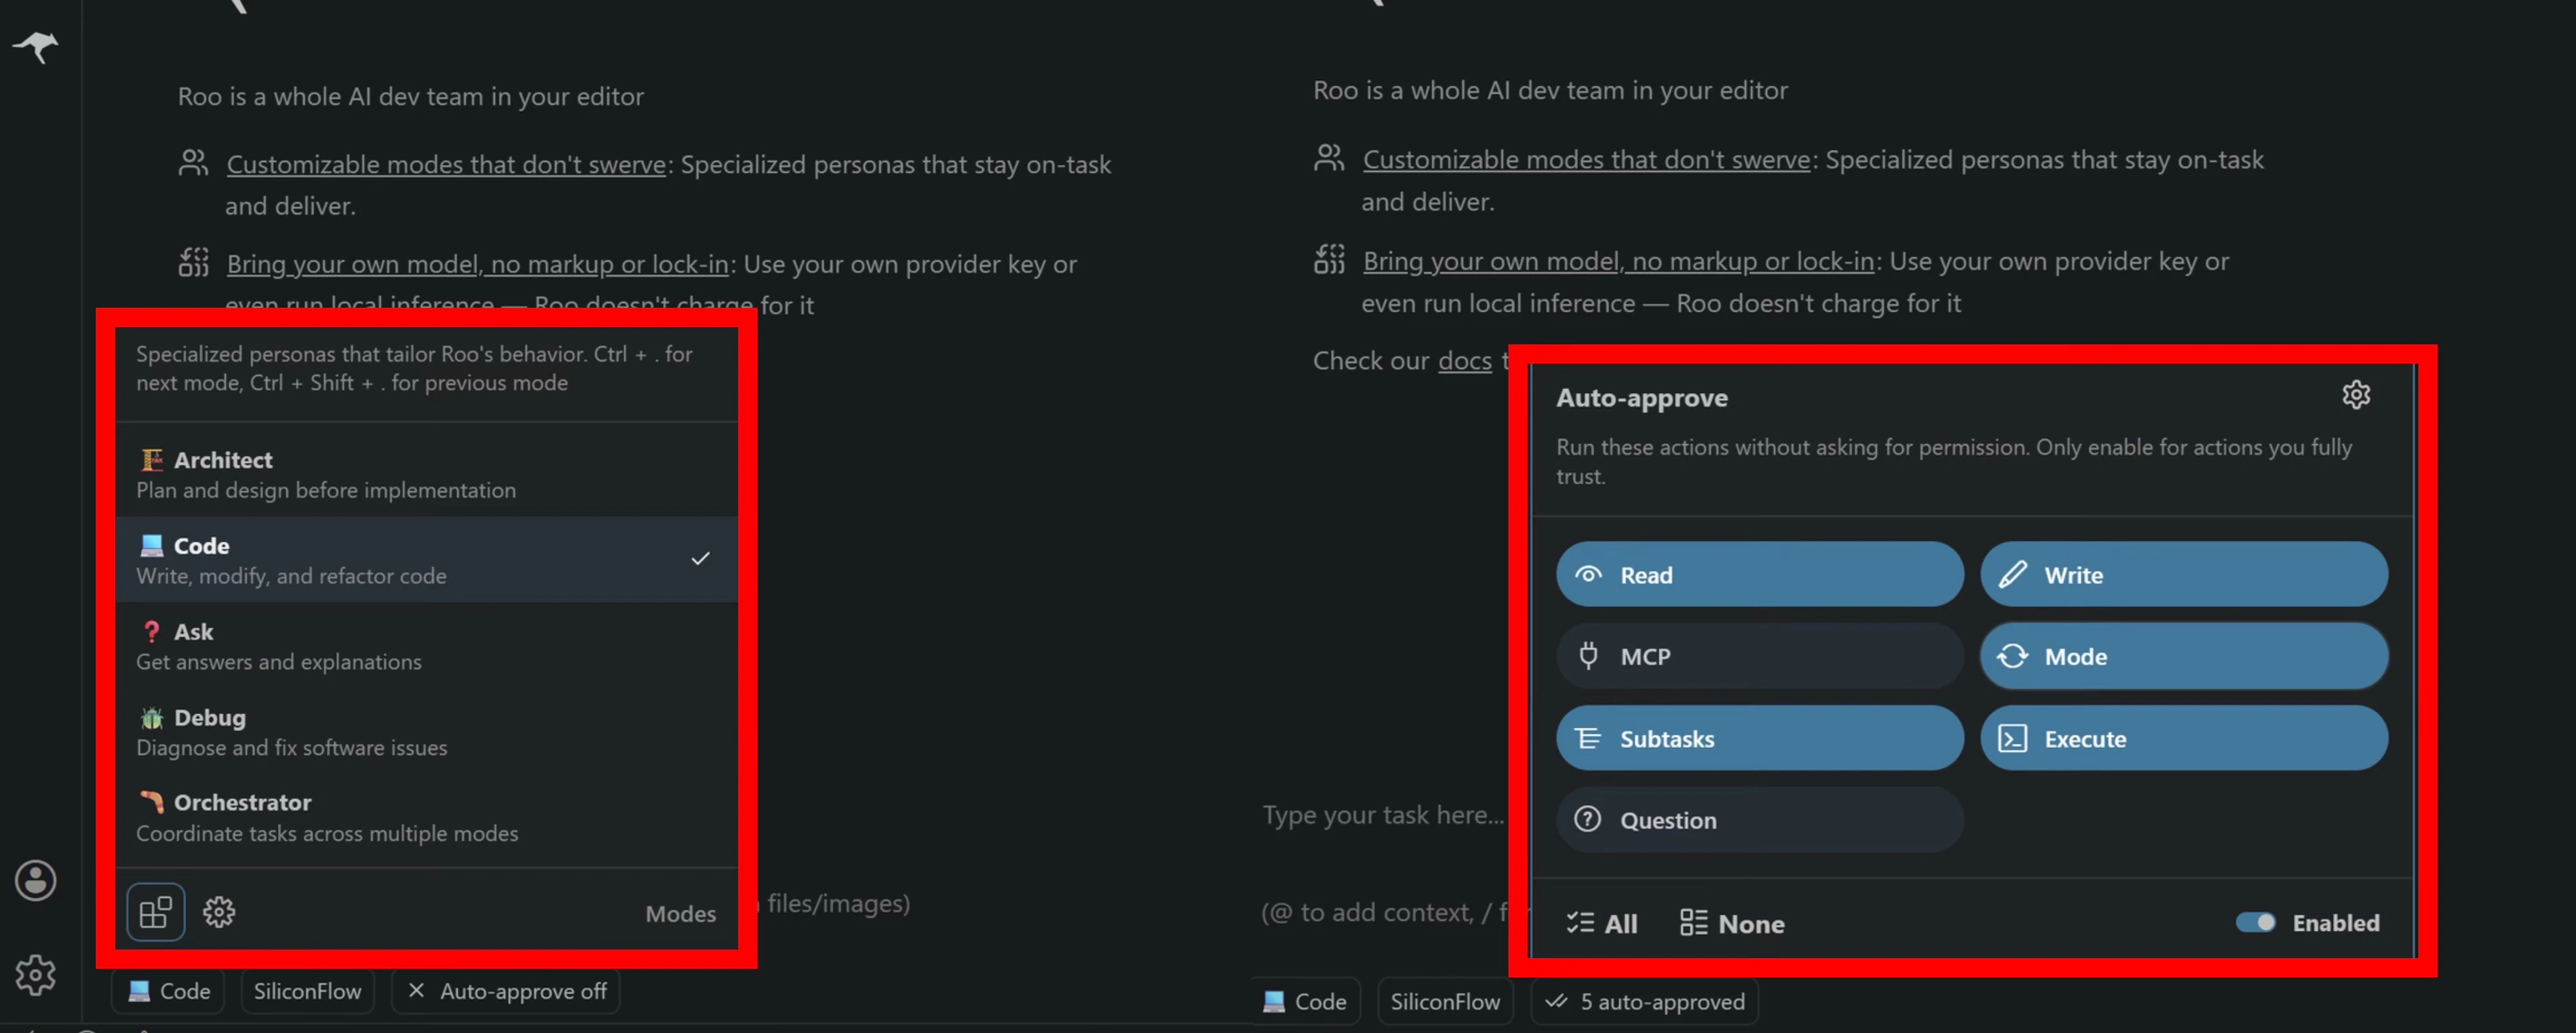
With your SiliconFlow APIs configured, you can now leverage Roo Code’s diverse modes, powered by high-performance SiliconFlow models, to streamline your development workflow.
Beyond the defaults, you can tailor Roo Code’s behavior by customizing existing modes or creating Specialized Assistants. See the Custom Modes documentation for detailed setup instructions.
You can also configure Auto-approve settings, enabling Roo Code to run specific commands seamlessly without asking every time.
Already Using OpenRouter?
If you’re managing models across multiple platforms, you can now connect your SiliconFlow API key to OpenRouter using BYOK, enabling a unified workflow without switching between accounts. Once connected:- Requests draw from your SiliconFlow balance first
- Billing and rate limits stay in your SiliconFlow account
- OpenRouter’s fallback routing still works to improve reliability

Resources
Roo Code
- Website: https://roocode.com/
- Docs: https://docs.roocode.com/
- Github: https://github.com/RooCodeInc/Roo-Code
- Discord: https://discord.gg/roocode
- X: https://x.com/roocode?s=20
OpenRouter
- BYOK Setting: https://openrouter.ai/workspaces/default/byok
- Roo Code on OpenRouter: https://openrouter.ai/apps/roo-code
- SiliconFlow on OpenRouter: https://openrouter.ai/provider/siliconflow
SiliconFlow
- Website: https://siliconflow.com
- API Documentation: https://docs.siliconflow.com
- Model Library: https://siliconflow.com/models
- Discord: https://discord.com/invite/7Ey3dVNFpT
- X: https://x.com/SiliconFlowAI