Step 1: Prerequisites
1.1 Get Your SiliconFlow API Key
Before you begin, ensure you have a valid SiliconFlow account:- Get Your SiliconFlow API Key: https://cloud.siliconflow.com/account/ak
1.2 Node 22 or newer
To verify your Node version:Step 2: Install OpenCla
OpenClaw Recommended Installation Method2.1 macOS/Linux:
2.2 Windows (PowerShell):
Step 3: Configure SiliconFlow APIs
3.1 Initialize Configuration
After installation, run the following CLI in your terminal:3.2 Locate the Configuration File
On Windows:3.3 Add SiliconFlow as a Model Provider
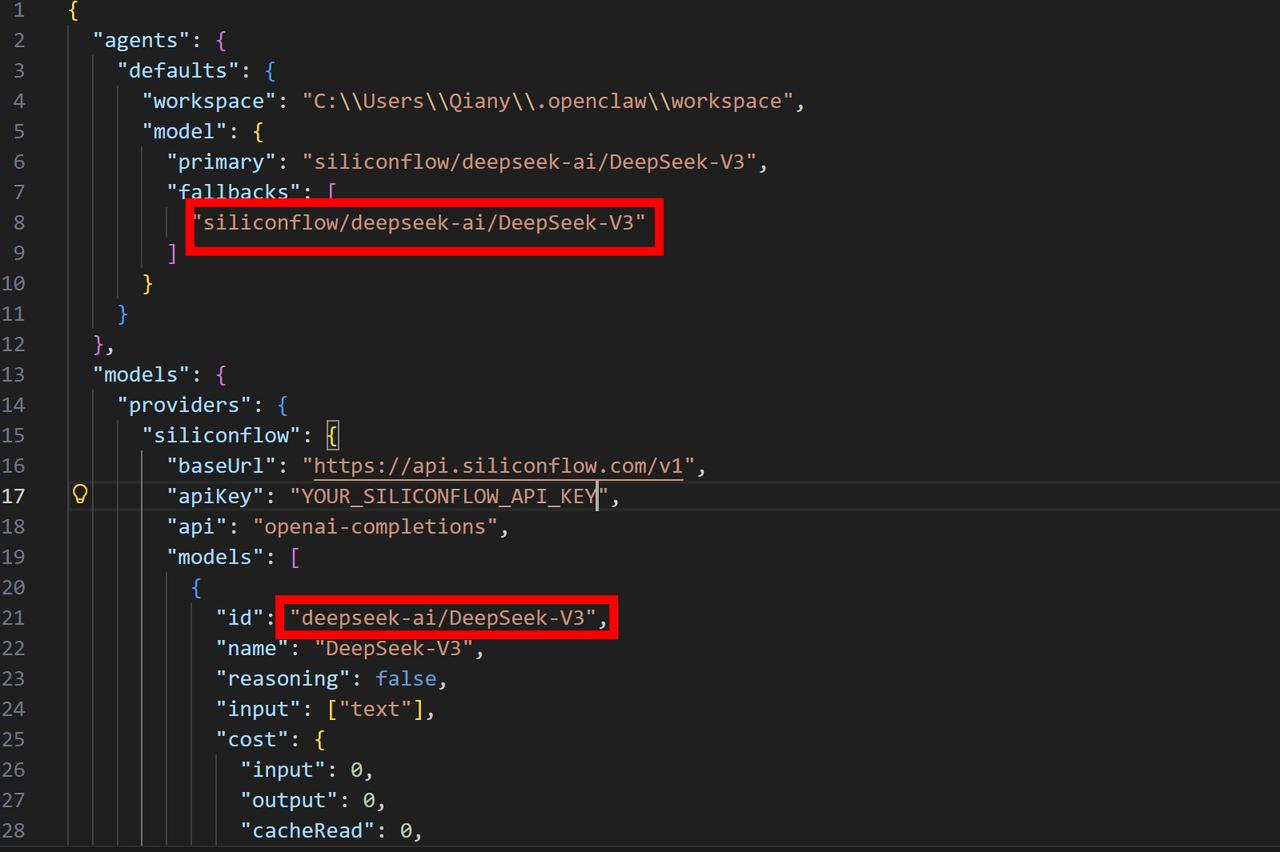
Merge the following configuration into the"models" section of your openclaw.json file.
3.4 Register the Model in the Agents Section
Add the following entry under the"agents" section:
- The model identifier must match the ID defined in the provider configuration.
- It is recommended to first add the model under the “fallbacks” section to prevent runtime errors caused by misconfiguration.
3.5 Verify Model Registration
Run:
"models"and "agents" sections, you can add more models supported by SiliconFlow
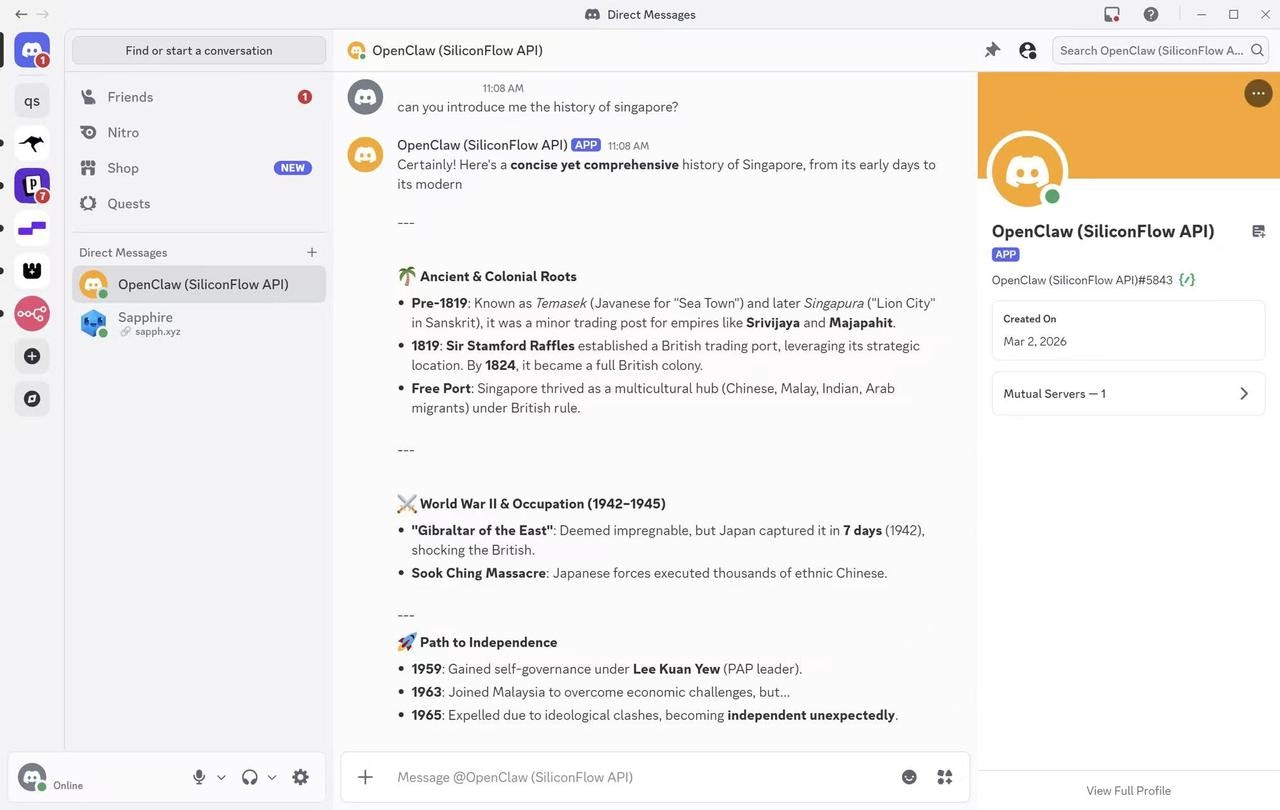
With SiliconFlow configured, you can now connect OpenClaw to a messaging platform. In the following section, we will use Discord as an example to demonstrate how to deploy an OpenClaw bot on Discord using SiliconFlow APIs.
For detailed configuration guides on additional channels — including Telegram, WhatsApp, Slack, Signal, iMessage, Microsoft Teams, and more — please visit the official documentation at https://docs.openclaw.ai/channels.
Example: Run OpenClaw in Discord
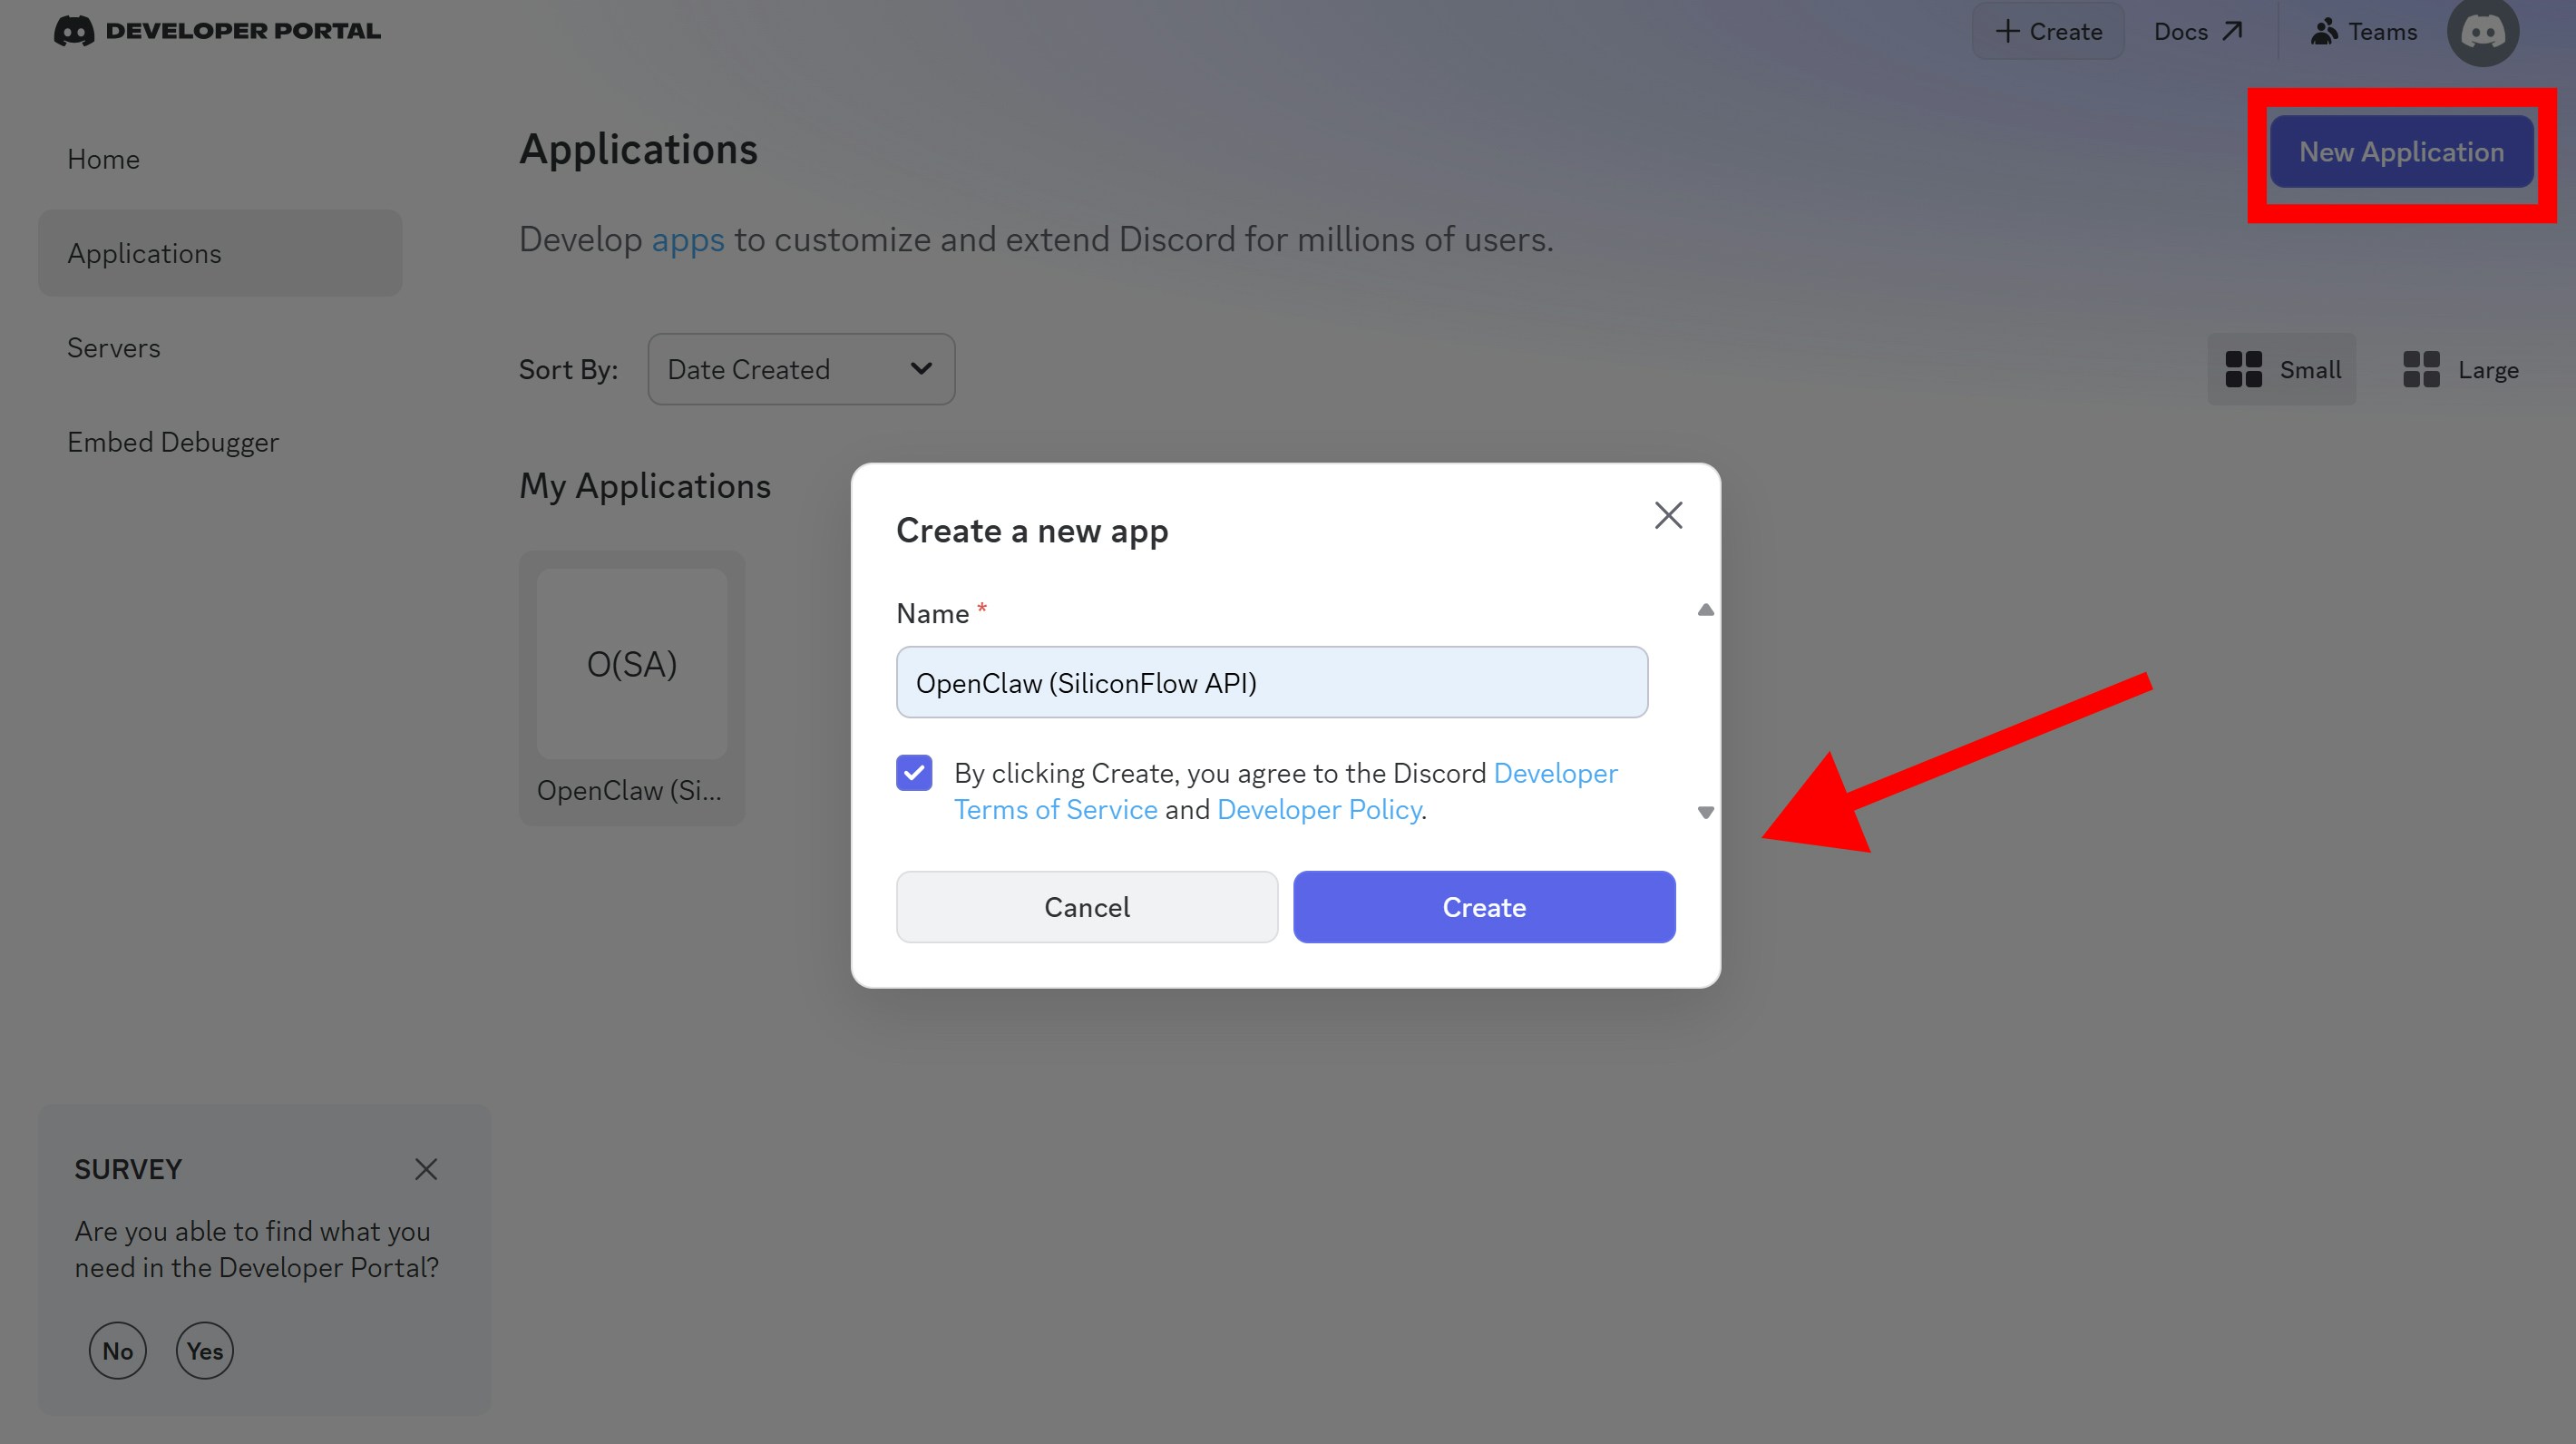
Create a Discord Application
- Go to the Discord Developer Portal.
- Click
New Application. - Enter a bot name (e.g.,
OpenClaw (SiliconFlow API)) and thenCreate.
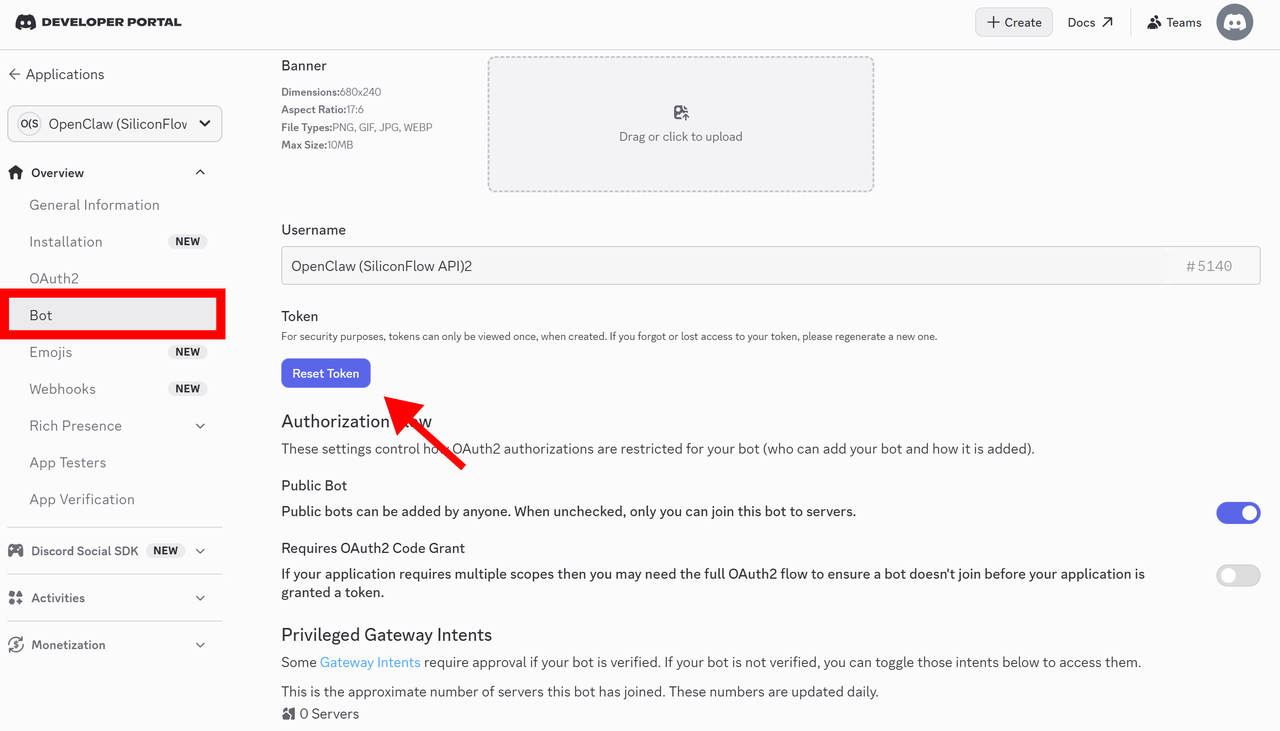
Configure the Bot
Navigate to theBot section.
Reset and Copy Bot Token
- Click
Reset Token. - Copy the token and store it securely. You will need it during the OpenClaw onboarding process.
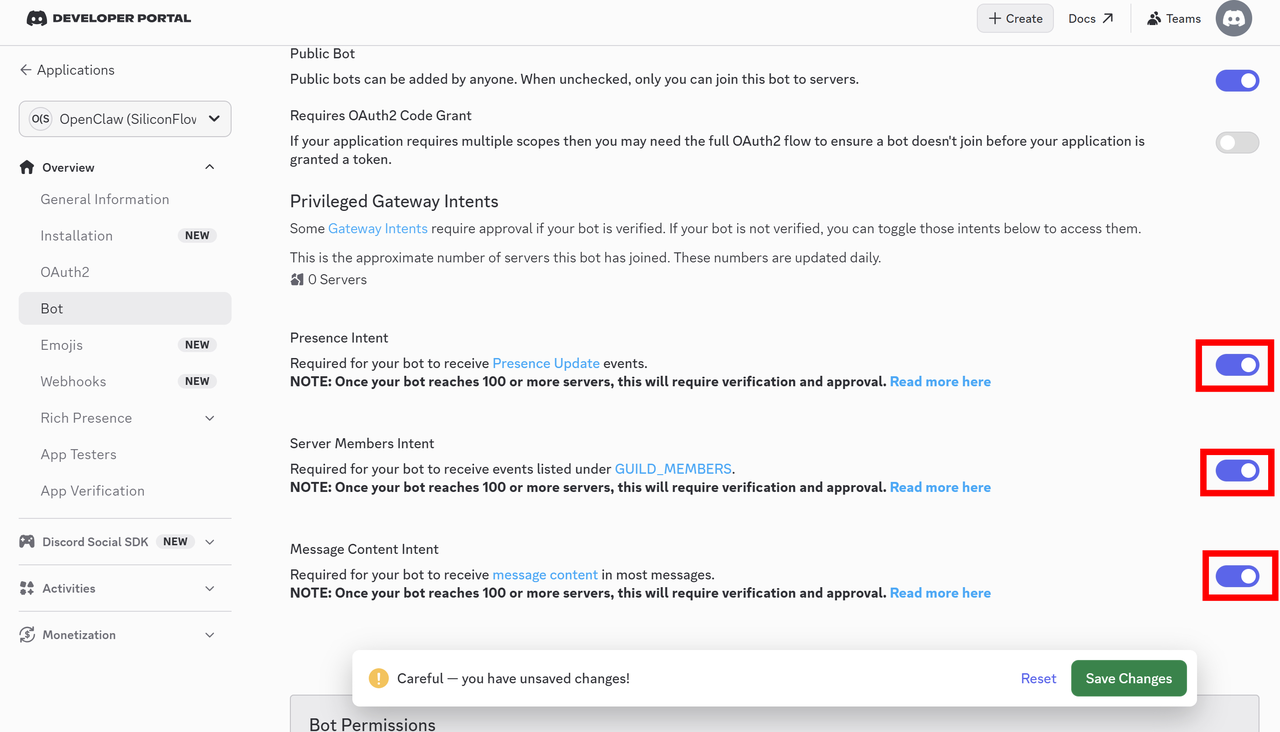
Enable Required Intents
Enable the following features:- Presence Intent
- Server Members Intent
- Message Content Intent
Save Changes.
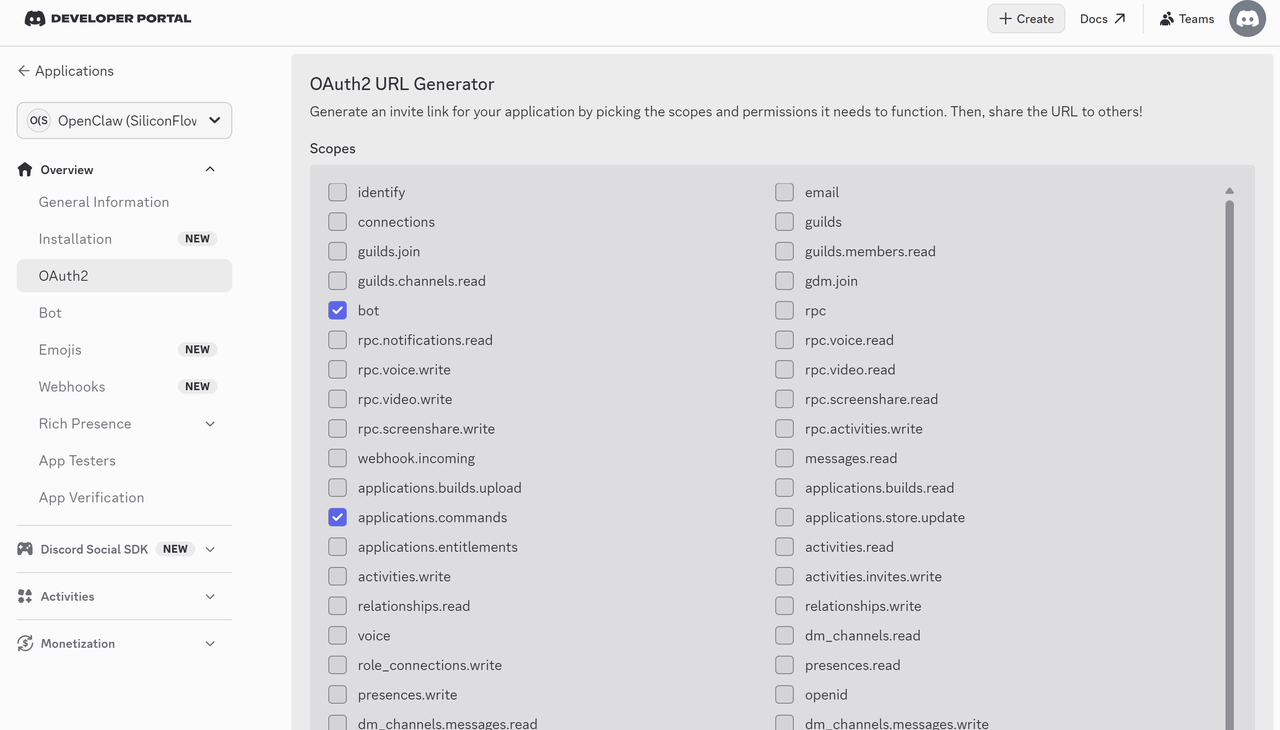
Configure OAuth2
Go to OAuth2 → URL Generator.Scopes
Enable thebot and applications.commands scopes for basic functionality.
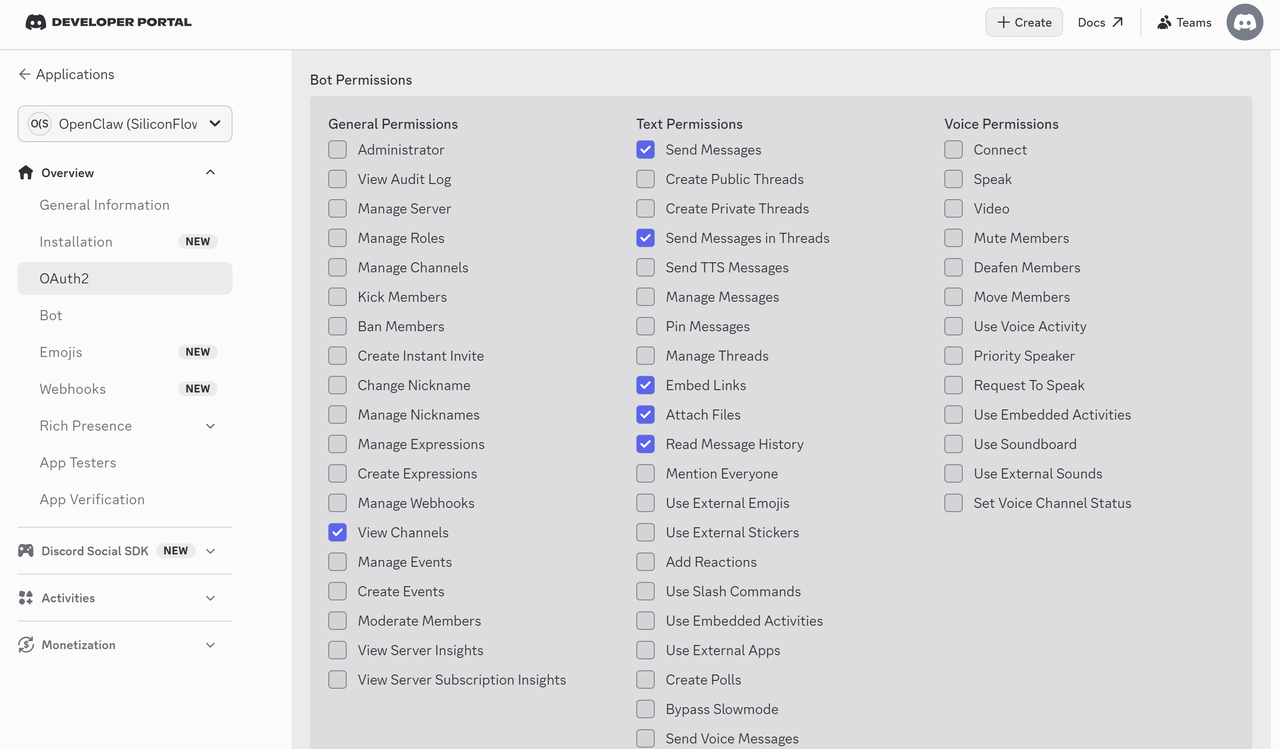
Bot Permissions
- Select the necessary permissions required for your use case.
- Copy the generated URL at the bottom of the page.
- Open the URL in your browser and:
- Select the target Discord server
- Confirm authorization
- Add the bot to your server
Onboard OpenClaw
- In your terminal, run:
-
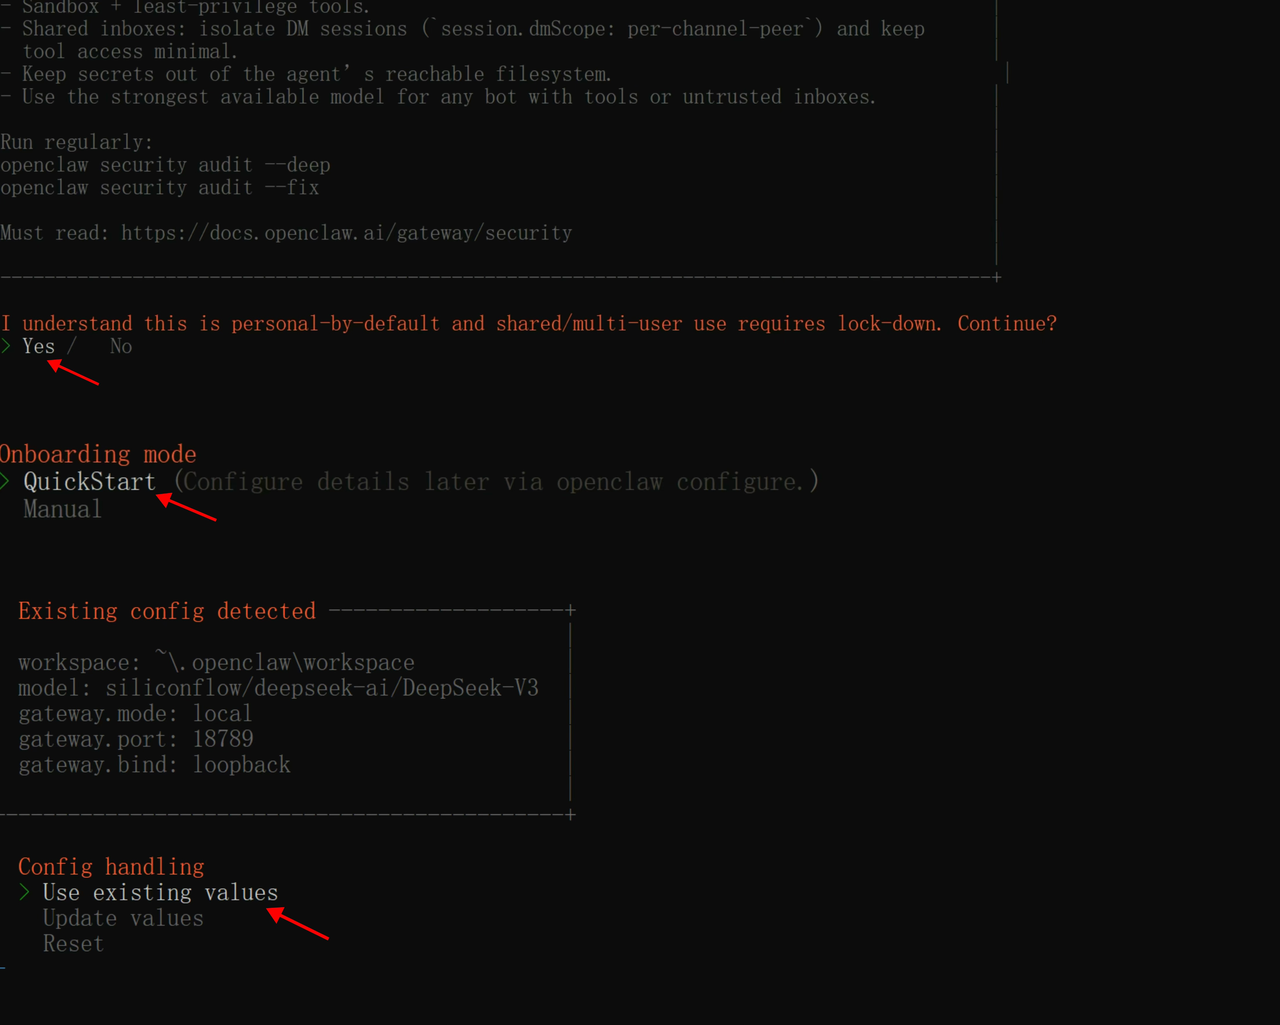
During the openclaw onboard process:
- Confirm that you understand OpenClaw operates as a personal-by-default assistant, then select
Yesto proceed. - Choose
QuickStartas the onboarding mode. - Select
Use existing valuesto retain the previously configured workspace, model, and gateway settings. This ensures that your previously configured SiliconFlow model remains active without requiring reconfiguration.
- Confirm that you understand OpenClaw operates as a personal-by-default assistant, then select
-
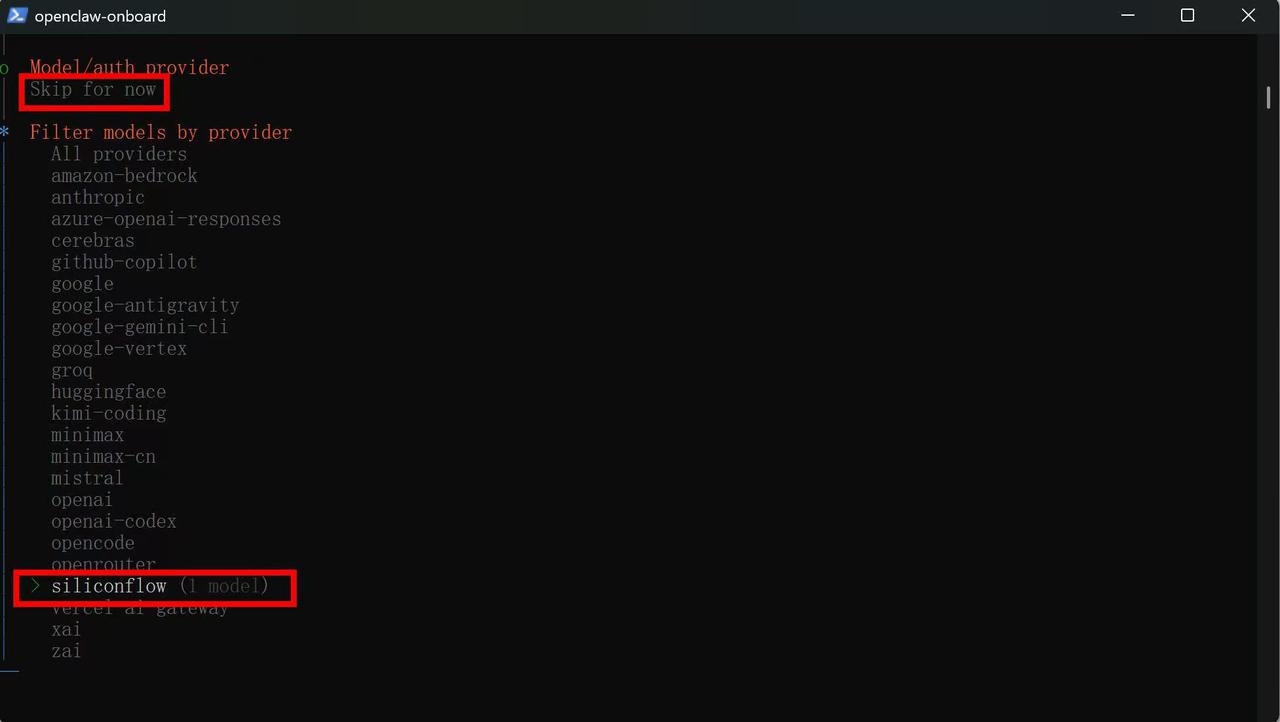
Select
Skip for nowin the Model/auth provider step. -
Select
siliconflowin the Filter models by provider step.
openclaw.json.
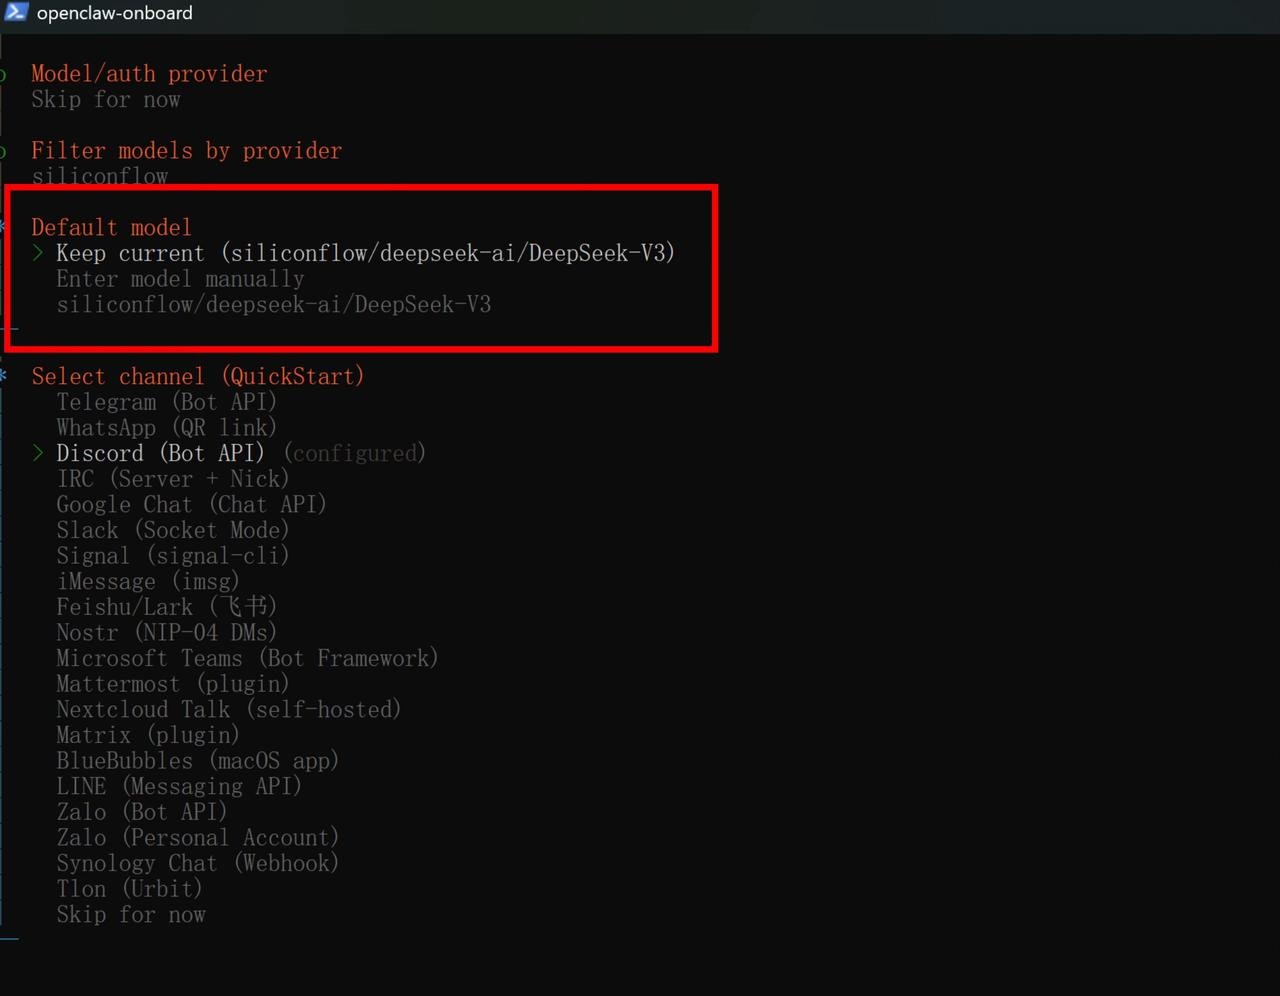
If SiliconFlow has already been configured correctly, it will appear in the provider list automatically.
- Under Default model, choose
Keep current (siliconflow/deepseek-ai/DeepSeek-V3)which confirms that OpenClaw will use the previously configured SiliconFlow model. - Under Select channel (QuickStart), choose
Discord (Bot API).
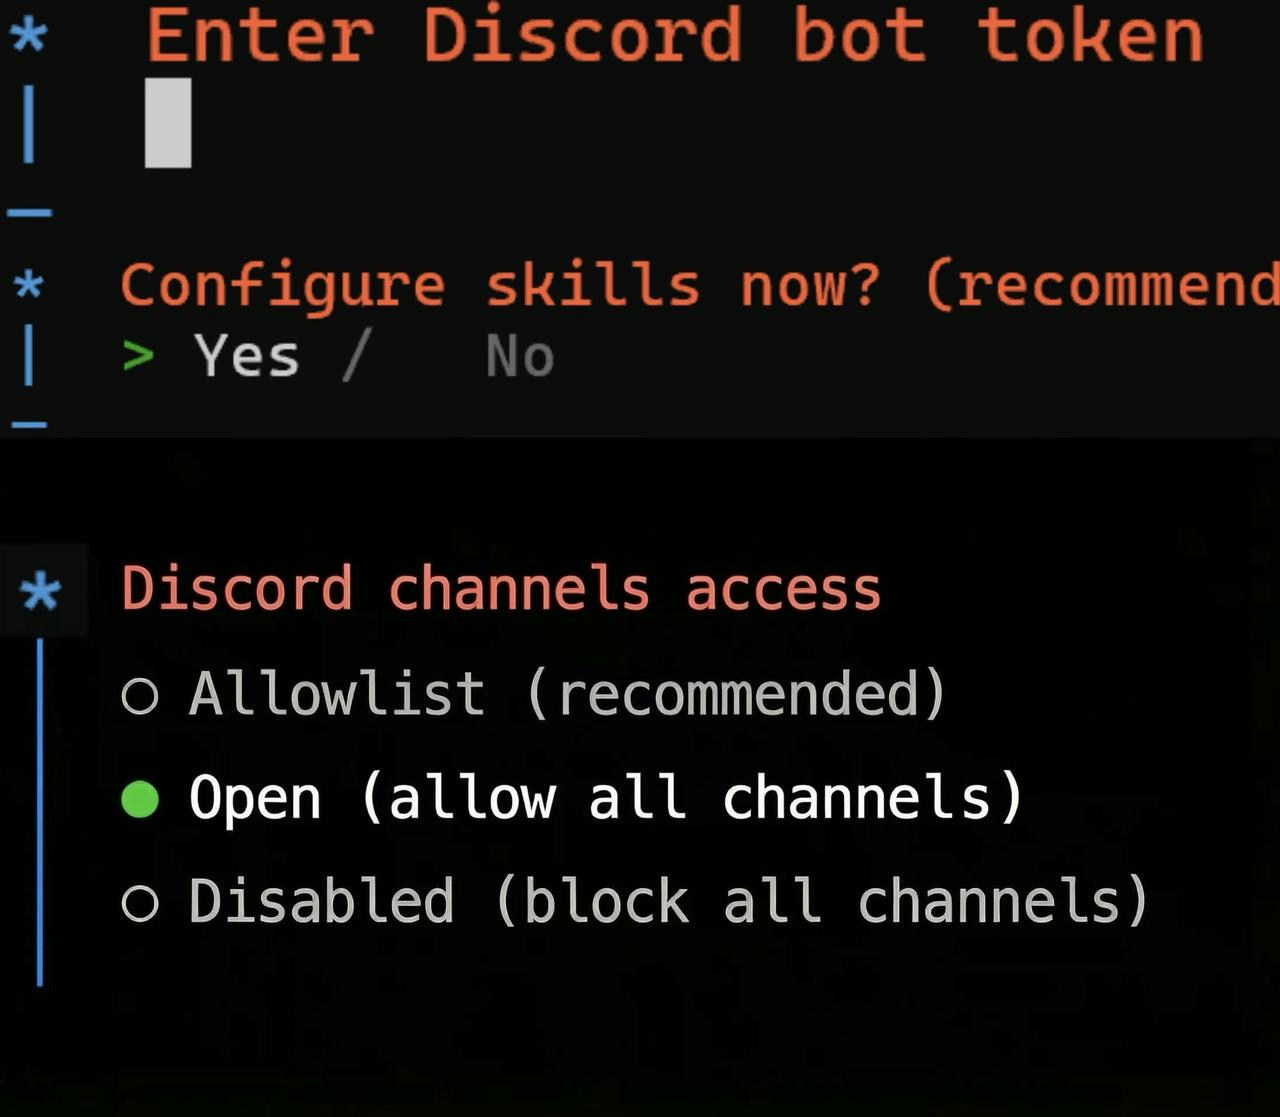
- Paste your previously prepared Discord bot token into the input field.
- In the Configure Skills step, select
Yesto manually configure skills, or selectNoto skip — the system will automatically enable a default set of skills on startup. - Choose how the bot should interact with your Discord channels.
- Pairing Your Discord Bot with OpenClaw
- Open the Discord server that your bot has been invited to.
- Locate the bot you created in the member list and send it a direct message.
- The bot will automatically respond with a pairing code.
- Approve the Pairing via CLI