> ## Documentation Index
> Fetch the complete documentation index at: https://docs.siliconflow.com/llms.txt
> Use this file to discover all available pages before exploring further.
# Use siliconcloud in 302ai
## 1 About [302.AI](http://302.AI)
302.AI is a pay-as-you-go AI application platform that provides a wide range of AI online applications and comprehensive AI API access. \
Recently, 302.AI has collaborated with SiliconFlow to allow 302.AI users to directly access all SiliconFlow models within the 302 platform without additional charges; and also allows SiliconFlow users to directly use ready-to-use AI applications within the 302 platform without developing or deploying them themselves.
### 1.1 Access 302.AI Website or Client
* [Website](https://302.ai/)
* [Client Download](https://302.ai/download/) Register an account after entering. If you have an account, log in directly.
## 2 Configuring SiliconFlow Model Services in 302.AI
### 2.1 Creating a Chatbot
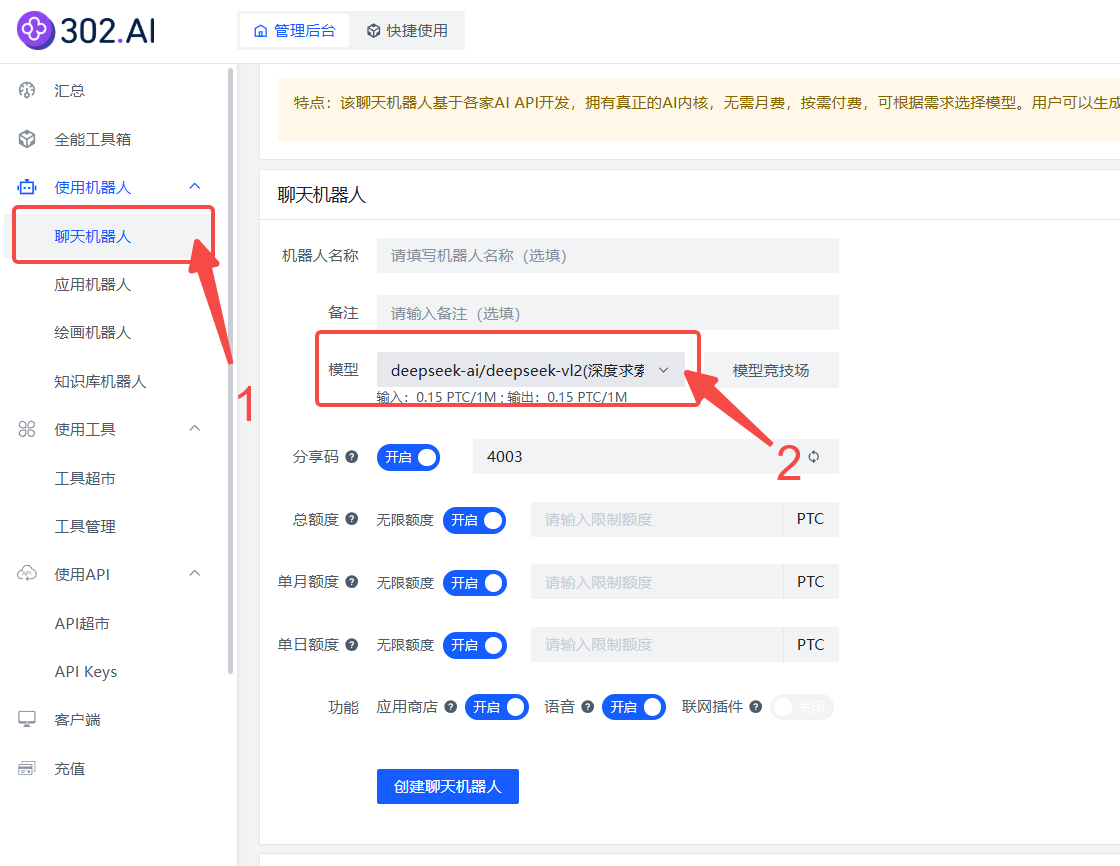
1. Log in to the 302.AI management backend via the website or client, and click through the following steps: Use Robots → Chatbots → Models.
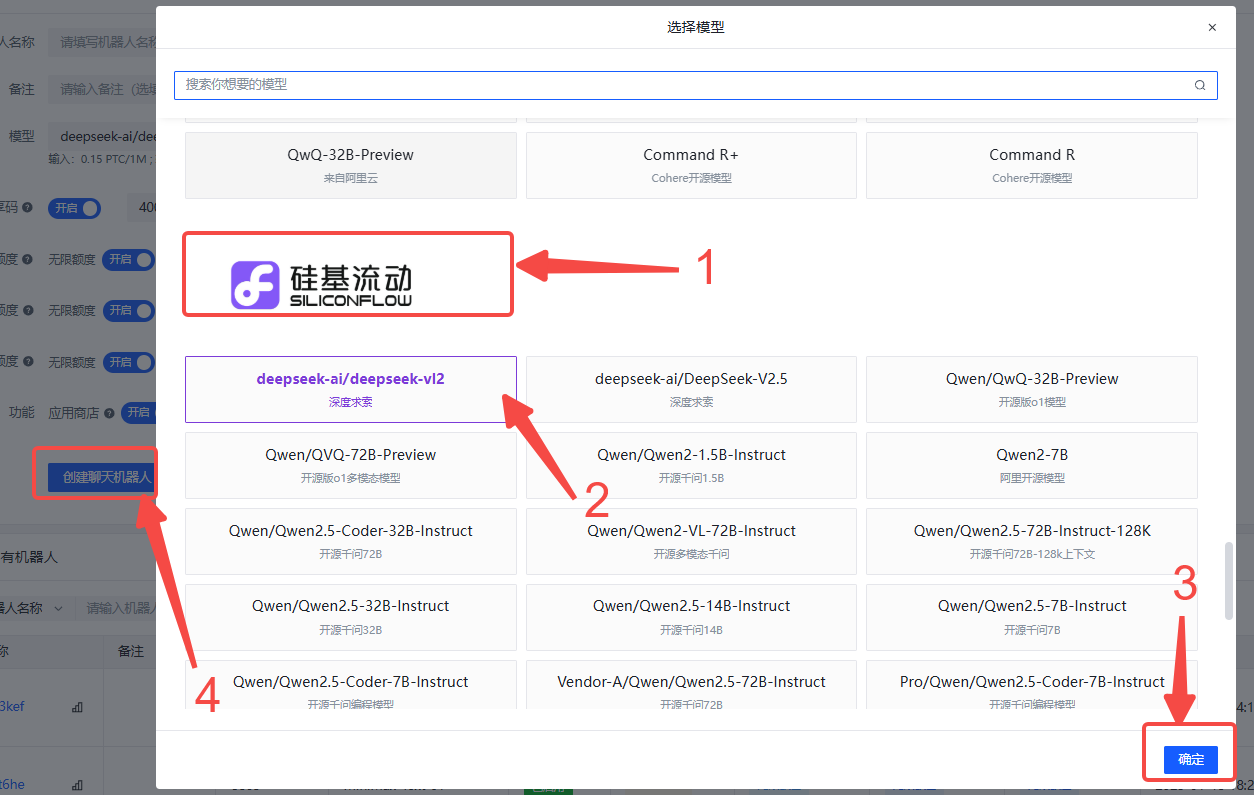
 2. Scroll down to the SiliconFlow section, choose a model (e.g., deepseek-ai/deepseek-vl2), and click Confirm → Create Chatbot.
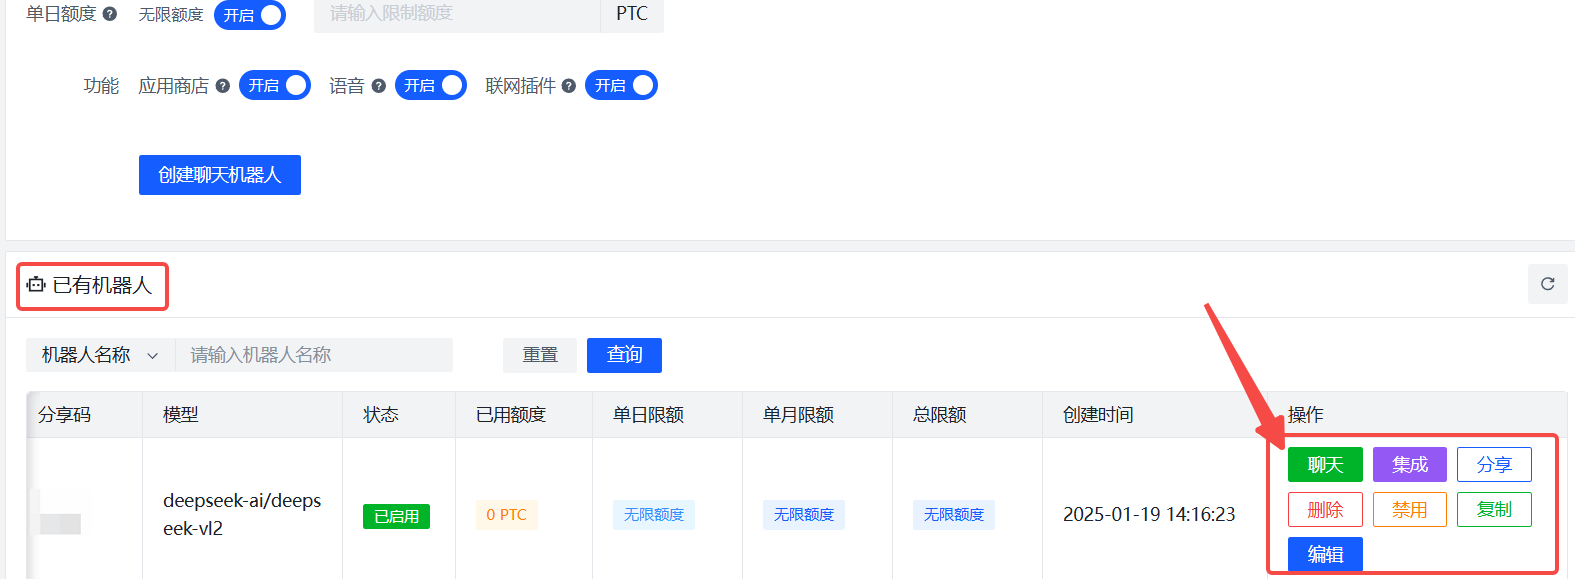
 3. After creation, the chatbot will be displayed below the page. You can further choose Chat, Share, Edit, etc. operations.
 #### 2.2 Using the Chatbot
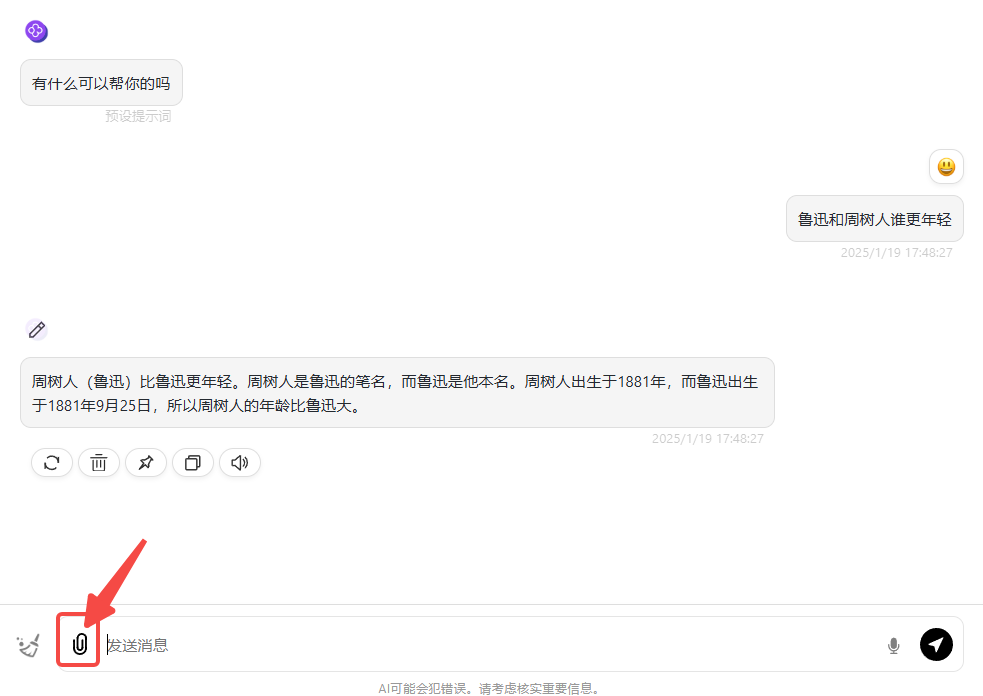
1. Enter the chatbot and start a conversation by typing text in the input box. The button on the left side of the input box supports uploading images or files, choose according to the model's characteristics.
#### 2.2 Using the Chatbot
1. Enter the chatbot and start a conversation by typing text in the input box. The button on the left side of the input box supports uploading images or files, choose according to the model's characteristics.
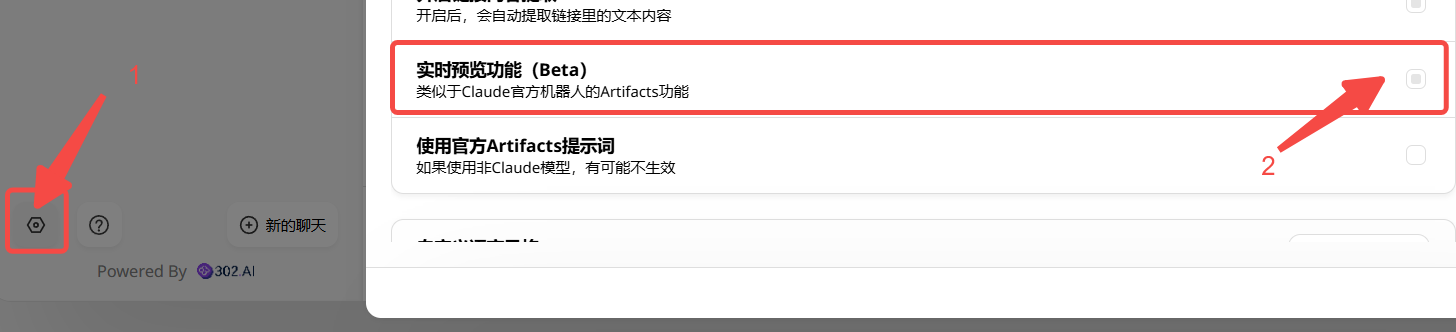
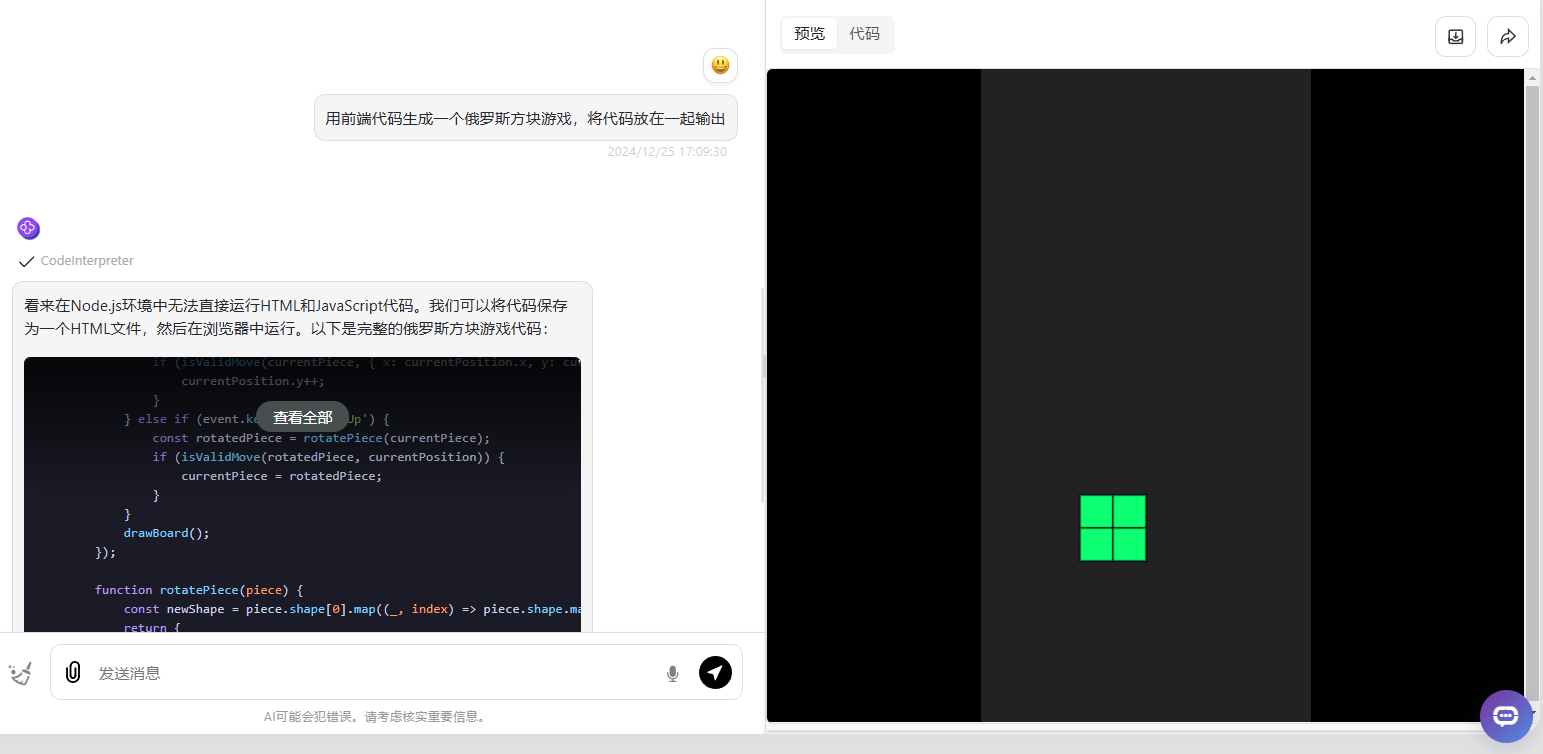
 2. Click the Settings button at the bottom left of the interface to enable the chatbot's Real-time Preview Function and see the model-generated code's runtime effects in real-time.
 #### 2.3 Using in the All-Purpose Toolbox
In addition to the method of creating a chatbot, you can also use SiliconFlow models via the All-Purpose Toolbox:
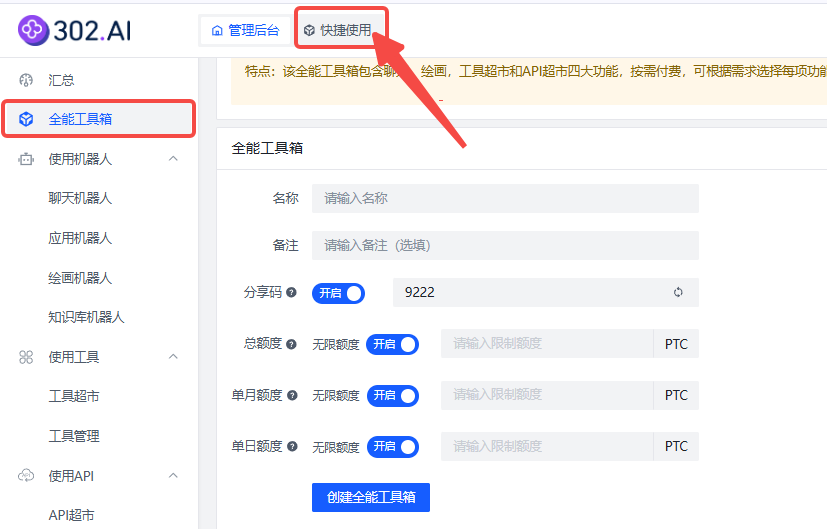
1. Click All-Purpose Toolbox → Quick Use.
#### 2.3 Using in the All-Purpose Toolbox
In addition to the method of creating a chatbot, you can also use SiliconFlow models via the All-Purpose Toolbox:
1. Click All-Purpose Toolbox → Quick Use.
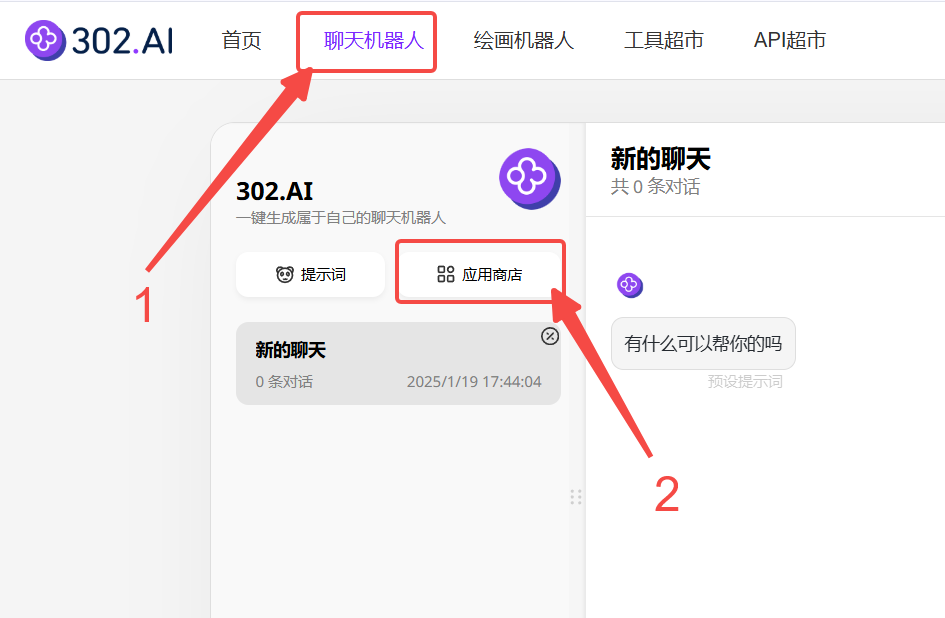
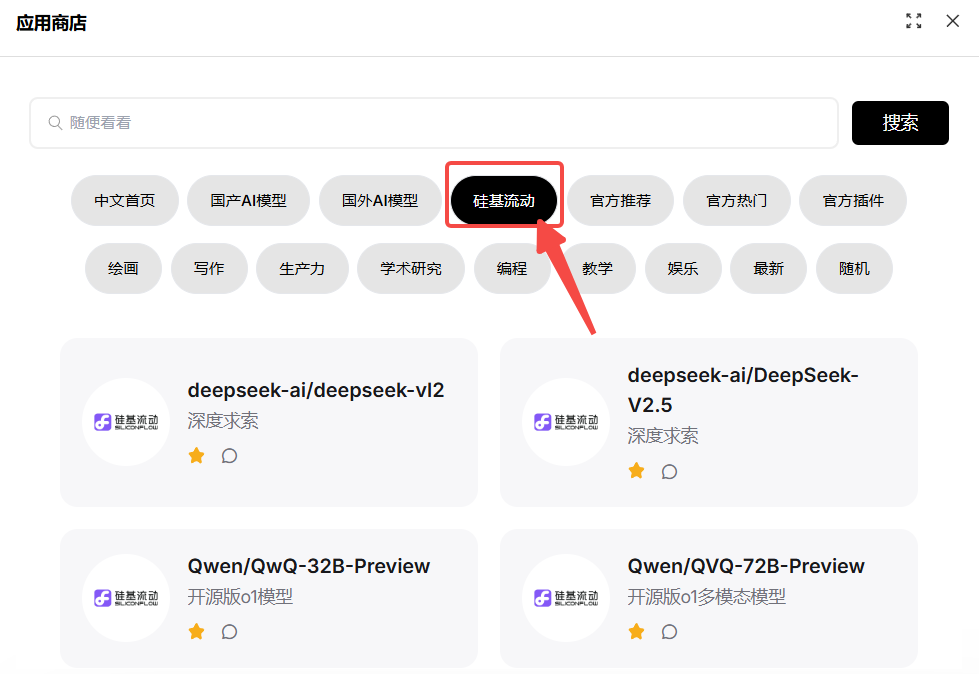
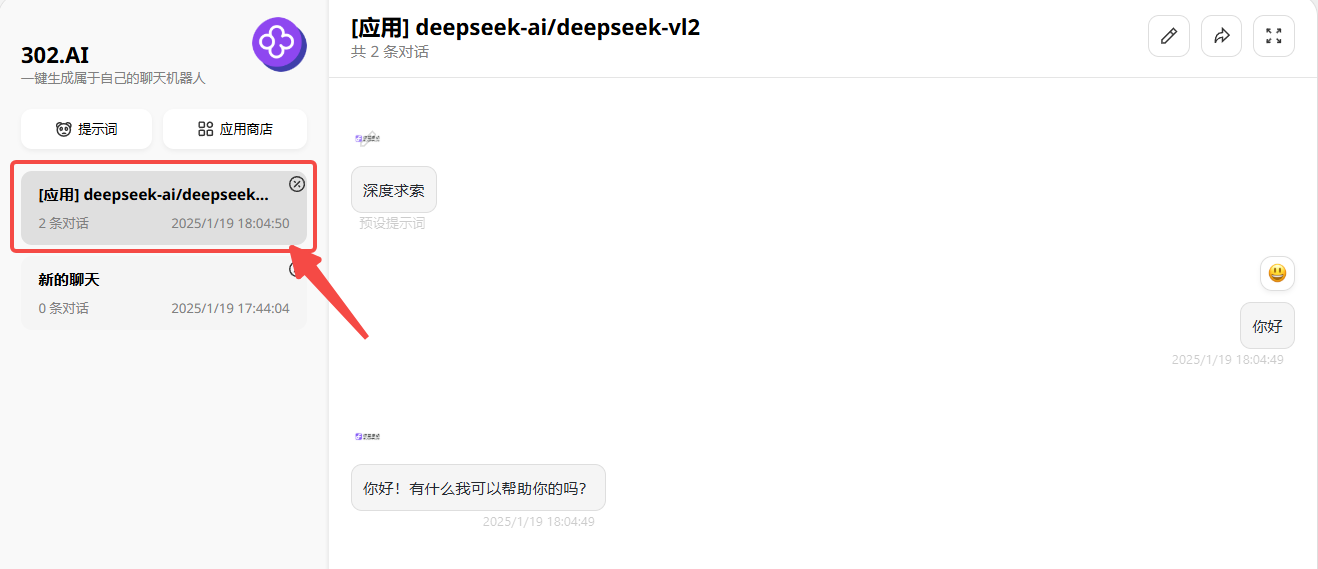
 2. Click:\
Chatbot → App Store → Silica Flow, select the model, and you can start the conversation.
2. Click:\
Chatbot → App Store → Silica Flow, select the model, and you can start the conversation.
 ### 3. Using SiliconFlow Models in the Model Arena
#### 3.1 Creating a Model Arena
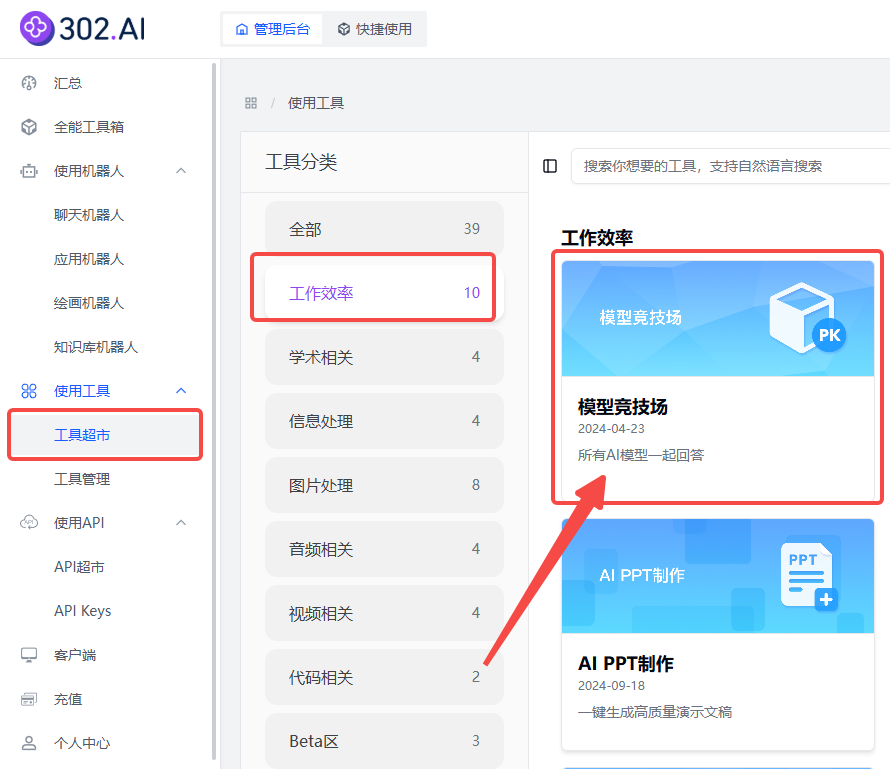
In the management backend menu, select Use Tools → Tool Supermarket → Tool Efficiency → Model Arena, and click Create after opening.
### 3. Using SiliconFlow Models in the Model Arena
#### 3.1 Creating a Model Arena
In the management backend menu, select Use Tools → Tool Supermarket → Tool Efficiency → Model Arena, and click Create after opening.
 #### 3.2 Selecting Models for Competition
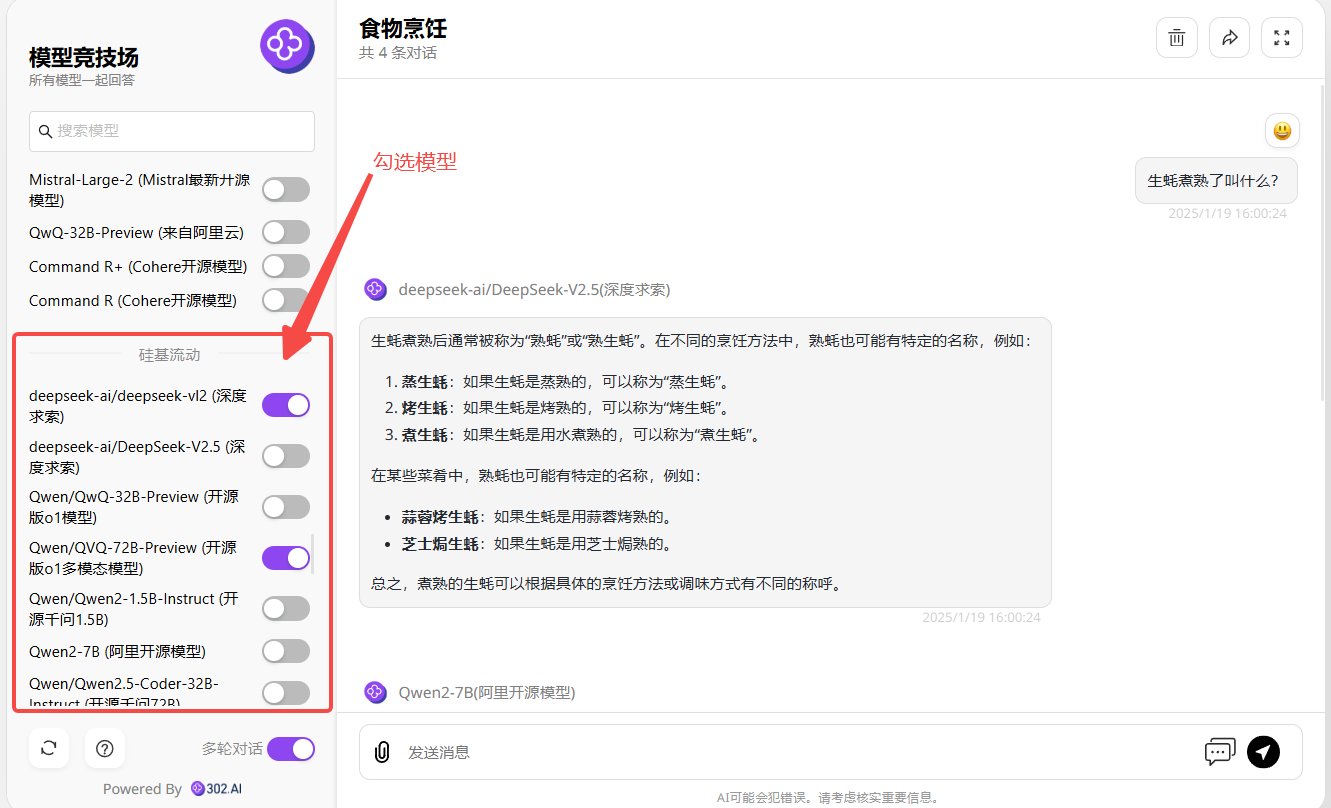
After entering the model arena, scroll down to find SiliconFlow and check the desired models as needed. After checking, enter a prompt to see the responses from different models side by side on the right side of the page.
#### 3.2 Selecting Models for Competition
After entering the model arena, scroll down to find SiliconFlow and check the desired models as needed. After checking, enter a prompt to see the responses from different models side by side on the right side of the page.
 ### 4. Accessing SiliconFlow Models via API
(For language models as an example)
#### 4.1 Viewing Documentation
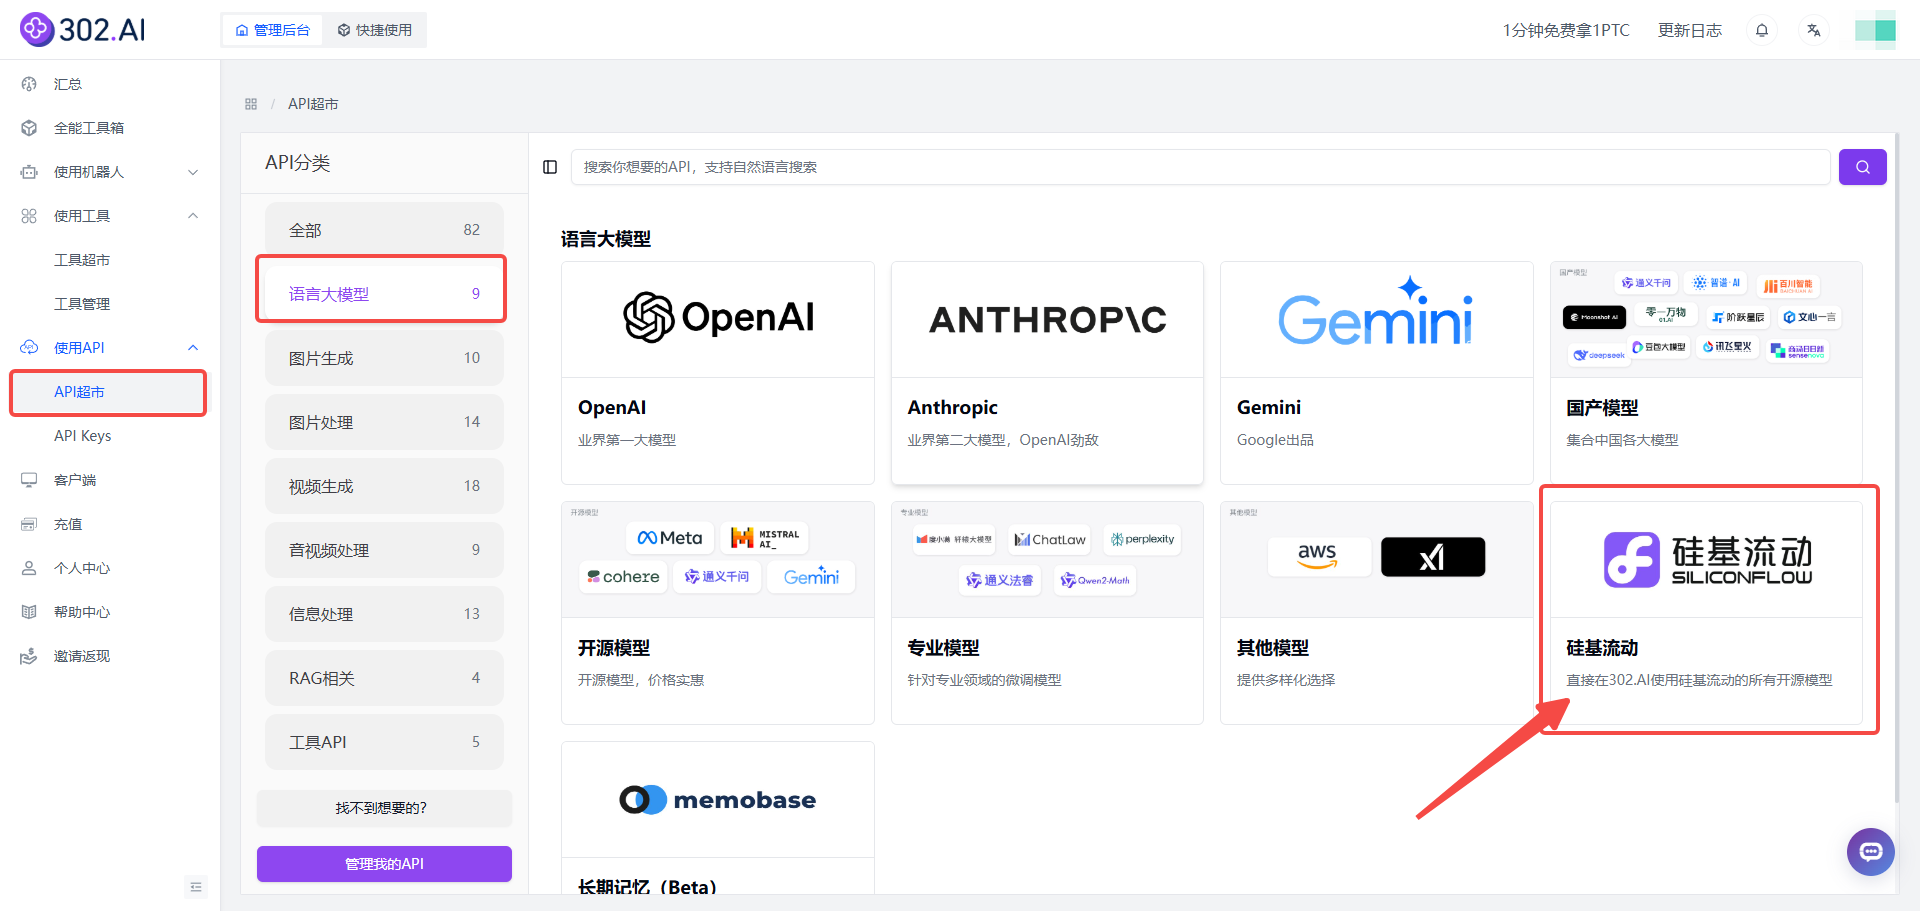
Click API Supermarket, select Language Large Models under the category, and find SiliconFlow.
### 4. Accessing SiliconFlow Models via API
(For language models as an example)
#### 4.1 Viewing Documentation
Click API Supermarket, select Language Large Models under the category, and find SiliconFlow.
 #### 4.2 Online Debugging
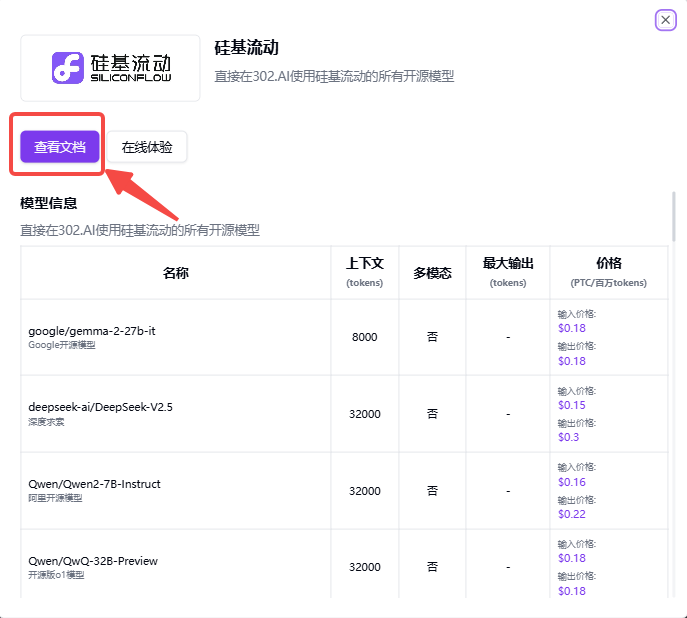
1. Click View Documentation to enter the API documentation.
#### 4.2 Online Debugging
1. Click View Documentation to enter the API documentation.
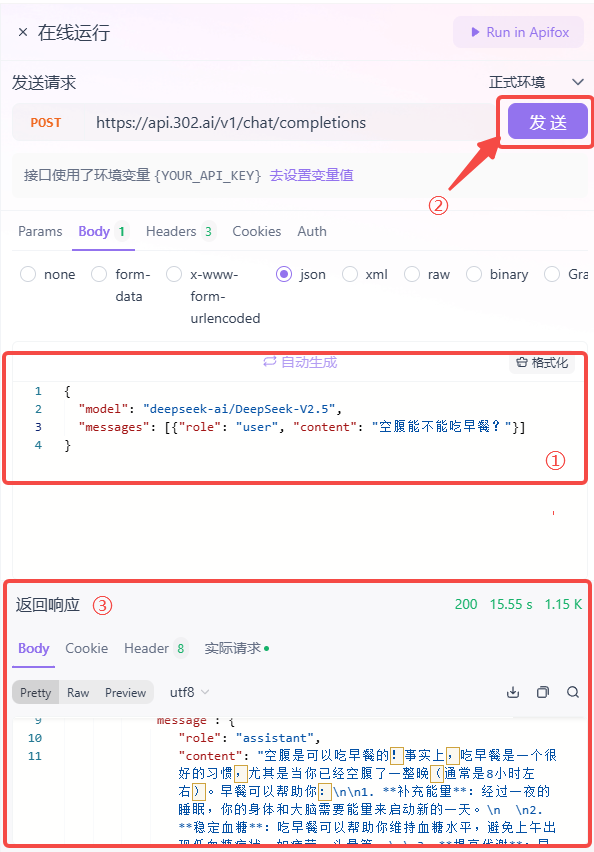
 2. After entering the API documentation, click Online Debugging → Set Variable Values to confirm if the API KEY has been automatically assigned.
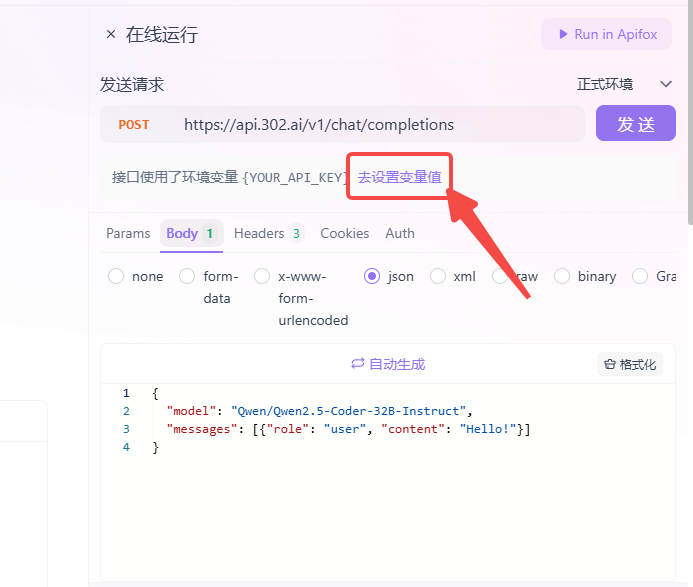 3. Fill in the Model ID and Text Content according to the parameter template, click Send, and wait for the output results.